Introduction
Few desserts evoke the same warmth and nostalgia as a slice of coconut cream pie. It’s a dish that brings back memories of family gatherings, sun-soaked picnics, and the inviting scent of homemade goodness wafting through the kitchen. Coconut cream pie is more than just a dessert; it’s a comforting embrace made from simple ingredients, lovingly crafted by hands that have passed down recipes through generations. Each bite transports you back to those cherished moments spent with family, sharing stories and laughter over a table laden with delicious treats.
Family recipes hold a special place in our hearts; they connect us to our roots and remind us of the love and care that went into creating them. One such recipe that stands out in our household is Grandma’s Dreamy Coconut Cream Pie. This beloved dessert combines traditional techniques with a rich, creamy filling that tantalizes the taste buds and leaves a lasting impression on all who indulge. With its luscious texture and delightful flavor, it is destined to become a family favorite in your home just as it has in ours.
The Allure of Coconut Cream Pie
Coconut cream pie is a classic dessert that has graced tables for generations. It features a silky smooth custard made with coconut milk and cream, enveloped in a flaky pie crust and topped with a generous dollop of whipped cream. The beauty of this dessert lies not only in its taste but also in its delightful texture. The creamy filling contrasts perfectly with the crispness of the pie crust, while the sweetened shredded coconut adds both flavor and texture, creating a harmonious balance that keeps you coming back for more.
The flavors of coconut cream pie are as enchanting as its texture. The tropical sweetness of coconut is complemented by the richness of the custard, offering a taste that transports you to a sunlit beach with every bite. Unlike store-bought options, which can often be overly sweet or lacking in depth, homemade coconut cream pie allows you full control over the quality of ingredients and the flavors you want to highlight. The satisfaction of creating this dessert from scratch is unparalleled, as you know every layer is crafted with love and intention.
Ingredients Breakdown
To create Grandma’s Dreamy Coconut Cream Pie, you’ll need a handful of essential ingredients that come together to form this delightful dessert. Each component plays a vital role in achieving the perfect balance of flavor and texture, making it crucial to select high-quality ingredients. Let’s delve into the key ingredients that make this pie so special:
– Pre-baked Pie Crust: The foundation of any great pie is its crust. You can use a store-bought pie crust for convenience, but nothing beats the taste of a homemade crust. A homemade pie crust can be tailored to your preference, providing a buttery and flaky texture that complements the creamy filling. If you choose to go the store-bought route, opt for a high-quality option that is free from preservatives.
– Sweetened Shredded Coconut: This ingredient is essential for infusing the pie with that quintessential coconut flavor. However, simply adding it to the custard won’t achieve the depth of flavor you’re looking for. Toasting the shredded coconut is a game changer, as it enhances its natural sweetness and adds a delightful nuttiness that elevates the entire dessert.
– Whole Milk: The heart of the custard, whole milk contributes to the creaminess and richness of the filling. Using whole milk ensures a velvety texture that is both satisfying and indulgent. It’s important not to skimp on this ingredient, as lower-fat alternatives can result in a less satisfying pie.
– Egg Yolks and Cornstarch: These two ingredients work in tandem to thicken the custard, giving it that dreamy, creamy consistency that coconut cream pie is known for. The egg yolks add richness and depth, while cornstarch acts as a stabilizer, ensuring the custard sets perfectly without being too runny.
– Heavy Whipping Cream: To elevate the pie, we finish it off with a luscious whipped topping made from heavy whipping cream. This addition not only adds a rich, creamy layer on top but also lightens the overall dessert, creating a delightful contrast with the dense custard beneath.
Step-by-Step Instructions for Success
Now that we have our ingredients ready, let’s dive into the essential steps to ensure your coconut cream pie turns out perfectly.
Toasting the Coconut
Toasting the coconut is a crucial step that enhances its flavor and adds a beautiful golden hue. Here’s how to achieve the perfect toast:
1. Preheat the Oven: Start by preheating your oven to 350°F (175°C). A hot oven will help the coconut toast evenly.
2. Spread the Coconut: Place the sweetened shredded coconut in a single layer on a baking sheet. This allows for even toasting and prevents clumping.
3. Bake and Monitor: Place the baking sheet in the oven and bake for about 5-10 minutes. Keep a close eye on the coconut as it can go from perfectly toasted to burnt in a matter of seconds. Stir the coconut halfway through to ensure even browning.
4. Cool: Once the coconut is golden brown, remove it from the oven and let it cool before using it in the pie. Toasted coconut can be stored in an airtight container for later use, but it’s best used fresh to retain its crunch.
Preparing the Custard Mixture
Creating the custard for Grandma’s Dreamy Coconut Cream Pie is a delicate process that requires attention to detail. Here’s how to prepare the custard:
1. Heat the Milk: In a medium saucepan over medium heat, pour in the whole milk. The goal here is to heat the milk until it’s steaming, but not boiling. This step is critical, as boiling can curdle the custard. Stir occasionally to prevent the milk from sticking to the bottom of the pan.
2. Combine the Egg Yolks and Cornstarch: In a separate bowl, whisk together the egg yolks and cornstarch until smooth. This mixture will help thicken the custard, so it’s important to ensure there are no lumps.
3. Temper the Egg Mixture: Once the milk is steaming, slowly ladle a small amount of the hot milk into the egg yolk mixture while whisking constantly. This step, known as tempering, is essential to prevent the eggs from scrambling when added to the hot milk. Gradually add more hot milk to the egg mixture, whisking continuously until well combined.
4. Cook the Custard: Pour the tempered egg mixture back into the saucepan with the remaining milk. Continue to cook over medium heat, stirring constantly until the mixture thickens and coats the back of a spoon. This process usually takes about 5-10 minutes. Be patient, as rushing this step can result in a grainy texture.
As we continue to build on Grandma’s Dreamy Coconut Cream Pie, these steps create the rich foundation needed for a truly indulgent dessert. The next part will explore how to combine these elements into a delectable pie that will surely bring smiles to your family’s faces with each slice. Stay tuned for more details on assembling and serving this timeless treat!
{{image_1}}
The Magic of Each Ingredient in the Custard
Creating the perfect custard for Grandma’s Dreamy Coconut Cream Pie relies heavily on the function of each ingredient. Egg yolks serve as the base of the custard, providing richness and a silky texture. The cornstarch acts as a thickening agent, ensuring the custard sets properly while maintaining a smooth mouthfeel. Granulated sugar not only sweetens the filling but also assists in achieving the right texture when dissolved during cooking. Whole milk is essential for creaminess, while a touch of vanilla extract adds depth and warmth to the flavor profile. Finally, shredded coconut contributes both flavor and texture, ensuring that each bite is a delicious reminder of tropical paradise.
Mixing the Egg Yolks and Cornstarch
To start, separate the egg yolks from the whites, placing the yolks in a large bowl. Add the cornstarch to the yolks and whisk them together until the mixture is smooth and free of lumps. This step is crucial as it ensures that the cornstarch is evenly distributed, which helps prevent clumping during the cooking process. The combination of yolks and cornstarch creates a stable base for the custard that will thicken beautifully as it cooks.
Tempering the Eggs to Avoid Curdling
Tempering the egg yolks is a vital step that prevents curdling when combined with the hot milk mixture. To do this, slowly whisk in a small amount of the hot milk mixture into the egg yolk and cornstarch mixture. This gradual increase in temperature allows the yolks to warm without cooking them too quickly. Once you’ve added about a cup of the hot liquid to the egg mixture, pour the tempered mixture back into the saucepan with the remaining milk. This technique is essential to achieving a smooth custard, as it prevents the egg yolks from scrambling.
Combining and Thickening the Mixture
With the tempered egg mixture complete, return the saucepan to medium heat. Continuously stir the mixture with a wooden spoon or a whisk to ensure even cooking and prevent sticking. As the custard heats, it will begin to thicken. Watch for signs that it is ready: the mixture will start to bubble gently, and when you coat the back of a spoon with it, a line should remain when you swipe your finger across. This indicates that the custard has reached the ideal consistency.
Finishing Touches on the Custard
Once thickened, remove the custard from heat and stir in the shredded coconut and vanilla extract. This is the moment to infuse the custard with flavor and texture. The coconut will soften slightly, adding a chewy dimension to the filling, while the vanilla enhances the overall taste profile. For an extra touch of coconut flavor, consider adding a few drops of coconut extract. It’s the finishing touch that elevates Grandma’s Dreamy Coconut Cream Pie to heavenly status.
Chilling the Pie for Optimal Flavor Development
After preparing the custard, pour it into the pre-baked pie crust. Allow the custard to cool at room temperature for about 30 minutes before covering it with plastic wrap and transferring it to the refrigerator. Chilling the pie is vital, as it allows the custard to set properly and develop its flavors. Ideally, let it chill for at least 4 hours, or overnight if possible. The waiting time may be challenging, but the reward of a perfectly set, flavorful pie is worth it.
Preparing the Whipped Cream Topping
While the pie chills, it’s time to prepare the whipped cream topping. Start with a clean bowl and whisk or an electric mixer. It’s essential to chill your mixing bowl and beaters for about 15 minutes beforehand for the best results. Add heavy cream, powdered sugar, and a splash of vanilla extract to the chilled bowl. Beat the mixture on medium speed until soft peaks form. Be careful not to overwhip, as this can lead to butter formation. The goal is a light, airy cream that will beautifully complement the rich custard.
Assembling the Pie for Presentation
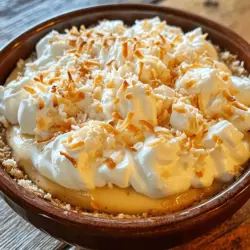
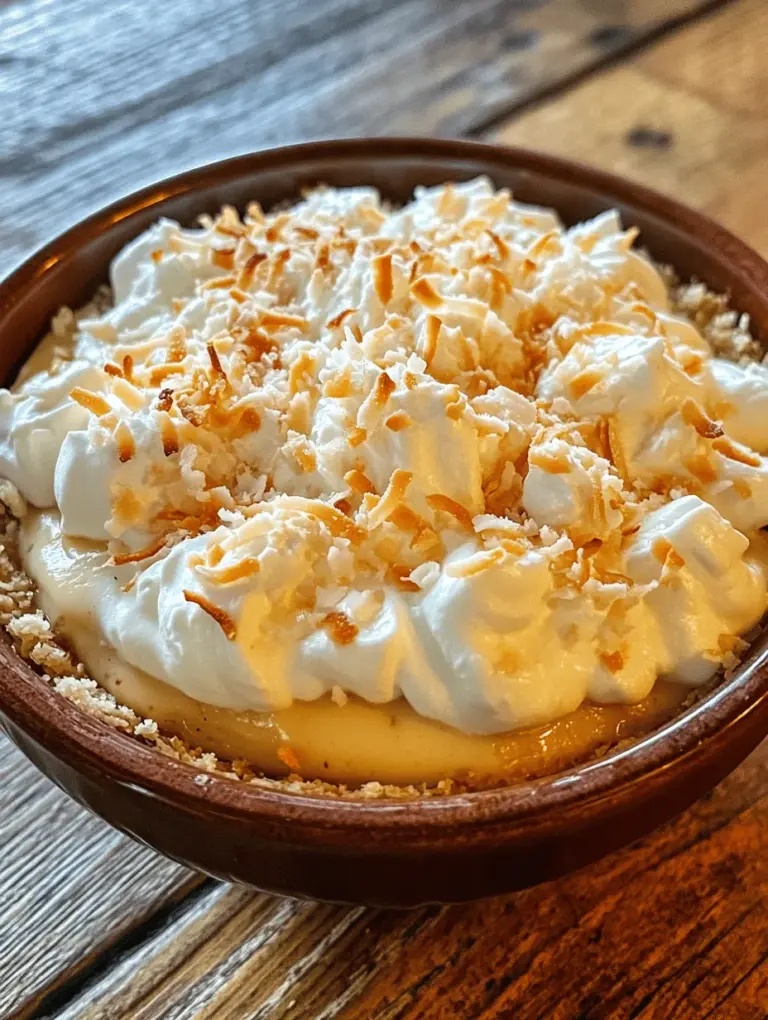
Once the custard has fully set, it’s time to assemble the pie. Gently spread the whipped cream over the top of the custard, using an offset spatula for even distribution. For an elegant finish, create peaks or swirls in the whipped cream. To garnish, sprinkle extra shredded coconut or chocolate shavings on top. If you want to add a pop of color, consider adding a few fresh berries or mint leaves.
Serving Suggestions for Your Coconut Cream Pie
When it comes to serving Grandma’s Dreamy Coconut Cream Pie, presentation is key. Consider placing slices on decorative plates, adding a sprig of mint for color, and serving with a dollop of additional whipped cream on the side. Pair the pie with a refreshing beverage, such as iced tea, lemonade, or even a tropical smoothie, to enhance the dessert experience.
This coconut cream pie is perfect for various occasions, from family gatherings to holiday celebrations and casual get-togethers. Whether serving it at a summer barbecue or during cozy winter holiday dinners, its creamy texture and rich flavor make it a crowd-pleaser.
Nutritional Information
A slice of Grandma’s Dreamy Coconut Cream Pie is a delightful treat, but it’s essential to be mindful of portion sizes. Typically, a single slice contains approximately 300-400 calories, depending on the size and specific ingredients used. The pie is rich in carbohydrates and sugars due to the crust and custard, so moderation is key. Enjoying this dessert occasionally allows you to indulge while still maintaining a balanced diet.
Conclusion
Grandma’s Dreamy Coconut Cream Pie isn’t just a dessert; it’s a comforting tradition that brings warmth and joy to any gathering. The creamy custard, fluffy whipped cream, and a touch of coconut create a delightful experience for anyone who takes a bite. This recipe encourages you to gather your loved ones around the table, share stories, and create lasting memories over a slice of homemade pie. So gather your ingredients, channel your inner baker, and let this pie become a cherished part of your family traditions. Enjoy the process of making this delightful dessert, and savor the joy it brings to your home.