Introduction to No-Bake Strawberry Crunch Cheesecake
When it comes to delightful desserts that are both visually appealing and delicious, few can rival the charm of a No-Bake Strawberry Crunch Cheesecake. This dessert has gained immense popularity among dessert lovers and home bakers alike, and it’s easy to understand why. With its vibrant colors, luscious flavors, and creamy texture, this cheesecake not only satisfies your sweet tooth but also impresses at any gathering or celebration.
One of the most appealing aspects of this dessert is its simplicity. As the name suggests, there’s no baking involved, making it a perfect option for those who may be intimidated by traditional baking or who simply want to save time. The absence of oven cooking allows you to whip up this delightful treat without the worry of overbaking or monitoring temperatures. This no-bake cheesecake is an excellent choice for busy schedules, especially during the warmer months when you want to avoid heating up the kitchen.
At the heart of this dessert is the wonderful marriage of fresh strawberries and creamy cheesecake. The strawberries provide a burst of natural sweetness and a refreshing flavor that complements the rich and velvety cheesecake layer. Together, they create an indulgent experience that will leave your taste buds begging for more. Plus, the addition of a crispy topping adds a delightful crunch that elevates the entire dessert, making it a multi-textured treat that everyone will adore.
Understanding the Ingredients
To create the perfect No-Bake Strawberry Crunch Cheesecake, it’s essential to understand the key ingredients that come together to form this masterpiece. Selecting fresh, high-quality ingredients is crucial, as they significantly impact the overall taste and texture of the final product. Here’s a breakdown of each component:
1. Cream Cheese: The star of the cheesecake layer, cream cheese provides a rich and creamy base. It’s important to use full-fat cream cheese for the best flavor and texture. Make sure it’s softened to room temperature before mixing to avoid lumps and ensure a smooth consistency.
2. Strawberries: Fresh strawberries are the highlight of this dessert. Not only do they add a beautiful red hue, but they also contribute a natural sweetness and tartness. When selecting strawberries, look for firm, ripe berries without blemishes. You can also use frozen strawberries if fresh ones are unavailable, but make sure to thaw and drain them properly before use.
3. Graham Crackers: The classic crust ingredient, graham crackers provide a sweet and slightly crumbly base that pairs perfectly with the creamy filling. Crushing them into fine crumbs creates a sturdy foundation for the cheesecake. You can also opt for flavored graham crackers, such as cinnamon or chocolate, for an added twist.
4. Nuts: Nuts add an extra layer of crunch to the topping, balancing the creamy cheesecake texture. Pecans or walnuts work particularly well, giving a rich, buttery flavor that complements the other ingredients. Ensure that the nuts are chopped finely for even distribution throughout the topping.
5. Powdered Sugar: Used to sweeten the cheesecake filling, powdered sugar dissolves easily and helps achieve a smooth texture. Adjust the amount based on your desired sweetness level, keeping in mind that the strawberries also contribute natural sugars.
6. Vanilla Extract: A splash of pure vanilla extract enhances the flavor of the cheesecake, adding a warm and aromatic note that brings all the ingredients together.
7. Heavy Whipping Cream: The key to achieving a light and fluffy cheesecake layer, heavy cream is whipped to stiff peaks before being folded into the cream cheese mixture. This step is crucial for adding volume and creating a luxurious mouthfeel.
Understanding these ingredients and their roles in the recipe will help you create a No-Bake Strawberry Crunch Cheesecake that is not only delicious but also visually stunning.
Creating the Cheesecake Layer
Now that we’ve covered the essential ingredients, it’s time to dive into the exciting part of preparing the cheesecake layer. This step is straightforward, yet it requires attention to detail to ensure that your cheesecake turns out perfectly creamy and flavorful.
Step-by-Step Instructions for Mixing the Cheesecake
1. Soften the Cream Cheese: Begin by placing the cream cheese in a large mixing bowl. Allow it to sit at room temperature for about 30 minutes to soften. This will make it easier to mix and help prevent lumps in the final cheesecake.
2. Mix the Ingredients: Using a hand mixer or a stand mixer fitted with a paddle attachment, beat the softened cream cheese on medium speed until it becomes smooth and creamy. This should take about 2-3 minutes.
3. Add Powdered Sugar and Vanilla: Gradually add the powdered sugar and vanilla extract to the cream cheese. Continue mixing on low speed until fully incorporated. You want to achieve a smooth and sweet mixture without any graininess.
4. Prepare the Strawberry Puree: While the cream cheese mixture is coming together, wash and hull about a cup of fresh strawberries. Blend them in a food processor or blender until smooth. If you prefer a chunkier texture, you can pulse the strawberries a few times to leave some small pieces.
5. Incorporate the Strawberry Puree: Gently fold the strawberry puree into the cream cheese mixture using a spatula. This step is essential for adding color and flavor to the cheesecake. Be careful not to overmix, as you want to maintain the lightness of the filling.
6. Whip the Heavy Cream: In a separate bowl, pour in the heavy whipping cream. Using a clean mixer or a whisk, whip the cream on medium-high speed until stiff peaks form. This means that when you lift the whisk, the cream should hold its shape and not fall back into the bowl.
7. Fold in the Whipped Cream: Carefully fold the whipped cream into the strawberry cream cheese mixture. Use a gentle folding motion to combine the two mixtures, ensuring that you don’t deflate the whipped cream. This step is vital for achieving the light and airy texture of your cheesecake.
Importance of Achieving the Right Consistency and Flavor Balance
Achieving the right consistency is key to a successful cheesecake. The mixture should be thick yet smooth, allowing it to hold its shape once set. The balance of flavors is equally important; the cream cheese should be rich and tangy, while the strawberries should provide a fresh sweetness. Taste the mixture before proceeding to the next step, and adjust the sweetness if needed by adding more powdered sugar.
Assembling the Cheesecake
With the cheesecake layer prepared, it’s time to assemble the dessert. For this, a springform pan is ideal. The removable sides make it easy to release the cheesecake once it’s set, allowing for a beautiful presentation.
Step-by-Step Guide to Assembling the Cheesecake
1. Prepare the Springform Pan: Lightly grease the sides of the springform pan with a bit of cooking spray or butter. This will help prevent sticking when it’s time to remove the cheesecake.
2. Pour the Cheesecake Mixture: Carefully pour the prepared cheesecake mixture into the center of the springform pan. Use a spatula to spread the mixture evenly, ensuring there are no air pockets.
3. Smooth the Top: After pouring in the mixture, use the spatula to smooth the top, creating an even surface. This will help with the aesthetics once the cheesecake is set.
4. Refrigerate: Cover the cheesecake with plastic wrap or aluminum foil and place it in the refrigerator. Allow it to chill for at least 4 hours, though overnight is preferable for optimal flavor development and setting.
Importance of Refrigeration Time
Refrigeration is crucial for allowing the cheesecake to set properly. The cold environment helps the cream cheese mixture firm up, giving it the desired structure. Skipping this step may result in a runny cheesecake that doesn’t hold its shape when cut. Additionally, chilling the cheesecake enhances the flavors, allowing the strawberry and cream cheese to meld beautifully.
Crafting the Crunchy Topping
While the cheesecake is chilling, you can prepare the crunchy topping that will elevate your dessert to new heights. The crispy topping adds texture and a delightful contrast to the smooth cheesecake, making every bite a delightful experience.
1. Prepare the Ingredients: Gather your graham cracker crumbs, chopped nuts, and melted butter. The melted butter acts as a binding agent, helping the crumbs and nuts stick together.
2. Combine the Ingredients: In a medium-sized bowl, mix together the graham cracker crumbs and chopped nuts. Pour in the melted butter and stir until the mixture is well combined and resembles wet sand.
3. Spread the Topping: Once the cheesecake has set in the refrigerator, carefully remove it from the springform pan. Place the cheesecake on a serving platter and evenly sprinkle the crunchy topping over the surface, pressing it down gently to adhere.
4. Chill Again (Optional): If you prefer a firmer topping, you can return the cheesecake to the refrigerator for an additional 30 minutes to allow the topping to set.
With the topping crafted and the cheesecake assembled, you’re just a few steps away from enjoying a slice of this delicious No-Bake Strawberry Crunch Cheesecake. Stay tuned for the next part as we explore additional tips for creating the best version of this delightful dessert and address some common questions that may arise during the preparation process.
{{image_1}}
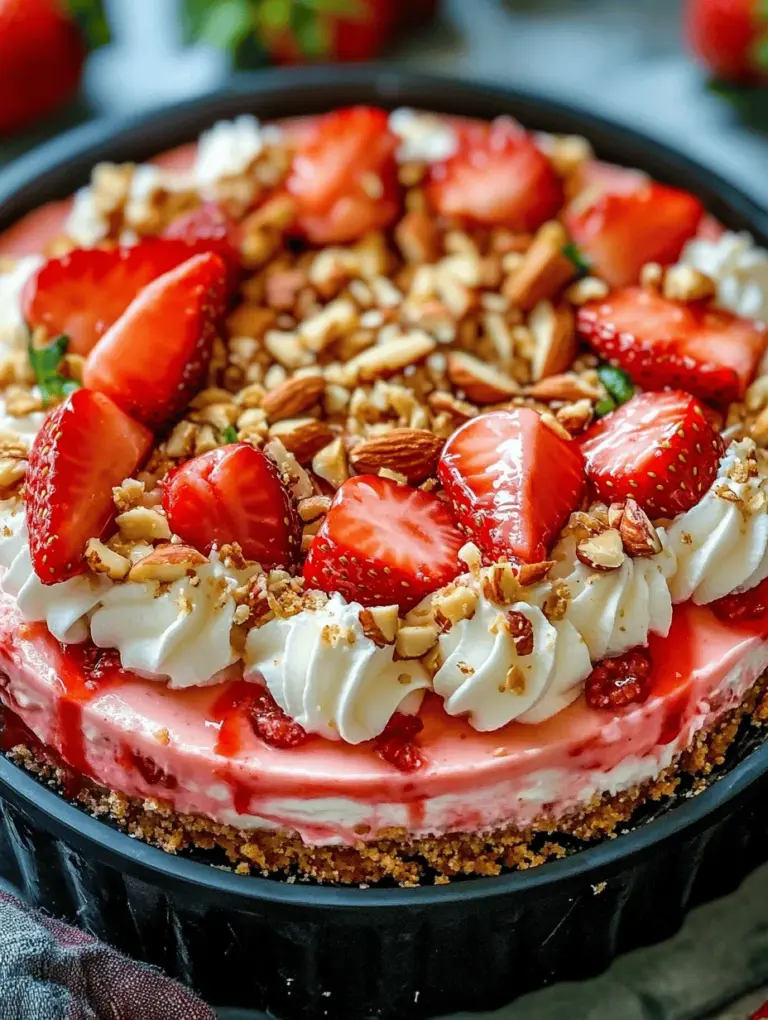
No-Bake Strawberry Crunch Cheesecake with Crispy Topping
Description of the Crunchy Topping
The crunchy topping of the No-Bake Strawberry Crunch Cheesecake is a delightful contrast to the creamy filling underneath. Composed of graham cracker crumbs, melted butter, toasted coconut flakes, and chopped nuts, this topping brings a satisfying texture that enhances each bite. The blend of flavors creates a perfect balance; the graham cracker crumbs add a subtle sweetness and a hint of vanilla, while the toasted coconut provides a tropical flair and an inviting chewiness. The nuts introduce a delightful crunch and nutty undertone that rounds out the flavor profile, making every mouthful an exciting experience. This topping not only enhances the texture but also adds a rich depth of flavor to the cheesecake, elevating it from simple to sensational.
Detailed Instructions for the Crunchy Topping
Ingredients for the Crunchy Topping:
– 1 cup graham cracker crumbs
– 1/2 cup unsweetened shredded coconut
– 1/2 cup chopped nuts (such as almonds or pecans)
– 1/4 cup unsalted butter, melted
– 1 tablespoon granulated sugar (optional for extra sweetness)
Instructions:
1. Prepare the Ingredients: Begin by measuring and preparing all the ingredients needed for the crunchy topping. This will make the process smoother and more efficient.
2. Mix the Dry Ingredients: In a large mixing bowl, combine the graham cracker crumbs, shredded coconut, and chopped nuts. If you prefer a sweeter topping, add the granulated sugar at this stage and mix well to ensure all dry ingredients are evenly distributed.
3. Incorporate the Butter: Pour the melted butter over the dry mixture. Using a spatula or your hands, gently mix until the crumbs are fully coated with butter. The mixture should hold together when pressed, resembling damp sand.
4. Toast the Mixture (Optional): For an enhanced flavor, you can toast the mixture in a skillet over medium heat for about 3-5 minutes, stirring frequently until it turns golden brown. This step adds an extra layer of nuttiness and depth to your crunchy topping.
5. Set Aside: Once mixed, set the topping aside while you prepare the cheesecake base. This allows the flavors to meld together, creating an even more delicious topping.
Final Assembly and Presentation
Steps for Adding the Crunchy Topping:
1. Check the Cheesecake: Ensure that your cheesecake filling has fully set in the refrigerator for at least 4 hours or overnight. It should be firm to the touch and ready for the topping.
2. Add the Topping: Once the cheesecake is set, carefully remove it from the springform pan. Place it on a serving platter. Evenly sprinkle the crunchy topping over the cheesecake, pressing down gently to ensure it adheres to the filling without sinking.
3. Garnishing: For an attractive finish, garnish the cheesecake with fresh strawberries. You can slice them in half or leave them whole, depending on your preference. Additionally, adding dollops of whipped cream around the edges enhances the dessert’s visual appeal and provides a creamy complement to the crunchy topping.
4. Presentation Tips: When serving, consider placing the cheesecake on a decorative cake stand or platter. The height and elegance of a cake stand elevate the dessert, making it an eye-catching centerpiece for any table.
Serving Suggestions and Pairings
The No-Bake Strawberry Crunch Cheesecake is versatile and suitable for various occasions, from intimate family gatherings to larger celebrations.
– Parties: This cheesecake is a perfect addition to summer parties or birthdays. Its no-bake nature means you can prepare it in advance, allowing you to enjoy your time with guests.
– Picnics: Slice the cheesecake into individual portions and pack them in containers for an easy dessert option at picnics. The flavors of strawberries and cream are always a hit outdoors.
– Family Gatherings: Serve this cheesecake as a refreshing dessert after a hearty meal with family. Its lightness will cleanse the palate and satisfy sweet cravings.
Suggested Beverage Pairings:
– Wine: A glass of sparkling wine or prosecco pairs wonderfully with the sweetness of the cheesecake, adding a celebratory touch to your dessert experience.
– Coffee: For those who enjoy coffee, a rich espresso or a creamy latte complements the cheesecake beautifully, enhancing the flavors without overpowering them.
– Tea: Herbal teas, particularly those with fruity notes, can also accompany this dessert well, providing a comforting finish to any meal.
Nutritional Information and Benefits
Overview of Nutritional Aspects:
This No-Bake Strawberry Crunch Cheesecake is not only delicious but also offers several nutritional benefits, especially thanks to its wholesome ingredients.
– Strawberries: Rich in vitamin C, antioxidants, and dietary fiber, strawberries are low in calories and provide numerous health benefits, including improved heart health and better blood sugar control.
– Nuts: The nuts used in the crunchy topping add healthy fats, protein, and fiber, making the cheesecake more filling and providing essential nutrients.
– Coconut: Unsweetened shredded coconut is a good source of healthy fats and can aid in digestion and heart health due to its fiber content.
Considerations for Portion Sizes:
While this cheesecake is a delightful treat, it’s important to consider portion sizes, particularly if you are mindful of your dietary intake. A single slice can be satisfying, and you can easily freeze any leftover cheesecake for future enjoyment. This way, you can indulge in moderation without feeling deprived.
Conclusion: The Joy of No-Bake Desserts
Creating a No-Bake Strawberry Crunch Cheesecake is a rewarding endeavor that showcases the joy of simple, delicious desserts. The ease of preparation, combined with the refreshing flavors and delightful textures, makes this cheesecake a favorite among both novice and experienced bakers. The creamy filling paired with the crunchy topping offers a delightful contrast that is sure to impress anyone who takes a bite.
This recipe not only highlights the deliciousness of strawberries but also provides an opportunity to explore creativity in the kitchen. Whether you are preparing this cheesecake for a special occasion or simply to treat yourself, the process of making it is enjoyable and fulfilling.
We encourage you to try this No-Bake Strawberry Crunch Cheesecake recipe and savor the delightful experience of creating this delicious treat. Share it with family and friends, and bask in the compliments that are sure to follow. Enjoy every moment of the journey, from mixing the ingredients to slicing into the final masterpiece!
