Introduction to Homemade Ice Cream
Creating your own ice cream at home is not just a culinary task; it’s an experience brimming with joy and satisfaction. The process of transforming simple ingredients into a luscious dessert that can evoke nostalgia and delight is something every food lover should try at least once. In this article, we will delve into the art of making Delightful Dreamy Homemade Ice Cream, a simple yet scrumptious recipe that allows you to unleash your creativity while enjoying a delicious treat.
Homemade ice cream is more than just a dessert; it is a canvas for your personal flavors and preferences. Whether you crave the classic taste of vanilla, the richness of chocolate, or the refreshing zing of fruit, making ice cream at home gives you the freedom to experiment and customize your treats to suit your palate. With endless possibilities for mix-ins and flavor combinations, this recipe is perfect for any occasion—from a summer barbecue to a cozy family movie night.
The Benefits of Homemade Ice Cream
Making ice cream from scratch offers a plethora of advantages that go beyond mere flavor. Here are some compelling reasons why you should consider crafting your own frozen delights:
Control Over Ingredients and Flavors
One of the most significant benefits of homemade ice cream is the control it provides over ingredients. You can choose high-quality, natural components, avoiding the artificial additives and preservatives commonly found in store-bought varieties. By selecting the ingredients that go into your ice cream, you can ensure that every scoop is made from wholesome products, tailored to your taste.
Healthier Options Compared to Store-Bought Varieties
Store-bought ice creams often contain excess sugars and unhealthy fats. When you create your own, you can adjust the sweetness and fat content to suit your dietary needs. This means you can indulge in a creamy treat without the guilt, making it a healthier alternative that doesn’t compromise on taste.
Customization to Suit Dietary Restrictions and Preferences
Whether you’re lactose intolerant, following a vegan diet, or simply wish to avoid certain allergens, homemade ice cream can be easily adapted to meet your dietary requirements. By substituting ingredients or choosing specific flavor combinations, you can create a dessert that everyone can enjoy without worry.
Key Ingredients for Dreamy Ice Cream
To create the perfect batch of Delightful Dreamy Homemade Ice Cream, it’s essential to understand the key ingredients that contribute to its rich texture and delectable flavor. Let’s take a closer look at each component:
Heavy Cream
Heavy cream is the backbone of any ice cream recipe, providing the rich texture and creaminess we all love. Its high-fat content ensures that the ice cream remains smooth and scoopable even after being frozen. The creaminess of the heavy cream creates that luxurious mouthfeel that is characteristic of premium ice cream.
Whole Milk
Whole milk plays a crucial role in balancing the richness of the heavy cream. It adds a lightness that prevents the ice cream from becoming too dense. The combination of milk and cream creates a harmonious blend that contributes to the overall texture of the final product.
Granulated Sugar
Sugar is not just a sweetener; it also impacts the freezing process of your ice cream. Granulated sugar lowers the freezing point of the mixture, ensuring that it remains soft and creamy rather than turning into an icy block. The right amount of sugar will enhance the flavors while providing the necessary sweetness that makes ice cream so irresistible.
Pure Vanilla Extract
Vanilla extract is a flavor enhancer that elevates the taste profile of your ice cream. Using pure vanilla extract, as opposed to artificial flavorings, adds depth and richness to the final product. It serves as a beautiful base that complements a variety of mix-ins and flavors.
Salt
While salt may seem like an odd addition to a dessert, it serves a vital purpose in enhancing the overall flavor. A pinch of salt can elevate the sweetness and balance the flavors, making each spoonful even more enjoyable. It’s a secret ingredient that will take your homemade ice cream to the next level.
Optional Mix-Ins
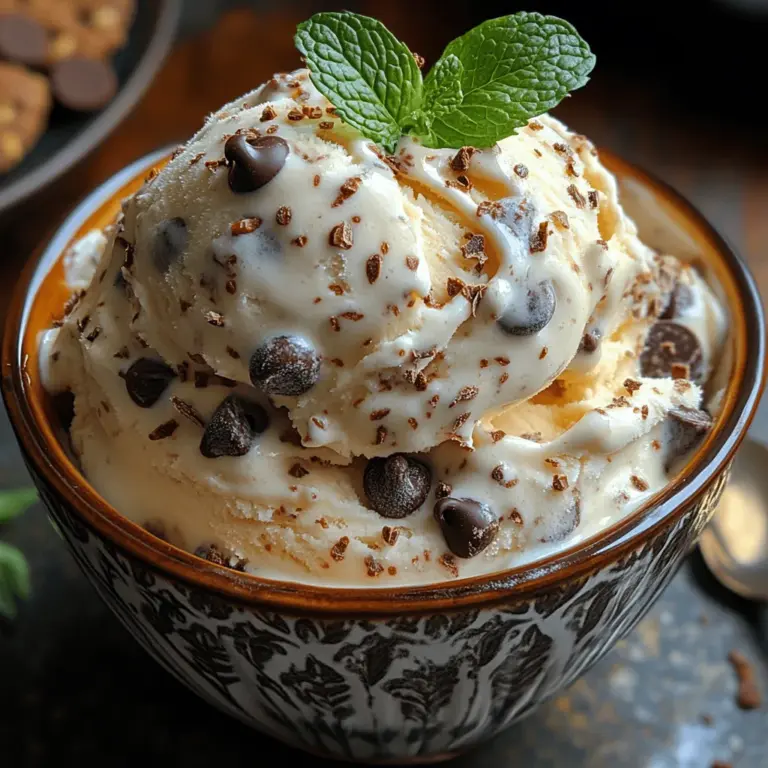
The beauty of homemade ice cream lies in its versatility. You can personalize your creation with a range of mix-ins, such as chocolate chips, crushed cookies, fruit pieces, or nuts. These additions not only contribute flavor and texture but also allow you to be creative and make the ice cream truly your own.
Step-by-Step Guide to Making Homemade Ice Cream
Now that you have a solid understanding of the ingredients, it’s time to roll up your sleeves and get started on creating your very own Delightful Dreamy Homemade Ice Cream. Follow these step-by-step instructions to ensure a smooth and enjoyable ice cream-making process.
Preparation of Ingredients
Before diving into the mixing and freezing, it’s essential to prepare all your ingredients. Gather the following items: heavy cream, whole milk, granulated sugar, pure vanilla extract, salt, and any mix-ins you wish to include. Measure out each ingredient accurately to ensure the perfect balance of flavors and texture. Having everything ready will streamline the process and make it more enjoyable.
Mixing the Base
1. Combine the Dairy: In a large mixing bowl, pour in the heavy cream and whole milk. Use a whisk to combine them gently, ensuring they are well mixed.
2. Add Sugar and Salt: Gradually add the granulated sugar and salt to the dairy mixture. Whisk until the sugar is fully dissolved. This step is crucial, as it ensures that the sweetness is evenly distributed throughout the ice cream base.
3. Incorporate Vanilla: Add the pure vanilla extract to the mixture and whisk again. The aroma of vanilla will begin to fill your kitchen, hinting at the deliciousness to come.
Incorporating Mix-Ins
Once your base is ready, it’s time to get creative with mix-ins. Here’s how to ensure an even distribution of flavors and textures:
1. Choose Your Favorites: Select your desired mix-ins, such as chocolate chips, cookie crumbles, or fresh fruit pieces. Aim for a balanced amount—too many mix-ins can disrupt the texture of the ice cream.
2. Fold in Gently: Using a spatula, gently fold the mix-ins into the ice cream base. Be careful not to overmix, as this can lead to a grainy texture. You want to maintain the smoothness of your ice cream while ensuring the flavors are evenly distributed.
3. Taste and Adjust: Before freezing, taste the mixture to see if you’d like to adjust the sweetness or add more flavor. This is your chance to customize the ice cream to your liking.
At this point, you are ready to move on to freezing your homemade ice cream, and soon enough, you’ll be indulging in a bowl of your delightful creation. Stay tuned for the next part of this article, where we will cover the freezing process and additional tips for achieving the perfect texture.
{{image_1}}
Churning Process: Understanding the Role of the Ice Cream Maker
Once you’ve prepared your ice cream base and let it chill, it’s time to bring your creation to life with the churning process. This step is critical for achieving that creamy, smooth texture that we all love in ice cream. An ice cream maker is your best friend here, whether you have an electric model or a manual one.
How to Achieve the Right Consistency
To begin churning, pour your chilled ice cream mixture into the ice cream maker’s bowl. Turn on your machine and allow it to churn for about 20 to 30 minutes, or until the mixture thickens to a soft-serve consistency. The churning process incorporates air into the mixture, which is essential for that light and fluffy mouthfeel. It’s important not to rush this step; churning too quickly or stopping early can result in a dense final product.
Monitor the texture as it churns. You want to look for a consistency that holds its shape but is still soft enough to scoop easily. If you’re using a manual ice cream maker, you may need to crank it a bit longer to achieve the same results. Always refer to your ice cream maker’s instructions for the best outcome.
Freezing and Setting: Best Practices for Achieving the Perfect Scoopable Texture
Once the churning process is complete, it’s time to transfer your ice cream to a storage container for freezing. However, if you want to enjoy it right away, you can serve it as soft serve. For those who prefer a firmer texture, follow these steps:
1. Transfer to a Container: Use a spatula to transfer the churned ice cream into an airtight container. Make sure to smooth the top to minimize air exposure.
2. Cover Well: Press a piece of parchment paper directly onto the surface of the ice cream before sealing the container. This helps prevent ice crystals from forming, which can ruin the texture.
3. Freeze: Place the container in the coldest part of your freezer. Let it freeze for at least 4 hours, but overnight is ideal for a firmer ice cream that’s easy to scoop.
By following these freezing practices, you’ll ensure that your homemade ice cream retains its creamy consistency and is ready for serving.
Flavor Variations to Try: Encouraging Creativity with Alternative Flavors and Mix-ins
Homemade ice cream is a canvas for your culinary creativity. While the base recipe is delicious on its own, consider exploring these exciting flavor variations to elevate your ice cream experience.
Classic Vanilla with a Twist: Infusing Herbs or Spices
Start with a classic vanilla base, but add a twist by infusing unique flavors. Consider steeping fresh mint leaves or basil in the cream before chilling. Alternatively, try adding spices like cinnamon or nutmeg for a warm, aromatic profile. A hint of vanilla bean can also add depth and sophistication.
Chocolate Lovers Delight: Incorporating Cocoa Powder or Chocolate Syrup
For those who can’t resist chocolate, enhance your base by mixing in cocoa powder or rich chocolate syrup. Adjust the sweetness according to your preference, and consider adding chocolate chips or chunks for added texture. A swirl of fudge or caramel can also create a delicious marbled effect.
Fruity Sensations: Using Fresh Fruits or Fruit Preserves
Fresh fruit can transform your homemade ice cream into a refreshing delight. Puree strawberries, mangoes, or peaches and fold them into your base during the last few minutes of churning. Alternatively, swirl in fruit preserves for a fun contrast of flavors. For a tropical twist, try incorporating coconut milk for a creamy, fruity ice cream.
Nutty Indulgence: Adding Nuts or Nut Butter for Texture and Flavor
Nuts add a delightful crunch and flavor to your ice cream. Toasted almonds, pecans, or walnuts can be folded in after churning for added texture. If you’re a fan of nut butter, consider swirling in almond or peanut butter for a rich creaminess that pairs beautifully with chocolate or vanilla bases.
Serving Suggestions for Your Homemade Ice Cream: Creative Ways to Present and Enjoy Your Homemade Treat
Once your homemade ice cream is ready, it’s time to think about how to serve it. Here are some creative suggestions to enhance your serving experience.
Bowls vs. Cones: The Pros and Cons of Different Serving Vessels
Deciding between bowls and cones often comes down to personal preference. Bowls provide a larger surface area, making it easier to enjoy multiple scoops and toppings. They are also a great option for families or gatherings, as they can be shared. Cones, on the other hand, add a fun element to the experience, allowing you to enjoy your ice cream on the go. They can be made from classic waffle cones or even cookie cones for an extra treat.
Toppings and Sauces: Ideas to Enhance Flavor and Presentation
The right toppings can take your ice cream from good to extraordinary. Consider offering a variety of toppings such as crushed nuts, sprinkles, chocolate chips, or fresh fruit. Drizzle sauces like hot fudge, caramel, or berry coulis over the top to enhance both flavor and presentation. For a gourmet touch, consider using edible flowers or a sprinkle of sea salt to elevate your dish.
Pairing with Other Desserts: Combining with Cakes or Pastries for a Decadent Experience
For a truly indulgent treat, consider pairing your homemade ice cream with other desserts. A scoop of vanilla ice cream on top of a warm chocolate brownie or a slice of pie creates a delightful contrast of temperatures and textures. You can also create ice cream sandwiches by placing ice cream between two cookies or brownies for a fun and tasty dessert.
Storing Your Homemade Ice Cream: Guidelines for Preserving Your Ice Cream’s Quality and Flavor
Proper storage is essential to maintain the quality and flavor of your homemade ice cream. Here are some guidelines to ensure your treat stays delicious for as long as possible.
Airtight Containers: Importance of Proper Storage to Prevent Freezer Burn
When storing your ice cream, it’s crucial to use airtight containers. This helps prevent ice crystals from forming and keeps your ice cream fresh. Plastic containers with tight-fitting lids or glass containers with seals work well. Avoid using containers that are too large for the amount of ice cream, as excess air can lead to freezer burn.
Optimal Freezing Techniques: How to Maintain Texture and Prevent Iciness
To maintain the best texture, avoid placing your ice cream in the door of the freezer, as this area experiences temperature fluctuations. Instead, store it towards the back of the freezer where it’s consistently cold. If you notice ice crystals forming on the surface, simply stir the ice cream to reincorporate them before serving.
Shelf Life of Homemade Ice Cream: Understanding How Long Your Treat Will Last
Homemade ice cream is best enjoyed within the first two weeks after making it, as flavor and texture can decline over time. However, if stored properly, it can last for up to a month in the freezer. After that, it may still be safe to eat, but the quality may not be up to par.
Conclusion: The Joy of Homemade Ice Cream
Crafting your own homemade ice cream is not just about enjoying a delightful treat; it’s also a rewarding process that encourages creativity in the kitchen. The joy of experimenting with flavors, textures, and presentation is a fulfilling experience that can be shared with family and friends.
As you savor the fruits of your labor, you’ll find that homemade ice cream is perfect for any occasion, whether it’s a hot summer day or a cozy winter evening. The satisfaction of creating something delicious from scratch is unparalleled, making every scoop a well-deserved reward. So gather your ingredients, unleash your creativity, and indulge in the bliss of homemade ice cream whenever the craving strikes.
