Introduction
In the world of baking, cookies hold a special place in our hearts, not only because they are delicious but also because they evoke a sense of nostalgia and joy. Among all the varieties that exist, the vibrant and whimsical Cookie Monster Cookies stand out as a delightful twist on the classic cookie. These playful treats are characterized by their bright blue chocolate candies, which mimic the iconic character’s fur, and their unique combination of textures that make each bite an adventure. Whether you are baking for a birthday party, a school event, or simply to brighten up a regular day, Cookie Monster Cookies are sure to bring smiles to faces of all ages.
This recipe isn’t just about making cookies; it’s about creating a fun experience in the kitchen. Perfect for family baking sessions or as a creative project for kids, these cookies invite everyone to get involved. The vibrant colors and playful presentation make them a favorite among children, while the delicious blend of flavors keeps adults coming back for more. In this article, we’ll explore the story behind these delightful cookies, break down the ingredients that make them so special, and guide you through the preparation and baking process to ensure that your Cookie Monster Cookies turn out perfectly every time.
The Story Behind Cookie Monster Cookies
The beloved Cookie Monster character, known for his insatiable appetite for cookies, originated from the iconic television show “Sesame Street,” which first aired in 1969. Designed to teach children about sharing, friendship, and the joys of learning, Cookie Monster quickly became a fan favorite due to his humorous antics and love for cookies. His character embodies the essence of childhood wonder and the joy of indulging in sweet treats, making him a symbol of fun and playfulness.
The popularity of Cookie Monster-themed treats has surged in recent years, with bakers and pastry chefs around the world creating their own versions of this playful cookie. From cupcakes to ice cream, the blue and fuzzy aesthetic of Cookie Monster has inspired a multitude of desserts. Cookie Monster Cookies, in particular, have gained a reputation for being not only visually stunning but also deliciously satisfying. They have become a staple at celebrations, gatherings, and even bake sales, delighting people of all ages with their whimsical appearance and delightful flavors.
Cookies hold a significant cultural place in many societies. They are often associated with celebrations, festivities, and gatherings, serving as a sweet end to meals or a comforting snack enjoyed with family and friends. The Cookie Monster Cookies specifically highlight this cultural significance through their connection to childhood memories and the simple joys of sharing treats with loved ones. As you bake these cookies, you not only create a delicious dessert but also participate in a tradition that brings people together.
Understanding the Ingredients
To achieve the perfect Cookie Monster Cookies, it’s essential to understand the role of each ingredient in the recipe. Here’s a breakdown of the key components that contribute to their delightful texture and flavor:
1. Unsalted Butter: The foundation of many cookie recipes, unsalted butter is crucial for achieving the right texture. Using butter at room temperature allows for easy creaming with sugar, resulting in a light and fluffy cookie. The fat content in butter also adds richness and depth to the flavor.
2. Brown Sugar vs. Granulated Sugar: This recipe calls for both brown and granulated sugar, each contributing unique characteristics. Brown sugar, with its higher moisture content and molasses flavor, enhances the cookie’s chewiness and adds a deep, caramel-like taste. Granulated sugar, on the other hand, helps the cookies spread out and become crisp around the edges.
3. Eggs: Eggs are vital in cookie baking as they act as a binding agent, holding all the ingredients together. They also provide leavening properties, which help the cookies rise and achieve a soft, tender texture.
4. All-Purpose Flour: The backbone of the cookie, all-purpose flour provides structure and stability. The right amount is crucial; too much flour can result in dry cookies, while too little can make them too soft.
5. Baking Soda and Salt: Baking soda is a leavening agent that reacts with acidic ingredients to help the cookies rise. It also
{{image_1}}
Detailed Breakdown of Each Step in the Recipe
Creating Cookie Monster Cookies is as much about the process as it is about the final product. To ensure your cookies turn out perfectly, follow these detailed steps closely.
Creaming the Butter and Sugars: Achieving the Right Consistency
Begin by placing your softened butter into a large mixing bowl. Use an electric mixer on medium speed to cream the butter until it’s light and fluffy. This should take about 2-3 minutes. The key here is to incorporate air into the butter, which will help your cookies rise and maintain a soft texture. Gradually add the granulated and brown sugars, continuing to beat the mixture until it’s well combined and creamy. The sugars should be fully integrated with the butter, resulting in a smooth texture that holds some volume.
Incorporating Eggs and Vanilla: Ensuring Thorough Mixing
Once your butter and sugar are perfectly creamed, it’s time to add the eggs and vanilla extract. Crack the eggs into a small bowl to check for any shell fragments, then add them to the mixture one at a time, mixing well after each addition. This ensures the eggs are fully incorporated, enhancing the moisture and richness of the cookies. Add the vanilla extract and mix for another 30 seconds until everything is well blended. The mixture should be smooth and slightly glossy.
Combining Dry Ingredients: Avoiding Overmixing for Softness
In a separate bowl, whisk together your dry ingredients: flour, baking soda, and salt. This step is crucial as it ensures that the leavening agent (baking soda) is evenly distributed throughout the flour. Gradually add the dry mixture to the wet ingredients. Use a spatula or wooden spoon to combine them, mixing until just combined. Be careful not to overmix; overworking the dough can lead to tough cookies. The goal is to have a soft and slightly sticky dough that holds together.
Folding in Chocolates and Coconut: Tips for Even Distribution
Now comes the fun part—adding the mix-ins! Gently fold in the chocolate chips and shredded coconut using a spatula. Make sure to distribute them evenly throughout the dough without overmixing. This step is crucial as it ensures that each cookie will have a delightful burst of chocolate and a hint of coconut flavor in every bite.
Scooping and Spacing the Dough: Importance of Spacing for Proper Baking
Using a cookie scoop or two tablespoons, portion out the dough onto a baking sheet lined with parchment paper. Leave adequate space (about 2 inches) between each dough ball. This spacing is essential; as the cookies bake, they will spread out, and proper spacing will prevent them from merging into one giant cookie. For added fun, you can shape the dough into a more rounded mound to mimic the Cookie Monster’s characteristic look.
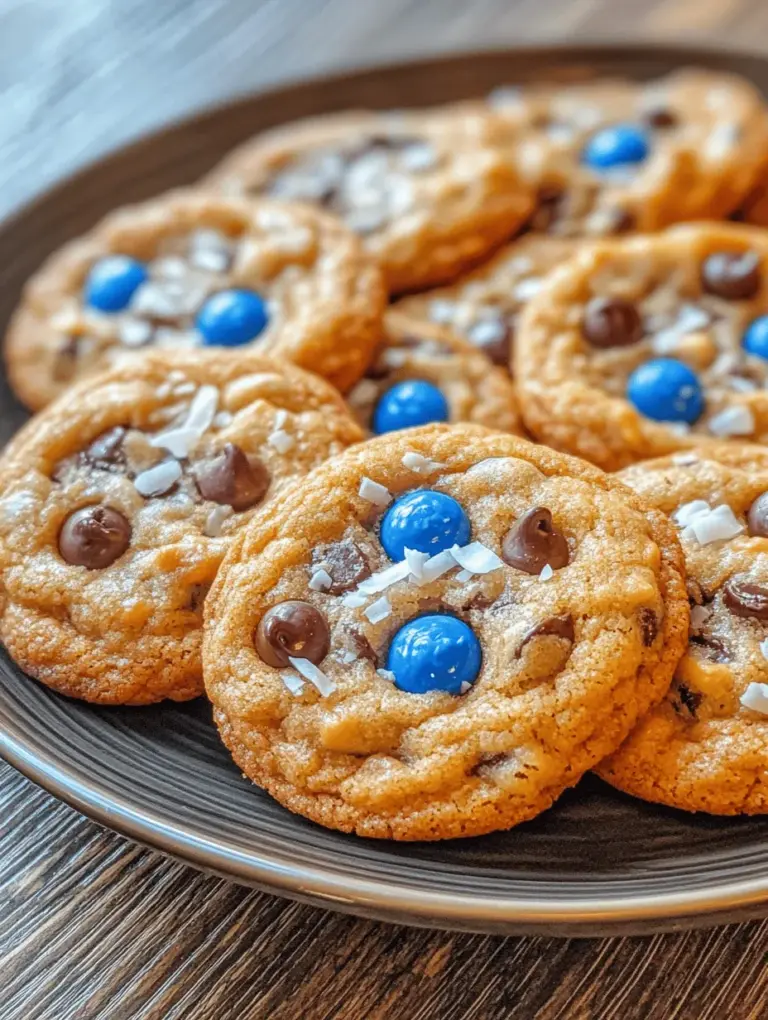
Decorating with Extra Candies: Enhancing the Cookie Monster Theme
To bring your Cookie Monster Cookies to life, press a few extra chocolate chips or colorful candy pieces into the tops of each cookie dough ball before baking. This not only enhances the visual appeal but also adds an extra touch of sweetness to each bite. Feel free to use blue candies or M&M’s to stick with the Cookie Monster theme!
Baking Perfect Cookie Monster Cookies
Baking Time and Temperature: Achieving the Ideal Texture
Preheat your oven to 350°F (175°C). Once your cookies are ready, place the baking sheets in the oven and bake for 10-12 minutes. The key to perfect cookies is to keep an eye on them; they should be slightly golden around the edges but still soft in the center. This slight underbaking ensures that they remain chewy and delicious once cooled.
Recognizing When Cookies Are Done: Importance of Visual Cues
As your cookies bake, watch for visual cues. When the edges are set and the tops are just beginning to turn golden brown, it’s time to remove them from the oven. Remember, cookies continue to bake after being taken out, so err on the side of caution to prevent overbaking.
Cooling Process: Why It’s Essential for Texture and Flavor Development
Once removed from the oven, let the cookies sit on the baking sheet for about 5 minutes. This cooling period allows them to firm up slightly. Afterward, transfer them to a wire rack to cool completely. This step is crucial for developing their final texture and flavor. The cookies will continue to set as they cool, ensuring a perfect balance between soft and chewy.
Serving and Enjoying Your Cookies
Ideas for Presenting Cookie Monster Cookies
When it’s time to serve your Cookie Monster Cookies, consider creative presentation ideas. Place them on a colorful platter or stack them in a clear glass jar for a fun display. You can even decorate the serving area with Cookie Monster-themed party supplies for a whimsical touch, perfect for birthdays or gatherings.
Pairing Suggestions (Like Milk or Ice Cream)
These cookies pair wonderfully with a tall glass of milk—classic and comforting. For an indulgent treat, serve them alongside a scoop of vanilla or cookies and cream ice cream. The combination of warm cookies and cold ice cream creates a delightful contrast that is sure to please everyone.
Creative Serving Ideas for Parties or Gatherings
If you’re hosting a party, consider setting up a DIY cookie bar where guests can create their own Cookie Monster-inspired treats. Provide toppings like whipped cream, chocolate syrup, or additional candies. This interactive station not only engages your guests but also allows for customization and fun.
Variations and Customizations
Suggestions for Modifying the Recipe (e.g., Gluten-Free Options)
If you want to adapt the recipe for dietary needs, consider substituting the all-purpose flour with a gluten-free blend. Ensure that the blend contains xanthan gum or another binding agent to maintain the cookie’s structure. Additionally, using gluten-free oats can create a chewy texture without sacrificing flavor.
Incorporating Seasonal Elements (Like Holiday-Themed Candies)
Get creative with seasonal elements! During the holidays, you can replace the chocolate chips with festive candies like red and green M&M’s or even peppermint pieces for a refreshing twist. This not only gives your cookies a seasonal flair but also makes them perfect for holiday gatherings.
Adapting the Recipe for Different Dietary Needs (Vegan Alternatives, Nut-Free Options)
For a vegan version, replace the eggs with flax eggs (1 tablespoon of flaxseed meal mixed with 2.5 tablespoons of water per egg). Use a plant-based butter substitute and ensure the chocolate chips are dairy-free. If you need a nut-free option, simply omit any nuts and double up on the chocolate or coconut for added texture and flavor.
Conclusion
Making Cookie Monster Cookies is not just a baking endeavor; it’s a delightful experience that brings joy and creativity into your kitchen. From the moment you start creaming the butter and sugars to the final presentation of your beautifully baked cookies, every step is filled with fun and excitement.
We encourage you to try this recipe, share it with family and friends, and create lasting memories. Baking is a wonderful way to connect with loved ones, whether you’re sharing a batch of cookies over a glass of milk or crafting unique treats for a special occasion. Embrace the creativity that baking offers, as it can transform everyday gatherings into unforgettable celebrations filled with laughter and deliciousness. Happy baking!