Introduction
In the realm of desserts, no-bake options have carved out a special niche for themselves, capturing the hearts and taste buds of dessert lovers everywhere. The charm of no-bake desserts lies in their simplicity and convenience; they require minimal effort, no oven time, and often deliver an indulgent taste that rivals their baked counterparts. With the sweltering heat of summer or those busy weeknights when time is of the essence, no-bake desserts stand out as the go-to choice for satisfying sweet cravings without the fuss.
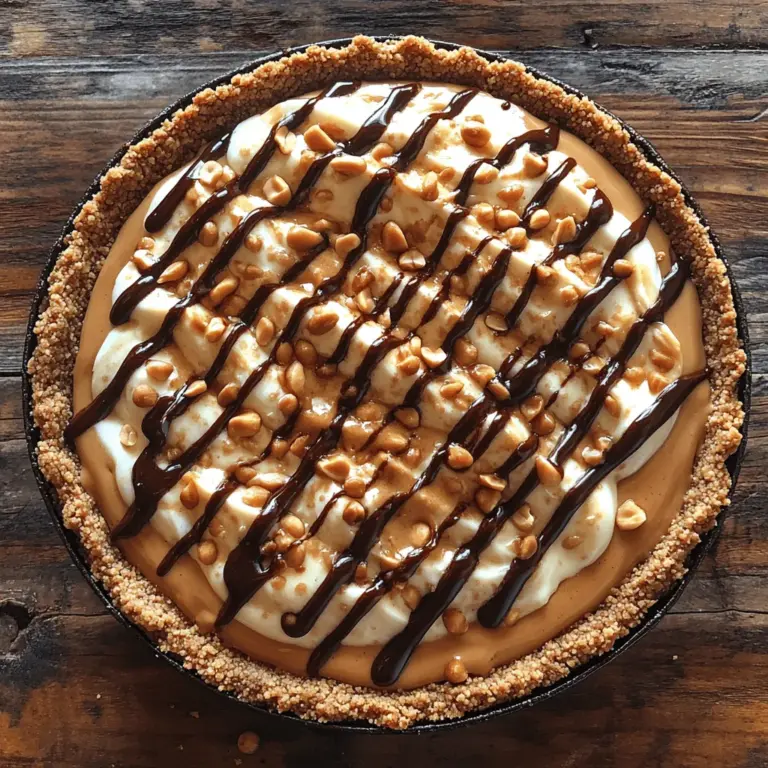
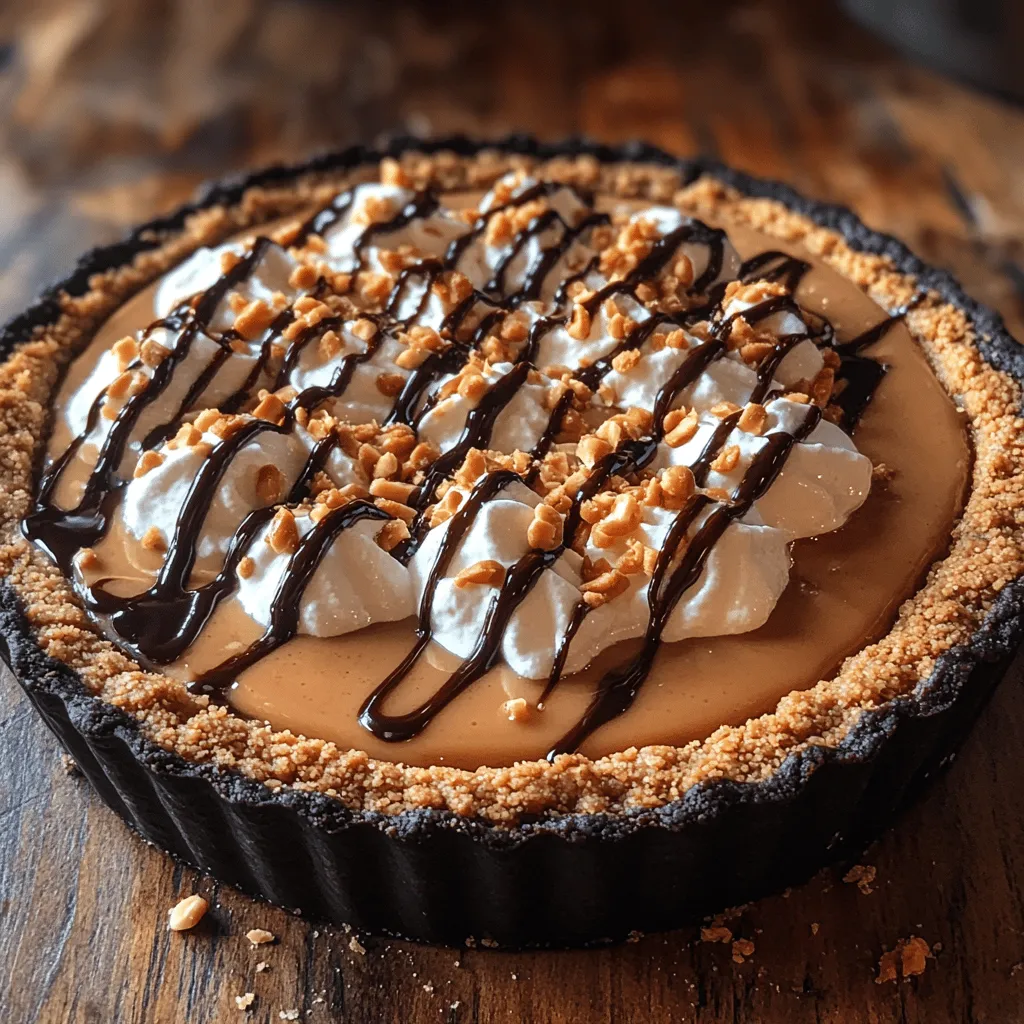
Among the plethora of no-bake options, the Creamy Dreamy No-Bake Peanut Butter Pie reigns supreme. This delectable dessert is a harmonious blend of flavors and textures, featuring a rich and velvety peanut butter filling nestled in a crunchy graham cracker crust. Each slice offers a delightful contrast between the creamy filling, the crumbly crust, and the optional garnishes of chocolate syrup and chopped peanuts, making it not only a treat for the palate but also a feast for the eyes.
What makes this pie particularly appealing is its ease of preparation. It requires no baking and can be whipped up in just a matter of minutes, making it an ideal dessert for both novice cooks and seasoned bakers. Whether you’re hosting a barbecue, a family gathering, or simply looking to indulge your sweet tooth, this no-bake peanut butter pie is bound to impress.
Understanding the Ingredients
Before diving into the preparation of this delightful pie, it’s essential to understand the key ingredients that bring this recipe to life. Each component plays a significant role in creating the perfect balance of flavor and texture that defines the Creamy Dreamy No-Bake Peanut Butter Pie.
Graham Cracker Crumbs
At the heart of this dessert is the graham cracker crust, which serves as the foundation for the pie. Graham cracker crumbs provide a delightful crunch and a hint of sweetness that perfectly complements the rich filling. The texture of the crust is crucial; it should be firm enough to hold the filling but crumbly enough to offer a pleasant bite.
Unsalted Butter
Unsalted butter is the binding agent for the crust, adding richness and flavor. By using unsalted butter, you have better control over the overall saltiness of the pie, allowing the sweet and nutty flavors of the peanut butter to shine through. It’s important to melt the butter completely before mixing it with the graham cracker crumbs to ensure an even distribution.
Creamy Peanut Butter
The star ingredient of this recipe is, without a doubt, creamy peanut butter. It provides the pie with its distinctive flavor and an incredibly smooth texture. Opt for a high-quality, creamy peanut butter for the best results, as it will not only enhance the taste but also contribute to the pie’s overall creaminess.
Powdered Sugar
Powdered sugar is used in the filling to add sweetness and help create a smooth texture. Unlike granulated sugar, powdered sugar dissolves quickly and easily, ensuring that the filling remains velvety and free of any grainy texture. It’s the perfect sweetener for desserts like this pie, where a fine texture is desired.
Vanilla Extract
A splash of vanilla extract is added to elevate the flavor profile of the pie. Vanilla enhances the overall taste and adds a warm, comforting note that complements the peanut butter. It’s a simple addition that makes a world of difference in the final product.
Cream Cheese
Cream cheese is another critical ingredient in the filling, contributing to its creamy texture and a touch of tanginess. Softening the cream cheese before mixing is essential; it allows for easier blending and ensures a uniform consistency in the filling. The cream cheese also helps to stabilize the filling, allowing it to hold its shape once set.
Heavy Whipping Cream
Heavy whipping cream plays a vital role in lightening the filling and adding a luscious mouthfeel. When whipped, it incorporates air, which gives the filling a light and airy texture that balances the richness of the peanut butter and cream cheese. This step is crucial for achieving that dreamy, creamy consistency that makes this pie so irresistible.
Optional Garnishes: Chocolate Syrup and Chopped Peanuts
To elevate the presentation and flavor of the Creamy Dreamy No-Bake Peanut Butter Pie, consider adding optional garnishes such as chocolate syrup and chopped peanuts. Drizzling chocolate syrup over the pie not only adds a touch of sweetness but also creates a beautiful visual contrast. Chopped peanuts can be sprinkled on top for added crunch and a burst of peanut flavor, enhancing the overall experience.
Step-by-Step Instructions for Preparation
Now that we have a clear understanding of the ingredients that make up the Creamy Dreamy No-Bake Peanut Butter Pie, let’s move on to the preparation process. Follow this detailed guide to ensure a flawless execution of this delightful dessert.
Preparing the Crust
1. Crush the Graham Crackers: Begin by crushing the graham crackers into fine crumbs. You can do this by placing them in a zip-top bag and using a rolling pin or by pulsing them in a food processor. Aim for a fine, sand-like consistency for the best results.
2. Combine with Melted Butter: In a medium bowl, combine the graham cracker crumbs with melted unsalted butter. Mix until the crumbs are fully coated and resemble wet sand. The butter will help bind the crumbs together, creating a firm crust.
3. Press into the Pie Plate: Pour the crumb mixture into a 9-inch pie plate. Using the back of a measuring cup or your fingers, press the mixture firmly into the bottom and up the sides of the plate. It’s crucial to achieve an even layer and to press down hard enough so that the crust holds its shape once set. This step is vital for a sturdy crust that can support the creamy filling.
4. Chill the Crust: Place the pie crust in the refrigerator for about 10-15 minutes to allow it to firm up before adding the filling. Chilling helps the butter to set, ensuring that your crust will hold its shape nicely.
Preparing the Filling
1. Soften the Cream Cheese: While the crust is chilling, take the cream cheese out of the refrigerator and allow it to soften at room temperature for about 10-15 minutes. Softening the cream cheese is crucial for easy mixing; it ensures that there are no lumps in your filling.
2. Mix the Filling Ingredients: In a large mixing bowl, combine the softened cream cheese and creamy peanut butter. Using an electric mixer, beat the two ingredients together until they are well combined and smooth. This should take about 1-2 minutes.
3. Add the Powdered Sugar and Vanilla: Gradually add the powdered sugar and vanilla extract to the cream cheese and peanut butter mixture. Continue to mix until everything is well incorporated and the mixture is creamy.
4. Whip the Heavy Cream: In a separate bowl, whip the heavy whipping cream until stiff peaks form. This step is essential for achieving the light and airy texture of the filling. Be careful not to over-whip, as this can lead to a grainy texture.
5. Fold in the Whipped Cream: Gently fold the whipped cream into the peanut butter mixture. Use a spatula to carefully combine the two mixtures, taking care not to deflate the whipped cream. This folding technique will ensure that your filling remains light and fluffy.
6. Fill the Crust: Once the filling is well combined and airy, pour it into the chilled graham cracker crust. Use a spatula to smooth the top and create an even surface.
7. Chill Again: Cover the pie with plastic wrap and place it back in the refrigerator. Allow it to chill for at least 4 hours, or preferably overnight. Chilling helps the filling to set properly, making it easier to slice and serve.
This marks the completion of the initial preparation steps for your Creamy Dreamy No-Bake Peanut Butter Pie. Continue to the next segment for additional tips and more details on finishing touches that will elevate your dessert to the next level.
How to Mix Ingredients for a Smooth and Creamy Filling
Creating the perfect filling for your Creamy Dreamy No-Bake Peanut Butter Pie starts with the right mixing technique. Begin by ensuring all your ingredients are at room temperature. This helps achieve a uniform consistency without lumps. In a large mixing bowl, combine the softened cream cheese and creamy peanut butter. Using an electric mixer, beat the two together on medium speed until the mixture is smooth and creamy, which should take about 2-3 minutes.
Next, gradually add in the powdered sugar and vanilla extract. Continue mixing until everything is well incorporated. The purpose of using powdered sugar instead of granulated sugar is to ensure a velvety texture, as powdered sugar dissolves more readily. Once your peanut butter mixture is smooth, set it aside.
Whipping the Cream: Technique for Perfect Folding
Whipping the cream is a crucial step in achieving that light and airy texture that contrasts beautifully with the dense peanut butter filling. In a separate mixing bowl, pour in the heavy whipping cream, ensuring the bowl is chilled, as colder cream whips better. Using a whisk or an electric mixer with a whisk attachment, beat the cream on high speed until soft peaks form. This process generally takes about 3-5 minutes.
Once your whipped cream reaches the desired consistency, it’s time to fold it into the peanut butter mixture. To do this, use a rubber spatula to scoop about one-third of the whipped cream and gently incorporate it into the peanut butter filling. Stir gently, using a folding motion rather than vigorous mixing. This technique helps to maintain the volume of the whipped cream, ensuring your filling remains light and airy. Repeat this process until all the whipped cream is combined with the peanut butter mixture, taking care to keep the texture fluffy.
Assembling and Chilling the Pie
With your filling ready, it’s time to assemble the pie. Pour the creamy peanut butter mixture into the prepared graham cracker crust. Use a spatula to spread it evenly, smoothing the top to create an appealing surface. After assembling, cover the pie with plastic wrap or aluminum foil, ensuring it’s tightly sealed to prevent any odors from the fridge from affecting the flavor.
Chilling time is critical for the best results. Place the pie in the refrigerator for at least 4 hours, or preferably overnight. This chilling period allows the filling to set properly, making it easier to slice while enhancing the flavors as they meld. The longer you let the pie chill, the firmer and creamier the texture will become, resulting in a dessert that is simply irresistible.
Flavor Profile and Texture
The Creamy Dreamy No-Bake Peanut Butter Pie boasts a rich and creamy consistency that is a delightful contrast to the crunchy graham cracker crust. Each bite offers a perfect balance of sweet and salty, primarily due to the creamy peanut butter’s natural flavors and the optional toppings like chocolate syrup or crushed peanuts. The texture is an essential element, where the smoothness of the filling complements the crunch of the crust, creating a satisfying experience for the palate.
Temperature plays a significant role in the pie’s flavor experience. Serving the pie straight from the refrigerator ensures it maintains its firm structure, allowing the flavors to shine without being overly soft. However, a slightly warmer serving can enhance the peanut butter’s natural oils, resulting in a richer taste.
Presentation Ideas
The visual appeal of your Creamy Dreamy No-Bake Peanut Butter Pie can elevate the dessert experience even further. Here are some suggestions for serving:
1. Garnishing: Beyond the basic toppings of whipped cream and chocolate syrup, consider adding chocolate shavings, crushed peanuts, or even a drizzle of caramel sauce over the top. This not only enhances the flavor but also adds texture and visual interest.
2. Plating: Use a sharp knife to slice the pie into equal portions. For an elegant touch, serve each slice on a chilled plate. You can add a dollop of whipped cream alongside the pie or a scoop of vanilla ice cream for an extra indulgent experience.
3. Layering: For an impressive presentation, consider layering individual servings in small jars. Start with a layer of crust, followed by the peanut butter filling, and then repeat until the jars are filled, finishing with a layer of whipped cream and a sprinkle of toppings.
Nutritional Information
Understanding the nutritional content of your Creamy Dreamy No-Bake Peanut Butter Pie can help you make informed choices, especially if you have dietary preferences or restrictions. Key ingredients offer various benefits:
– Peanut Butter: A great source of protein and healthy fats, peanut butter also provides essential nutrients such as vitamin E, magnesium, and potassium.
– Cream Cheese: While rich in flavor, cream cheese contributes calcium, which is vital for bone health. When choosing cream cheese, consider low-fat options for a lighter version.
– Heavy Whipping Cream: This ingredient adds richness and creaminess to the pie but also contributes to the overall calorie count. If you prefer a lighter option, you can substitute with whipped topping or a lighter cream product.
For those with dietary restrictions, gluten-free graham crackers are widely available and can easily be used to make this pie suitable for gluten-sensitive individuals.
Storage and Shelf Life
Proper storage is key to maintaining the quality of your Creamy Dreamy No-Bake Peanut Butter Pie. After preparing the pie, it can be safely stored in the refrigerator for up to 5 days. Be sure to cover it tightly to prevent it from absorbing any odors from other foods in the fridge.
If you want to enjoy the pie beyond the 5-day mark, you can freeze it. Slice the pie into portions and wrap each slice in plastic wrap, followed by aluminum foil to prevent freezer burn. When stored properly, the pie can last in the freezer for up to 2 months. To enjoy, simply thaw the slices in the refrigerator for a few hours before serving.
Conclusion
Creating the Creamy Dreamy No-Bake Peanut Butter Pie is not only easy but also incredibly satisfying. This dessert strikes a perfect balance between rich flavors and textures, making it suitable for various occasions—from casual family dinners to special celebrations.
The versatility of this recipe opens the door for creativity; consider experimenting with different flavors, such as almond butter or adding a swirl of raspberry or chocolate for a unique twist. With each iteration, you can make this pie your own personal favorite. So gather your ingredients, follow the steps, and enjoy a slice of this delightful treat that is sure to impress family and friends alike.
