Introduction
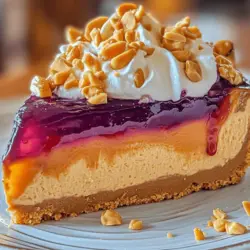
If you’re a fan of comfort food, then the combination of peanut butter and jelly likely brings back fond memories of childhood lunches and carefree afternoons. Now, imagine that nostalgic flavor transformed into a luscious cheesecake that balances creamy richness with the sweetness of jelly and a satisfying crunch from the crust. That is exactly what the Peanut Butter and Jelly Cheesecake offers.
This delightful dessert is a modern twist on a classic pairing, bringing together the velvety smoothness of cheesecake with the iconic flavors of peanut butter and jelly. The result is an irresistible treat that captures the essence of two beloved ingredients while elevating them to a gourmet experience. With its creamy filling, vibrant jelly layer, and crunchy graham cracker crust, this cheesecake is perfect for any occasion—be it a family gathering, a birthday celebration, or simply a well-deserved indulgence after a long day.
In this detailed article, we will explore the intricacies of making Peanut Butter and Jelly Cheesecake, from understanding its components to step-by-step instructions for creating this delicious dessert. Whether you are a seasoned baker or a novice in the kitchen, this recipe will guide you through each stage, ensuring you achieve a perfect cheesecake that will impress your friends and family.
Understanding the Components of Peanut Butter and Jelly Cheesecake
Peanut butter and jelly is a combination that traces its origins back to the early 20th century, quickly becoming a staple in American households, especially for children. The sweet and savory flavors blend beautifully, making it a favorite not just in sandwiches but also in a variety of desserts. From cookies to bars, the iconic duo has found its way into numerous sweet treats, and now it has a starring role in this decadent cheesecake.
When it comes to cheesecakes, the journey often begins with the filling, where cream cheese takes center stage. In this recipe, we marry the richness of cream cheese with the nutty flavor of peanut butter, creating a filling that is both indulgent and satisfying. The addition of sour cream enhances the creaminess while providing a slight tang, which balances the sweetness of the jelly layer that crowns the cheesecake.
The jelly layer is where you can unleash your creativity. While traditional grape jelly is a classic choice, feel free to experiment with other flavors such as raspberry, strawberry, or even blackberry. The fruity sweetness perfectly complements the nutty notes of the peanut butter, adding another layer of flavor and texture to the cheesecake.
Finally, the crunchy graham cracker crust serves as the foundation for this dessert. Its sweet, buttery flavor provides a delightful contrast to the creaminess of the cheesecake filling and the smoothness of the jelly. Together, these components create a harmonious blend of flavors and textures that make the Peanut Butter and Jelly Cheesecake a standout dessert.
Ingredients Breakdown
To create the perfect Peanut Butter and Jelly Cheesecake, it’s essential to understand the role of each ingredient. Below is a detailed breakdown of the key components.
Crust Ingredients
– Graham Crackers: The base of our cheesecake, graham crackers provide a sweet and slightly nutty flavor, along with a satisfying crunch. When crushed and combined with butter and sugar, they form a deliciously crispy crust that holds the cheesecake together.
– Butter: Melted butter is mixed with the graham cracker crumbs to help bind them together, creating a sturdy base that can hold the weight of the creamy filling. The butter adds richness and flavor, enhancing the overall taste of the crust.
– Sugar: A touch of granulated sugar is added to the crust mixture to enhance its sweetness, balancing the natural flavors of the graham crackers. This slight sweetness is key to achieving a deliciously flavored crust.
Cheesecake Filling Ingredients
– Cream Cheese: The star of the filling, cream cheese provides the rich, creamy texture that cheesecakes are known for. It’s essential to use full-fat cream cheese for the best results, as it contributes to the cheesecake’s smoothness and flavor.
– Peanut Butter: Smooth peanut butter infuses the cheesecake with its signature flavor. It also adds creaminess, making the filling velvety and indulgent. For the best results, opt for a high-quality peanut butter that is free from added sugars and hydrogenated oils.
– Sour Cream: Adding sour cream to the filling gives it a tangy balance that offsets the sweetness of the peanut butter and jelly. It also enhances the creaminess of the cheesecake, ensuring a smooth and luscious texture.
– Granulated Sugar: A key ingredient in the filling, sugar sweetens the cheesecake and helps to balance the savory notes of the peanut butter. The right amount of sweetness is crucial for achieving a well-rounded flavor.
– Eggs: Eggs are essential for binding the filling together and providing structure. They help the cheesecake set properly during baking, resulting in a smooth and creamy texture.
Jelly Layer Ingredients
– Fruit Jelly: The jelly layer adds a burst of flavor and sweetness, and you can choose your favorite variety to suit your taste. Classic grape jelly is popular, but feel free to experiment with raspberry, strawberry, or even mixed berry flavors for a unique twist.
– Cornstarch: This ingredient acts as a thickener for the jelly, ensuring it sets properly and creates a smooth layer on top of the cheesecake. It helps prevent the jelly from sliding off and keeps it cohesive with the filling beneath.
Optional Toppings
To elevate your Peanut Butter and Jelly Cheesecake, consider adding some optional toppings. These can enhance both the presentation and flavor of the dessert:
– Whipped Cream: A dollop of freshly whipped cream on top adds a light, airy texture that contrasts beautifully with the rich cheesecake.
– Chopped Peanuts: For a bit of crunch, sprinkle chopped peanuts on top. They provide a delightful nutty flavor and add visual interest to the cheesecake.
– Chocolate Drizzle: A drizzle of chocolate ganache or melted chocolate can add a decadent touch, complementing the peanut butter flavor perfectly.
– Fresh Berries: Fresh berries, such as raspberries or strawberries, can add a pop of color and a fresh flavor that enhances the overall dessert experience.
Step-by-Step Instructions for Making Peanut Butter and Jelly Cheesecake
Creating the perfect Peanut Butter and Jelly Cheesecake may seem daunting, but with our detailed step-by-step instructions, you’ll find it to be a rewarding experience. Here’s how to make this indulgent dessert from scratch.
Step 1: Preheat the Oven
Begin by preheating your oven to 325°F (160°C). This ensures that your cheesecake will bake evenly, achieving that perfect creamy texture.
Step 2: Prepare the Crust
1. Crush the Graham Crackers: Place graham crackers in a food processor and pulse until finely crushed. If you don’t have a food processor, you can place the crackers in a plastic bag and crush them with a rolling pin.
2. Mix the Ingredients: In a mixing bowl, combine the crushed graham crackers, melted butter, and sugar. Stir until the mixture resembles wet sand.
3. Form the Crust: Press the mixture firmly into the bottom of a 9-inch springform pan, ensuring an even layer. Use the back of a measuring cup or your fingers to compact it tightly.
4. Pre-bake the Crust: Bake the crust in the preheated oven for 8-10 minutes, or until it is lightly golden. This step helps set the crust and prevents it from becoming soggy once the filling is added.
Step 3: Prepare the Filling
1. Beat the Cream Cheese: In a large mixing bowl, beat the softened cream cheese using an electric mixer on medium speed until smooth and creamy. This may take about 2-3 minutes.
2. Add Peanut Butter: Add the peanut butter to the cream cheese and continue to beat until well combined and creamy.
3. Incorporate Sugar and Sour Cream: Gradually add the granulated sugar and sour cream, mixing until fully incorporated. Scrape down the sides of the bowl as needed to ensure everything is well blended.
4. Add Eggs: Beat in the eggs, one at a time, mixing on low speed just until combined. Avoid overmixing, as this can introduce too much air into the batter.
Step 4: Bake the Cheesecake
1. Pour the Filling: Pour the cheesecake filling into the pre-baked crust, smoothing the top with a spatula.
2. Bake the Cheesecake: Place the cheesecake in the preheated oven and bake for 55-60 minutes, or until the edges are set and the center has a slight jiggle. The cheesecake will continue to set as it cools.
3. Cool and Chill: Once baked, turn off the oven and leave the cheesecake inside with the door slightly ajar for about 1 hour. This gradual cooling process helps prevent cracks. Afterward, remove the cheesecake from the oven and let it cool to room temperature. Cover and refrigerate for at least 4 hours, or overnight for the best results.
Step 5: Prepare the Jelly Layer
1. Combine Jelly and Cornstarch: In a small saucepan, combine your chosen jelly and cornstarch. Stir well to combine.
2. Heat the Mixture: Place the saucepan over medium heat and bring the mixture to a simmer. Stir frequently until it thickens, which usually takes about 3-5 minutes.
3. Cool the Jelly: Once thickened, remove the saucepan from the heat and let the jelly cool slightly before spreading it over the chilled cheesecake.
By following these detailed steps, you are well on your way to creating a Peanut Butter and Jelly Cheesecake that is not only delicious but also a feast for the eyes. Stay tuned for the remaining steps as we delve into the final touches and presentation of this indulgent dessert.
{{image_1}}
Preparing the Crust
To create a sturdy graham cracker crust for your Peanut Butter and Jelly Cheesecake, begin by gathering your ingredients: graham cracker crumbs, granulated sugar, and melted butter. The crust serves as the foundation for your cheesecake, providing both texture and flavor.
Start by preheating your oven to 350°F (175°C). In a medium mixing bowl, combine 1 and 1/2 cups of graham cracker crumbs with 1/4 cup of granulated sugar. The sugar not only adds sweetness but also helps to bind the crumbs together. Next, pour in 1/2 cup of melted butter and mix until the entire mixture is well combined and resembles wet sand.
Transfer the mixture into a 9-inch springform pan. Using the back of a measuring cup or your fingers, press the crumb mixture firmly into the bottom and up the sides of the pan. It’s important to ensure that the crust is packed tightly; this will help it hold its shape once baked.
Bake the crust in the preheated oven for 8-10 minutes, or until it is lightly golden brown. This step is crucial, as baking the crust not only enhances its flavor but also provides a crisp texture that contrasts beautifully with the creamy cheesecake filling. Once baked, remove it from the oven and allow it to cool while you prepare the cheesecake filling.
Making the Cheesecake Filling
For the perfect cheesecake filling, the key is to achieve a creamy and smooth texture. Begin by letting 24 ounces of cream cheese sit at room temperature for about 30 minutes. This step is essential, as softened cream cheese blends more easily and reduces the likelihood of lumps in your filling.
In a large mixing bowl, beat the softened cream cheese using an electric mixer on medium speed until smooth and creamy, about 2-3 minutes. Gradually add in 3/4 cup of granulated sugar, and continue to mix until the sugar is fully incorporated and the mixture is light and fluffy.
Next, add 1 teaspoon of vanilla extract, which will enhance the overall flavor of the cheesecake. When incorporating the eggs, crack in 3 large eggs, one at a time, allowing each egg to fully blend into the mixture before adding the next. Be cautious not to overmix the batter at this stage; overmixing can lead to a dense cheesecake.
Once your filling is well combined, it’s time to pour it into the prepared graham cracker crust, smoothing the top with a spatula for an even surface.
Assembling the Cheesecake
Now comes the fun part: assembling your Peanut Butter and Jelly Cheesecake. To create the signature layers, take 1 cup of creamy peanut butter and gently warm it in the microwave for about 30 seconds. This will make it easier to swirl into the cheesecake filling.
Using a spoon or spatula, dollop the warmed peanut butter over the surface of the cheesecake filling. With a knife or toothpick, carefully swirl the peanut butter into the filling using a gentle motion. Be cautious not to overmix; the goal is to achieve a marbled effect that showcases both the peanut butter and the cheesecake.
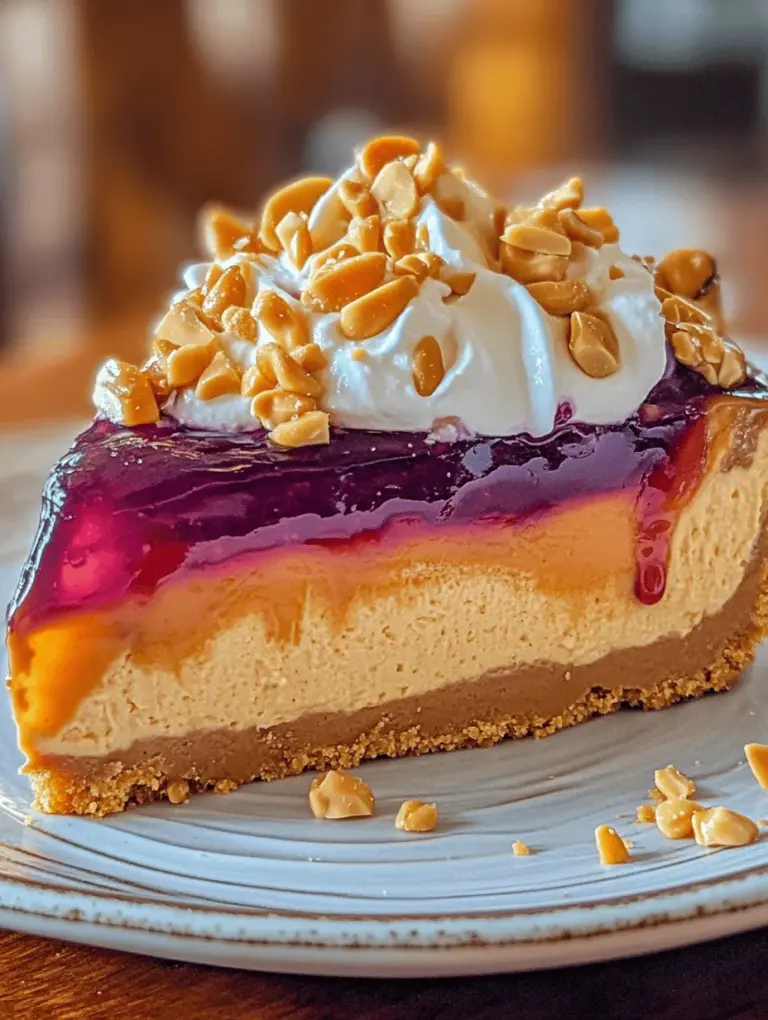
Next, take your jelly (commonly grape or strawberry) and spoon it over the top of the cheesecake. Again, use the knife to create swirls, ensuring that the jelly is evenly distributed without fully mixing it into the filling. This layering technique not only enhances the visual appeal but also allows for distinct flavor bites throughout the cheesecake.
Baking the Cheesecake
With your cheesecake assembled, it’s time to bake it. Preheat your oven to 325°F (160°C). To prevent cracks during the baking process, it is recommended to use a water bath. Wrap the outside of your springform pan with aluminum foil to ensure no water seeps in. Place the springform pan inside a larger roasting pan and fill the outer pan with hot water until it reaches halfway up the sides of the cheesecake pan.
Bake the cheesecake for 55-70 minutes, or until the edges are set but the center still has a slight jiggle. This jiggle is important; it indicates that the cheesecake will continue to set as it cools, resulting in a smooth and creamy texture rather than a dry, overbaked one.
Once baked, turn off the oven and crack the oven door slightly, allowing the cheesecake to cool gradually inside. This method helps prevent sudden temperature changes that could lead to cracks. Leave the cheesecake in the oven for an additional hour, then remove it from the water bath and cool it completely on a wire rack.
Preparing the Jelly Layer
While the cheesecake cools, you can prepare the jelly layer. If desired, you can enhance the jelly’s consistency for a more cohesive layer. In a small saucepan over low heat, combine 1 cup of jelly with 1 tablespoon of cornstarch. Stir until the mixture is smooth and begins to thicken slightly. This step is optional but helps create a more stable topping that won’t run off when served.
Once the jelly layer has achieved the desired thickness, allow it to cool slightly before pouring it over the cooled cheesecake. Spread it evenly across the top using a spatula, then refrigerate the cheesecake for at least 4 hours, or preferably overnight, to allow the flavors to meld and the cheesecake to fully set.
Topping and Serving
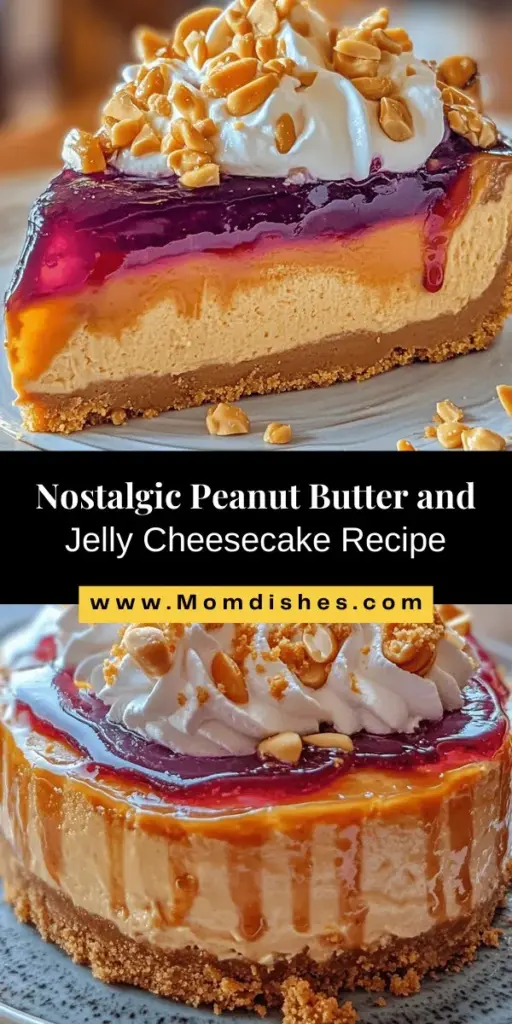
When you’re ready to serve, carefully remove the sides of the springform pan. To garnish, consider topping your cheesecake with whipped cream or crushed peanuts for added texture and flavor. For a decorative touch, you can also drizzle some additional peanut butter or chocolate sauce over the top.
To slice the cheesecake, use a sharp knife dipped in hot water. Wipe the blade clean between each cut to ensure clean slices. This technique will help maintain the beautiful layers you’ve created.
Understanding the Science Behind Cheesecake
Understanding the science behind cheesecake-making will enhance your baking skills. The primary ingredient, cream cheese, is a rich dairy product that provides the creamy texture we love in cheesecakes. When cream cheese is beaten, air is incorporated, which contributes to a light and fluffy filling.
Eggs play a crucial role in setting the cheesecake. They coagulate when heated, providing structure. However, it’s important not to overmix the filling after adding eggs, as this could incorporate too much air, leading to cracks during baking.
Baking methods, such as using a water bath, help regulate the temperature around the cheesecake, allowing it to bake evenly. This technique minimizes the risk of overbaking and prevents the surface from cracking, ultimately resulting in a smooth, creamy dessert.
Common Challenges and Solutions
Every baker faces challenges when making cheesecake. Here are some common issues and their solutions:
– Cracks on the Surface: Cracks are often caused by overmixing the batter or sudden temperature changes. To avoid this, ensure that your ingredients are at room temperature before mixing, and bake in a water bath. Gradually cooling the cheesecake in the oven also helps.
– Soggy Crust: A soggy crust can occur if the filling is too wet or if the crust isn’t baked long enough. Make sure to bake the crust until lightly golden and avoid adding too much jelly on top. Allowing the cheesecake to cool completely before adding the jelly can also help.
– Cheesecake Not Setting: If your cheesecake doesn’t set properly, it may be due to underbaking. Always check for the slight jiggle in the center before removing it from the oven. If it still seems unset after cooling, it may require additional time in the refrigerator.
Storage and Serving Suggestions
To keep your Peanut Butter and Jelly Cheesecake fresh, cover it tightly with plastic wrap or aluminum foil and store it in the refrigerator. Properly stored, the cheesecake will last for up to 5 days.
This dessert is perfect for a variety of occasions, from birthday celebrations to holiday gatherings. Its nostalgic flavors make it a crowd-pleaser, appealing to both children and adults alike. Consider serving it at potlucks or family get-togethers, where it will surely be a hit.
Conclusion
Making Peanut Butter and Jelly Cheesecake is a delightful and rewarding experience that combines beloved flavors into a unique dessert. The creamy filling, crunchy crust, and fruity jelly layer create a comforting treat that is sure to impress at any gathering. Whether you’re a seasoned baker or a novice in the kitchen, this recipe encourages you to embrace your culinary skills and indulge in a dessert that beautifully encapsulates the joy of classic flavors. So gather your ingredients, follow the steps, and enjoy a slice of this delicious cheesecake masterpiece!