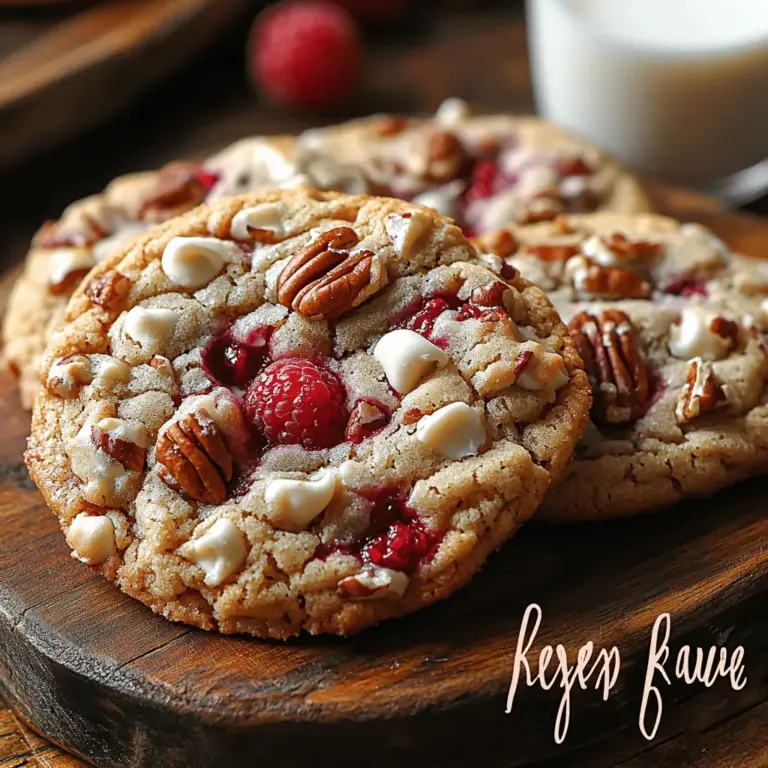
Delightful, sweet, and a little tart, Raspberry White Chocolate Bliss Cookies are the perfect treat for any occasion. Combining the rich flavors of white chocolate with the refreshing burst of fresh raspberries, these cookies offer a unique culinary experience that will tantalize your taste buds. The inviting aroma of baking cookies wafting through your home is just one of the many pleasures of this recipe, making it ideal for sharing with family and friends or simply enjoying during a quiet moment at home.
These blissful cookies not only indulge your sweet tooth but also present a delightful contrast in flavors and textures. The creamy sweetness of white chocolate perfectly complements the vibrant tartness of raspberries, creating a cookie that is both satisfying and refreshing. Whether you’re baking for a holiday celebration, a birthday party, or just a casual afternoon treat, this recipe provides a straightforward approach to achieving cookie perfection.
Understanding the Ingredients
Before diving into the preparation of Raspberry White Chocolate Bliss Cookies, it’s essential to understand the role each ingredient plays in creating this delightful treat. From the foundational elements to the star components that make these cookies shine, each ingredient contributes to the overall flavor and texture.
Butter: The Foundation for a Soft and Chewy Cookie
Butter is a crucial ingredient in any cookie recipe, and it serves as the foundation for achieving that perfect soft and chewy texture in Raspberry White Chocolate Bliss Cookies. When butter is creamed with sugars, it incorporates air into the dough, which helps the cookies rise and gives them a light, fluffy texture. For best results, use unsalted butter at room temperature; this allows for easier creaming and better incorporation of the other ingredients.
Sugars: Balancing Brown and Granulated Sugars for Depth of Flavor
The combination of brown and granulated sugars is essential for creating the ideal sweetness in these cookies. Granulated sugar contributes to the cookie’s crispness while brown sugar adds moisture and a rich flavor due to its molasses content. This dynamic duo not only enhances the cookie’s sweetness but also helps achieve a beautiful golden color and a chewy texture.
Eggs: The Binding Agent and Moisture Provider
Eggs play a crucial role in the structure of cookies. They act as a binding agent, holding all the ingredients together, and provide moisture, which is vital for achieving the desired texture. In this recipe, we will add the eggs one at a time, ensuring that each egg is well incorporated before adding the next. This technique helps to create a stable dough that holds its shape during baking.
Vanilla Extract: Enhancing the Overall Flavor Profile
Vanilla extract is a must-have in any cookie recipe as it brings a warm, aromatic quality that enhances the overall flavor profile. The addition of vanilla in the dough will elevate the sweetness and provide depth to the cookies, making each bite even more enjoyable. Opt for pure vanilla extract rather than imitation for the best flavor.
All-Purpose Flour: The Structure of the Cookie
All-purpose flour is the backbone of any cookie recipe, providing the necessary structure. The right amount of flour ensures that the cookies don’t spread too much during baking, maintaining their shape and chewiness. It’s essential to measure the flour accurately—too much can lead to dry cookies, while too little can result in overly flat ones.
Baking Soda: Leavening Agent for a Light Texture
Baking soda is a leavening agent that helps the cookies rise and become light and airy. When combined with acidic ingredients like brown sugar or the natural acidity of raspberries, baking soda produces carbon dioxide bubbles, which creates a fluffy texture in the finished cookies. It’s important to ensure that your baking soda is fresh for optimal results.
Salt: Balancing Sweetness and Enhancing Flavors
A pinch of salt may seem minor, but it plays a vital role in cookie recipes. Salt enhances the sweetness of the sugars and balances the flavors, preventing the cookies from tasting overly sweet. It also amplifies the overall flavor profile, making each bite more enjoyable.
Raspberries: Freshness and Tartness
Fresh raspberries are the star of this cookie recipe, providing a burst of tartness that beautifully contrasts with the sweetness of the white chocolate. Their vibrant color and juicy texture not only elevate the visual appeal of the cookies but also add a refreshing flavor. When using fresh raspberries, be sure to rinse and gently pat them dry to prevent excess moisture in the dough.
White Chocolate Chips: Creaminess and Sweetness
White chocolate chips bring a rich creaminess and sweetness to the cookies, complementing the tart raspberries perfectly. Their smooth texture melts beautifully during baking, creating delightful pockets of sweetness in each cookie. For the best results, choose high-quality white chocolate chips to ensure a rich flavor.
Nuts (Optional): Adding Crunch and Additional Flavor
While not mandatory, adding nuts such as chopped pecans or walnuts can provide a delightful crunch and additional flavor to the cookies. Nuts complement the creamy white chocolate and tart raspberries, creating a more complex texture and taste. If you prefer a nut-free version, feel free to omit this ingredient.
Preparation Steps
Now that we’ve explored the essential ingredients that contribute to the deliciousness of Raspberry White Chocolate Bliss Cookies, let’s move on to the preparation steps. Ensuring that you follow these steps meticulously will lead to cookies that are not only visually appealing but also bursting with flavor.
Preheating the Oven and Preparing Baking Sheets
Before starting any baking process, it’s crucial to preheat your oven. The ideal temperature for baking these cookies is 350°F (175°C). Preheating the oven ensures that the cookies bake evenly and achieve the desired texture. While the oven is heating, prepare your baking sheets by lining them with parchment paper. Using parchment paper is beneficial as it prevents the cookies from sticking to the baking sheet, allowing for easy removal once they’re baked. It also helps in achieving a more even bake.
Creaming Butter and Sugars
The first step in creating the cookie dough is to cream the butter and sugars together. In a large mixing bowl, beat the softened unsalted butter with both granulated and brown sugars using an electric mixer on medium speed. This process should take about 2-3 minutes. The goal is to achieve a light and fluffy texture, which indicates that enough air has been incorporated into the mixture. This step is critical as it directly impacts the final texture of your cookies; under-creaming can lead to dense cookies, while over-creaming can cause them to spread too much during baking.
Incorporating Eggs and Vanilla
Once your butter and sugars are well combined, it’s time to add the eggs and vanilla extract. Add one egg at a time, mixing well after each addition to ensure that they are fully incorporated. This gradual addition helps maintain the emulsion of the dough, resulting in a smoother texture. After the eggs are incorporated, pour in the vanilla extract and mix until just combined. The mixture should look creamy and homogenous at this stage, with no visible streaks of butter or egg.
Combining Dry Ingredients
In a separate bowl, sift together the all-purpose flour, baking soda, and salt. Sifting is an important step as it aerates the flour, preventing clumps and ensuring an even distribution of the leavening agent. After sifting, gently fold the dry ingredients into the wet mixture using a spatula or wooden spoon. Be careful not to overmix; mixing just until you see no streaks of flour is sufficient. The dough will start to come together, and you can then fold in the fresh raspberries and white chocolate chips. If you choose to add nuts, this is the stage to incorporate them as well.
Once your dough is prepared, you’re ready to scoop and shape your cookies before they head into the oven. The anticipation of baking these Raspberry White Chocolate Bliss Cookies will make your kitchen feel warm and inviting, setting the stage for a delicious treat that is sure to please everyone.
Stay tuned for the next part of this article, where we will cover the final steps of shaping, baking, and tips for achieving the perfect cookie!

Avoiding Overmixing for Ideal Cookie Texture
When it comes to baking cookies, the texture can make or break the final product. Overmixing the dough can lead to tough cookies, as it develops the gluten in the flour too much. For Raspberry White Chocolate Bliss Cookies, achieving the perfect chewy yet tender texture is essential.
To prevent overmixing, combine the dry ingredients into the wet mixture just until you see no dry flour. Then, when it comes to folding in the raspberries and white chocolate, take care to mix gently. Use a spatula or wooden spoon to cut through the mixture, lifting and turning it rather than stirring vigorously. This technique will help to maintain the shape of the raspberries while ensuring that the white chocolate is evenly distributed.
Folding in Raspberries and White Chocolate
Folding in the raspberries and white chocolate chips is a critical step that enhances both the flavor and texture of the cookies. First, ensure that your raspberries are fresh and unblemished; if you’re using frozen raspberries, allow them to thaw before incorporating them into the dough. The goal is to maintain their shape as much as possible, which adds visual appeal and bursts of flavor in each bite.
To achieve this, gently add the raspberries and white chocolate chips into the cookie dough after the dry ingredients have been combined. Using a spatula, fold them in carefully, ensuring that you do not crush the raspberries. Aim for a uniform distribution without mashing the berries, which could lead to a muddled texture.
The Choice of Nuts and Their Optional Inclusion
While Raspberry White Chocolate Bliss Cookies are delightful on their own, adding nuts can introduce an additional layer of flavor and crunch. Chopped macadamia nuts or slivered almonds are excellent choices, complementing the sweetness of the white chocolate and the tartness of the raspberries.
If you decide to include nuts, add them during the folding stage, just like the raspberries and chocolate. However, if you prefer a nut-free version, simply skip this step. The cookies will still be deliciously satisfying without nuts, allowing the raspberry and white chocolate flavors to shine.
Baking Process
Scooping and Spacing the Dough
Once your cookie dough is ready, it’s time to scoop it onto your baking sheet. For uniform cookies, using a cookie scoop or ice cream scoop can help ensure each cookie is the same size. This not only enhances the presentation but also ensures even baking across all cookies.
When placing the dough on the baking sheet, remember to leave enough space between each scoop. A good rule of thumb is to space them about 2 inches apart. This spacing allows the cookies to spread without merging, resulting in perfectly shaped, individual cookies.
Baking Time and Temperature
Preheat your oven to 350°F (175°C) for optimal baking conditions. When it comes to baking time, cookies typically need about 10 to 12 minutes. However, monitor them closely. The key indicators that your cookies are done include a slightly golden edge and a soft center. They may appear underbaked in the center; this is normal, as they will continue to cook slightly after being removed from the oven due to carryover cooking.
Understanding carryover cooking is essential in baking. This phenomenon occurs when the residual heat from the baking sheet continues to cook the cookies even after they have been taken out of the oven. Allowing them to cool on the baking sheet for a few minutes before transferring them to a wire rack will help achieve the perfect texture.
Cooling Techniques
Cooling cookies properly is a crucial step that can greatly impact their final texture. After the cookies have baked and are slightly golden, remove them from the oven and let them cool on the baking sheet for about 5 minutes. This resting period allows the cookies to set, making them easier to transfer without breaking.
Once they are firm enough to handle, move the cookies to a wire rack to cool completely. This method allows air to circulate around the cookies, preventing them from becoming soggy on the bottom. Proper cooling will ensure that your Raspberry White Chocolate Bliss Cookies retain their delightful chewiness and melt-in-your-mouth quality.
Serving Suggestions
Pairing Cookies with Beverages
Raspberry White Chocolate Bliss Cookies are versatile and pair beautifully with various beverages. For a warm treat, consider serving them alongside a steaming cup of tea, such as chamomile or Earl Grey, which complements the sweetness of the white chocolate and the tartness of the raspberries. Coffee lovers might enjoy them with a rich espresso or a creamy latte, enhancing the overall flavor experience.
For a refreshing twist, a glass of cold milk is a classic pairing that balances the sweetness of the cookies. Alternatively, a fruity sparkling water can amplify the raspberry flavor, making for a delightful afternoon snack.
Presentation Ideas for Serving at Gatherings
When it comes to serving, presentation can elevate the experience. Arrange your cookies on a decorative platter, and consider garnishing with fresh raspberries or a sprinkle of powdered sugar for an elegant touch. If you’re hosting a gathering, creating a dessert table with a variety of treats, including your bliss cookies, can impress guests and provide an inviting atmosphere.
You might also consider wrapping individual cookies in clear cellophane tied with a ribbon for a sweet party favor. This not only makes for a charming presentation but also allows your guests to take a piece of your delicious baking home with them.
Storing and Preserving Freshness
To keep your Raspberry White Chocolate Bliss Cookies fresh longer, store them in an airtight container at room temperature. They will generally stay fresh for about a week. Placing a slice of bread in the container can help maintain moisture, keeping the cookies soft and chewy.
If you want to enjoy these cookies at a later time, consider freezing them. Allow the cookies to cool completely, then place them in a single layer on a baking sheet and freeze until solid. Once frozen, transfer them to a resealable freezer bag or airtight container. They can last up to three months in the freezer. When you’re ready to enjoy them, simply thaw at room temperature or warm them briefly in the microwave for that freshly baked taste.
Nutritional Information
Analyzing the nutritional value of your Raspberry White Chocolate Bliss Cookies can help you understand their indulgence. Each cookie typically contains around 150 calories, with a breakdown of approximately 6 grams of fat, 20 grams of carbohydrates, 10 grams of sugar, and 2 grams of protein.
For those looking for healthier alternatives, consider substituting some of the all-purpose flour with whole wheat flour to increase fiber content. You can also use less sugar or opt for natural sweeteners like honey or maple syrup. Replacing butter with coconut oil can add a unique flavor while providing a dairy-free option.
Conclusion
Raspberry White Chocolate Bliss Cookies are more than just a dessert; they embody a delightful balance of flavors and textures that make them irresistible. With straightforward steps and accessible ingredients, anyone can recreate this blissful treat in their own kitchen. Whether enjoyed fresh out of the oven or stored for later, these cookies are sure to bring joy and sweetness to any moment. Embrace the pleasure of baking and indulge in the rich flavors of these delightful cookies. Your taste buds will thank you!