Introduction
Red velvet desserts have taken the culinary world by storm, captivating the hearts and taste buds of dessert lovers everywhere. These strikingly vibrant treats, characterized by their deep red color and subtle cocoa flavor, have transitioned from being a seasonal favorite to a beloved staple in bakeries and homes alike. Among the array of red velvet creations, fudgy brownies stand out as a delightful twist, merging the rich, velvety essence of red velvet with the indulgent texture of brownies.
The allure of fudgy brownies lies in their dense, moist texture, which strikes a perfect balance between softness and chewiness. When infused with the unique flavor profile of red velvet, these brownies transform into an irresistible dessert that is both visually stunning and decadently delicious. Whether you’re celebrating a special occasion or simply satisfying your sweet tooth, these fudgy red velvet brownies are sure to impress.
In this article, we will provide you with a detailed recipe for the best fudgy red velvet brownies, along with insights and tips to help you achieve baking perfection. Get ready to embark on a delicious journey that will not only tantalize your taste buds but also elevate your baking skills.
Understanding Red Velvet Baking
The History and Origin of Red Velvet Desserts
The origins of red velvet cake can be traced back to the early 20th century, with roots in the Southern United States. The term “velvet” initially referred to the cake’s smooth, soft texture. It wasn’t until the 1920s that the red hue became a hallmark of the dessert, largely due to the reaction between natural cocoa powder and acidic ingredients like buttermilk and vinegar. As the recipe evolved, the addition of red food coloring became popular, giving rise to the iconic red velvet cake we know and love today.
Over the years, red velvet has transcended its cake origins to inspire a wide variety of desserts, including cupcakes, cookies, and, of course, brownies. Each iteration retains the signature flavor and color while adding its own unique twist, making red velvet a versatile and beloved option for dessert enthusiasts.
The Unique Flavor Profile of Red Velvet and Its Ingredients
Red velvet desserts are celebrated not only for their striking appearance but also for their distinctive flavor. The combination of cocoa powder, buttermilk, and vinegar creates a unique taste that is both subtly chocolatey and tangy. The acidity from the buttermilk and vinegar serves to enhance the flavor of the cocoa, while also contributing to the cake’s tender crumb.
Key ingredients such as vanilla extract and butter further enrich the flavor profile, providing a depth that complements the chocolate notes. In the case of fudgy brownies, this flavor base is elevated, resulting in a rich and indulgent treat that is hard to resist.
The Significance of Cocoa Powder and Food Coloring
Cocoa powder is a vital ingredient in red velvet desserts, as it contributes to the overall flavor and texture. In brownie recipes, the use of high-quality cocoa powder ensures a deep chocolate flavor that pairs beautifully with the other components. The type of cocoa powder you choose can impact the taste and appearance of your brownies; for instance, Dutch-processed cocoa provides a smoother flavor and darker color compared to natural cocoa powder.
Food coloring, specifically red gel food coloring, is essential for achieving the iconic red hue. Unlike liquid food coloring, gel food coloring is more concentrated, allowing you to achieve the desired intensity without adding excess liquid to the batter. This is particularly important in brownie recipes, where maintaining the right texture is crucial.
Ingredients Breakdown
Overview of the Key Ingredients Used in the Recipe
To create the best fudgy red velvet brownies, it’s essential to understand the role of each ingredient in achieving the perfect texture and flavor. Here’s a breakdown of the key ingredients:
– Unsalted Butter: The backbone of any brownie recipe, unsalted butter provides the necessary fat content that contributes to the fudgy texture. Using unsalted butter allows for greater control over the saltiness of the final product.
– Sugars: A combination of granulated and brown sugar is typically used in brownie recipes. Granulated sugar adds sweetness, while brown sugar contributes moisture and a hint of caramel flavor, resulting in a richer taste.
– Eggs: Eggs are crucial for binding the ingredients together and providing structure to the brownies. They also add moisture, enhancing the fudgy texture.
– Vanilla Extract: A splash of vanilla extract enhances the overall flavor profile of the brownies, providing a warm, aromatic note that complements the cocoa.
– Red Gel Food Coloring: This ingredient is responsible for the signature red hue. Adjusting the amount of food coloring allows you to achieve the desired intensity of color in your brownies.
– Flour and Cocoa Powder: All-purpose flour provides the structure needed for the brownies, while cocoa powder imparts the chocolate flavor. Achieving the right balance between these two ingredients is essential for a fudgy consistency.
– Leavening Agents: Baking powder and baking soda are used to help the brownies rise. However, in fudgy brownies, it’s important to use them judiciously to maintain the dense texture.
– Salt: A small amount of salt enhances the flavors of the brownies, balancing the sweetness and highlighting the chocolate notes.
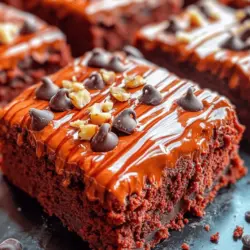
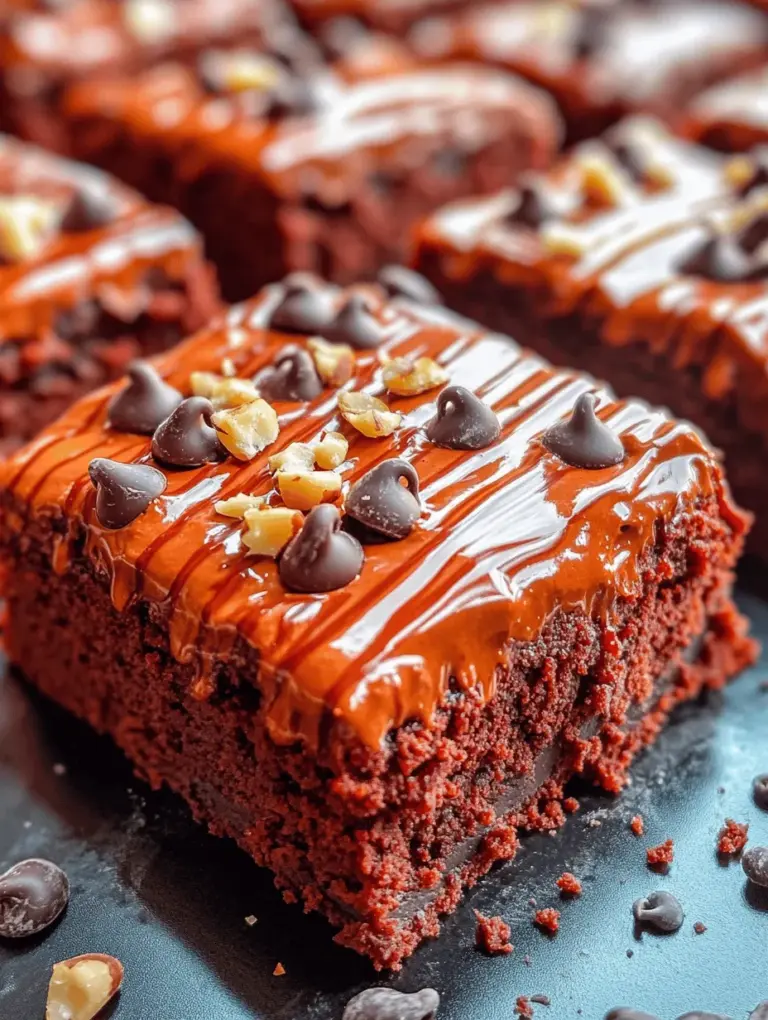
– Optional Ingredients: For those who want to elevate their brownies, adding chocolate chips or chopped nuts can introduce additional texture and flavor. Chocolate chips melt into the batter, while nuts add a delightful crunch.
Step-by-Step Instructions for Perfect Brownies
Preheating the Oven: Importance of Temperature Control in Baking
Before starting the brownie-making process, it’s crucial to preheat your oven to the appropriate temperature, typically 350°F (175°C). Preheating ensures that your brownies bake evenly and thoroughly, preventing uneven cooking or a gooey texture. An oven thermometer can be a handy tool to ensure accuracy, as many home ovens can be off by several degrees.
Mixing Wet Ingredients: Techniques for Achieving a Smooth Batter
The first step in creating your fudgy red velvet brownies is to prepare the wet ingredients. Begin by melting the unsalted butter in a medium saucepan over low heat. Once melted, remove it from the heat and allow it to cool slightly. In a mixing bowl, combine the melted butter with the sugars, whisking until smooth. This process helps dissolve the sugars, ensuring a uniform sweetness throughout the brownies.
Next, add the eggs one at a time, whisking well after each addition. This step is essential for achieving a smooth batter and incorporating air into the mixture, which will contribute to the overall texture of the brownies. After the eggs are fully integrated, stir in the vanilla extract and red gel food coloring, mixing until you achieve a consistent color throughout the batter.
Incorporating wet ingredients in this manner not only enhances the flavor but also sets the stage for the subsequent addition of dry ingredients, ensuring a fudgy and rich texture in your red velvet brownies.
Stay tuned for the next part, where we will explore the remaining steps of the recipe, including mixing the dry ingredients, baking the brownies, and tips for achieving that perfect fudgy consistency!
{{image_1}}
Combining Dry Ingredients
To start, it’s essential to combine your dry ingredients correctly to ensure that your fudgy red velvet brownies have a smooth, lump-free texture. Sifting your flour, cocoa powder, and any leavening agents is a crucial step that should never be skipped. Sifting not only removes lumps but also aerates the flour, making it easier to combine with the wet ingredients, which will help achieve that desirable fudgy consistency.
Why Sift?
Sifting helps to create a lighter mixture and ensures an even distribution of all dry ingredients, preventing any clumps from forming in your brownies. This is particularly important for cocoa powder, which tends to clump together. A well-sifted mixture will allow for a smoother batter and contribute to the overall texture of your brownies.
Folding Techniques
Once your dry ingredients are sifted, it’s time to combine them with the wet ingredients. Here’s where folding techniques come into play. Overmixing can lead to dense, rubbery brownies, so it’s crucial to gently incorporate the ingredients without losing air.
How to Fold Properly
1. Add the Dry Ingredients: Pour the sifted dry ingredients into the bowl containing your wet ingredients.
2. Use a Spatula: Take a rubber spatula and gently cut through the center of the mixture, dragging it from the bottom up and folding it over the top.
3. Rotate the Bowl: As you fold, rotate the bowl a quarter turn each time for even mixing.
4. Stop When Combined: Continue this process until just combined. A few streaks of flour are okay; they will mix in during the next step.
Optional Mix-Ins
If you choose to add chocolate chips or nuts, do it after you have folded in the dry ingredients. This ensures that your mix-ins don’t get crushed or overworked in the batter.
Tips for Even Distribution
1. Add Mix-Ins Last: Fold in your chocolate chips or nuts gently to avoid breaking them apart.
2. Use the Right Size: If adding nuts, consider chopping them into smaller pieces for better distribution.
3. Coat with Flour: Lightly toss your mix-ins in a bit of flour before adding them to the batter. This helps keep them suspended and prevents them from sinking to the bottom of the brownies.
Baking Tips
Now that your batter is ready, it’s time to bake! Achieving the perfect fudgy texture requires attention to detail, especially when it comes to doneness.
Signs of Doneness
1. Visual Cues: The edges should start to pull away from the sides of the pan, while the center remains slightly soft.
2. Toothpick Test: Insert a toothpick into the center of the brownies. If it comes out with a few moist crumbs, your brownies are done. If it comes out clean, they may be overbaked.
Perfect Fudgy Texture
To ensure a fudgy texture, it’s better to err on the side of underbaking slightly rather than overbaking. The residual heat will continue to cook the brownies a bit after they come out of the oven.
Cooling and Frosting Options
Once your brownies have baked to perfection, it’s essential to allow them to cool completely in the pan on a wire rack. This cooling time is crucial for achieving the right texture. If you frost the brownies while they are still warm, the frosting may melt and lose its shape.
Applying Cream Cheese Frosting
1. Cool Completely: Wait until the brownies are at room temperature before frosting.
2. Even Application: Use a spatula to spread a generous layer of cream cheese frosting over the top of your cooled brownies.
3. Chill for Best Results: For a firmer texture, refrigerate the frosted brownies for about 30 minutes before slicing.
Texture and Flavor Profile of Fudgy Brownies
The ideal fudgy brownie is characterized by its dense, chewy texture that contrasts with the light, airy feel of traditional cake brownies.
Fudgy vs. Cakey
Fudgy brownies are rich and moist, with a slightly gooey center, while cakey brownies are lighter and fluffier, resembling cake more than brownie. The key to achieving that fudgy consistency lies in the balance of ingredients, particularly the ratio of fat (butter) to flour and eggs.
Flavor Balance
The combination of chocolate and red velvet flavor creates a unique taste profile. The cocoa provides a deep chocolate flavor, while the red velvet adds a subtle hint of vanilla and buttermilk tang. This balance is further enhanced by the cream cheese frosting, which adds a rich creaminess that pairs beautifully with the fudgy texture.
Variations and Customizations
One of the joys of baking is the ability to customize recipes to suit your taste. Here are some ideas for variations and customizations to your fudgy red velvet brownies.
Exploring Different Flavor Profiles
Consider adding spices like cinnamon or a pinch of nutmeg for a warm, cozy flavor. Alternatively, a splash of vanilla extract or almond extract can elevate the flavor profile of your brownies.
Alternative Mix-Ins
Think outside the box with your mix-ins. Instead of traditional chocolate chips, try using white chocolate chips, peanut butter chips, or even caramel swirls for a different taste experience. Nuts such as walnuts or pecans can also add a delightful crunch.
Seasonal Variations
Incorporate seasonal ingredients for a festive twist. For example, add crushed peppermint candies during the winter holidays or use pumpkin puree in the fall for a seasonal flavor.
Serving Suggestions
When it comes to serving your fudgy red velvet brownies, presentation can make all the difference.
Presentation Ideas
– Slice Neatly: Use a sharp knife to cut your brownies into clean squares or rectangles.
– Garnish: Dust with powdered sugar or drizzle with extra cream cheese frosting for an appealing look.
– Serve on a Platter: Arrange your brownies on a decorative platter for gatherings or celebrations.
Pairing Suggestions
To complement the rich flavors of red velvet brownies, consider serving them with a glass of cold milk, a scoop of vanilla ice cream, or a hot cup of coffee. These pairings enhance the flavors and make for a delightful experience.
Storage Tips
To keep your brownies fresh, store them in an airtight container. You can keep them at room temperature for up to three days, or refrigerate them for longer shelf life. If you want to freeze your brownies, wrap them tightly in plastic wrap and place them in a freezer-safe container.
Common Mistakes and Troubleshooting
Baking is a science, and even the best bakers can make mistakes. Here are some common pitfalls to avoid and troubleshooting tips.
Common Pitfalls
1. Overmixing: This can lead to tough brownies. Remember to fold gently to preserve the fudgy texture.
2. Underbaking: While slightly underbaking is preferable, be careful not to underbake too much, or you’ll end up with raw batter.
3. Color Intensity: If your brownies don’t have the desired red color, ensure you’re using quality red food coloring and enough of it.
Troubleshooting Tips
– Overmixed Batter: If you suspect you’ve overmixed, try adding a little more flour to the batter to compensate.
– Underbaked Brownies: If they seem too gooey, return them to the oven for an additional 5-10 minutes, checking frequently.
– Color Issues: For a more vibrant color, consider adding a touch more food coloring when mixing your batter.
Salvaging Brownies
If your brownies don’t turn out as expected, don’t despair! If they are too crumbly, consider crumbling them and mixing with ice cream for a delicious dessert. If they are too dense, they can be served warm with a drizzle of chocolate sauce or melted ice cream on top.
Conclusion
In summary, these fudgy red velvet brownies are a delightful treat, perfect for any occasion. With the right techniques for combining ingredients, baking, and cooling, you can achieve the perfect texture and flavor. The joy of baking comes not just from the delicious end product but also from the process itself.
Don’t be afraid to experiment with variations and make this recipe your own. The possibilities are endless, from mix-ins to flavor enhancements, allowing you to celebrate your unique baking style. So gather your ingredients, embrace the joy of baking, and share these delightful brownies with friends and family. Enjoy the process and the delicious results!