Introduction
Fudge is a beloved treat that has been delighting taste buds for generations. This rich, creamy confection has become a staple in the world of sweets, known for its smooth texture and ability to melt in your mouth. One of the most delightful variations of this classic treat is white chocolate pistachio fudge. This recipe combines the sweetness of white chocolate with the nutty crunch of pistachios, creating a decadent dessert that is both visually appealing and irresistibly delicious.
The unique combination of flavors and textures in white chocolate pistachio fudge makes it perfect for various occasions. Whether you’re celebrating the holidays, hosting a party, or looking for a thoughtful homemade gift, this fudge is sure to impress. Its vibrant green pistachios against the creamy white chocolate not only make for a beautiful presentation but also enhance the overall flavor profile, making it a crowd-pleaser.
The Allure of White Chocolate and Pistachios
To truly appreciate the magic of white chocolate pistachio fudge, it’s essential to understand the allure of its key ingredients. White chocolate, while technically not chocolate in the traditional sense, boasts a rich and creamy flavor that is both sweet and indulgent. Unlike its darker counterparts, white chocolate is made from cocoa butter, sugar, and milk solids, resulting in that smooth, melt-in-your-mouth experience that many crave.
On the other hand, pistachios bring an entirely different dimension to the fudge. These small green nuts are known for their nutty flavor and slight salinity, which beautifully complements the sweetness of white chocolate. The contrast between the creamy fudge and the crunchy pistachios creates a delightful texture, making each bite a unique experience.
For those looking to elevate their fudge even further, consider adding optional ingredients like dried cranberries or cherries. The tartness of these fruits can provide a refreshing contrast to the sweetness of the fudge, rounding out the flavor profile and adding an unexpected twist.
Key Ingredients and Their Roles
Creating the perfect white chocolate pistachio fudge requires just a handful of key ingredients, each playing a crucial role in achieving the desired texture and flavor:
– White Chocolate Chips: These are the star of the show, providing the fudge with its signature sweetness and creamy texture. Using high-quality white chocolate chips will ensure that your fudge is smooth and indulgent.
– Sweetened Condensed Milk: This ingredient is vital for creating the rich, creamy consistency that fudge is known for. It adds sweetness and helps bind the ingredients together, ensuring a smooth final product.
– Unsalted Butter: Butter enhances the overall richness and flavor of the fudge. By using unsalted butter, you can control the saltiness of the final product, allowing the sweet and nutty flavors to shine through.
– Vanilla Extract: A splash of vanilla extract adds depth and warmth to the fudge, enhancing its overall flavor profile. This subtle addition makes a significant difference in the final taste.
– Pistachios: As the key flavor component, pistachios not only contribute to the taste but also provide texture. Their crunchiness contrasts beautifully with the smooth fudge, making each bite satisfying.
– Sea Salt: A sprinkle of sea salt is essential to balance the sweetness of the fudge and elevate the flavors. It enhances the nuttiness of the pistachios while providing a delightful contrast to the creamy fudge.
– Optional Dried Cranberries or Cherries: These ingredients are not mandatory, but they can introduce a burst of tartness that complements the sweetness of the fudge. If you choose to include them, be sure to chop them into small pieces for even distribution.
Step-by-Step Instructions for Perfect Fudge
Now that you are familiar with the alluring flavors and essential ingredients of white chocolate pistachio fudge, it’s time to dive into the preparation process. Follow these detailed step-by-step instructions to create a batch of fudge that will wow your family and friends:
1. Preparation: Before you start cooking, prepare your workspace. Line an 8-inch square baking dish with parchment paper, leaving some overhang on the edges. This will make it easier to lift the fudge out once it’s set.
2. Melt the White Chocolate: In a medium saucepan over low heat, combine the white chocolate chips, sweetened condensed milk, and unsalted butter. Stir continuously until the mixture is smooth and well combined. Be careful not to let it burn; low and slow is the key to achieving that perfect melt.
3. Add Vanilla Extract: Once the mixture is melted and well combined, remove it from the heat and stir in the vanilla extract. This will add a lovely depth of flavor to your fudge.
4. Incorporate Pistachios: Fold in the pistachios, making sure they are evenly distributed throughout the fudge mixture. If you’re using dried cranberries or cherries, add them at this stage as well.
5. Pour into Baking Dish: Carefully pour the fudge mixture into the prepared baking dish, spreading it evenly with a spatula. This ensures an even thickness and a smooth surface.
6. Sprinkle Sea Salt: Before the fudge sets, sprinkle a touch of sea salt on top. This will enhance the flavors and provide a delightful contrast to the sweetness.
7. Chill and Set: Place the baking dish in the refrigerator and allow the fudge to chill for at least 2 hours, or until it is firm to the touch. This step is crucial for achieving the right texture.
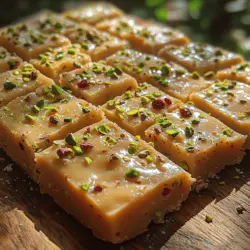
8. Cut and Serve: Once the fudge has set, use the parchment paper overhang to lift it out of the baking dish. Place it on a cutting board and use a sharp knife to cut it into small squares.
This white chocolate pistachio fudge not only offers a delightful taste but also a beautiful presentation, making it a perfect addition to any occasion. Enjoy your delicious creation, and stay tuned for more tips on how to perfect your fudge-making skills!
{{image_1}}
Preparing the Pan
To ensure a smooth and successful fudge-making experience, it’s crucial to prepare your pan properly. Start by lining an 8-inch square baking dish with parchment paper. This simple step is vital as it provides a non-stick surface, allowing for easy removal of the fudge once it has set. The parchment paper should hang over the edges of the pan slightly, which will create convenient handles for lifting the fudge out later. This method not only ensures that your fudge maintains its shape but also helps in achieving a clean cut when slicing the finished product.
Melting the Chocolate Mixture
Melting white chocolate can be tricky, as it can easily burn if not done carefully. To achieve a smooth and creamy consistency, use a double boiler or a microwave. If you opt for the microwave, heat the chocolate in short bursts of 20-30 seconds, stirring in between to prevent overheating. The key is to stop heating once the chocolate is mostly melted and then stir until completely smooth. This residual heat will finish melting the chocolate without the risk of burning. Maintaining a low temperature is crucial here, as white chocolate has a lower melting point than darker chocolates, making it more susceptible to seizing or burning.
Adding Flavorings
Incorporating additional flavorings into your fudge can elevate its taste profile. After melting the chocolate, it’s the perfect time to mix in your chosen flavorings. A teaspoon of vanilla extract adds a lovely depth and enhances the sweetness of the white chocolate. If you’re feeling adventurous, a pinch of sea salt can create a delightful contrast to the sweetness, enhancing the overall flavor. Stir these ingredients in thoroughly to ensure an even distribution of flavor throughout the fudge mixture.
Incorporating Pistachios
Once your chocolate is melted and flavored, it’s time to fold in the pistachios. To ensure an even distribution, chop the pistachios roughly before adding them to the mixture. This allows them to be incorporated more uniformly throughout the fudge. Use a spatula to gently fold the nuts into the chocolate, being careful not to overmix, which could cause the chocolate to seize. The goal is to maintain the beautiful color and texture of the pistachios while ensuring they are evenly spread throughout the fudge.
Pouring the Mixture
With the chocolate and pistachios combined, it’s time to pour the mixture into the prepared pan. Use a spatula to scrape all of the fudge from the bowl into the pan, and then spread it evenly across the surface. To remove any air bubbles trapped within the mixture, gently tap the pan on the counter a few times. This will help create a smooth, even surface for your fudge. Make sure to spread the fudge into the corners of the pan to ensure that every slice has a beautiful edge.
Adding Toppings
For an added touch of elegance and flavor, sprinkle additional chopped pistachios on top of the fudge before it sets. Press them down gently into the surface of the fudge to ensure they adhere. This not only enhances the presentation but also adds a delightful crunch when served. If desired, you can also drizzle some melted white chocolate over the top for a decorative finish, making the fudge not only delicious but visually appealing.
Chilling
Now that your fudge is prepared, it’s time to chill it to achieve the perfect texture. Place the pan in the refrigerator and allow the fudge to set for at least 2-3 hours. This cooling period is essential, as it allows the fudge to firm up, making it easier to cut into neat squares. For best results, do not rush this step—impatience can lead to a softer texture that may not hold together well once cut.
Serving Suggestions
Once your fudge has set and chilled, it’s time to enjoy it! Cut the fudge into squares or rectangles, and serve it on a decorative platter. For an elegant presentation, consider garnishing with additional whole pistachios or a light dusting of sea salt. This fudge pairs beautifully with coffee or tea, making it an excellent choice for dessert at gatherings or as a sweet treat for afternoon tea.
For a creative twist, you can layer the fudge with other flavors. Consider making a layer of chocolate fudge beneath the white chocolate pistachio layer, creating a striking visual contrast. Alternatively, package individual pieces in decorative bags or boxes as homemade gifts for friends and family.
Nutritional Information and Benefits
Pistachios are not just a delicious addition to your fudge; they also bring a host of health benefits. Rich in protein, fiber, and healthy fats, they are a nutrient-dense nut that can help promote heart health and improve cholesterol levels. A serving of pistachios contains essential vitamins and minerals, including vitamin B6, copper, and manganese.
Using white chocolate in moderation can also have its benefits. While it is higher in sugar and fat than dark chocolate, white chocolate contains a small amount of calcium and can be enjoyed in moderation as part of a balanced diet. If you wish to enhance the nutritional value of your fudge further, consider adding optional ingredients like dried cranberries or cherries. These fruits offer antioxidants and dietary fiber, contributing additional health benefits while adding a burst of flavor and color to your fudge.
Storage and Shelf Life
To maintain the freshness of your White Chocolate Pistachio Fudge, it’s essential to store it properly. Place the fudge in an airtight container lined with parchment paper to prevent sticking. When stored this way, your fudge can last for up to two weeks in the refrigerator. If you need to keep it longer, consider freezing it. Wrap the fudge tightly in plastic wrap and place it in a freezer-safe container. Well-stored fudge can last up to three months in the freezer. When you’re ready to enjoy it, simply thaw it in the refrigerator for a few hours before serving.
Conclusion
Making White Chocolate Pistachio Fudge at home is not only a delightful endeavor but also a rewarding one. With its creamy texture, sweet flavor, and the satisfying crunch of pistachios, this fudge is a treat that can be enjoyed by everyone. The simplicity of the recipe allows for easy preparation, making it an excellent choice for both novice and experienced bakers alike.
Whether you’re making it for a special occasion, a gift, or simply to indulge yourself, this fudge is sure to impress. Its elegant appearance and delicious taste make it a perfect addition to any dessert table. So gather your ingredients, follow the steps outlined above, and share this delightful sweet treat with your loved ones. They will undoubtedly appreciate the effort and enjoy every bite!