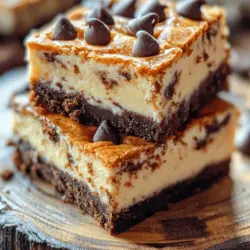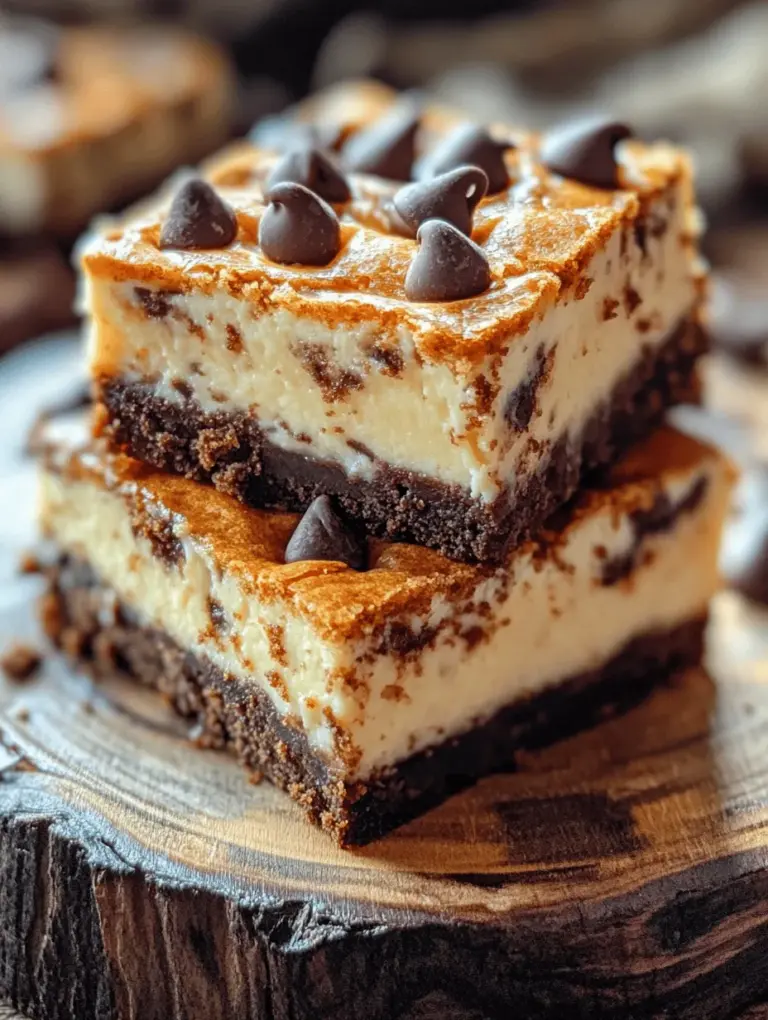
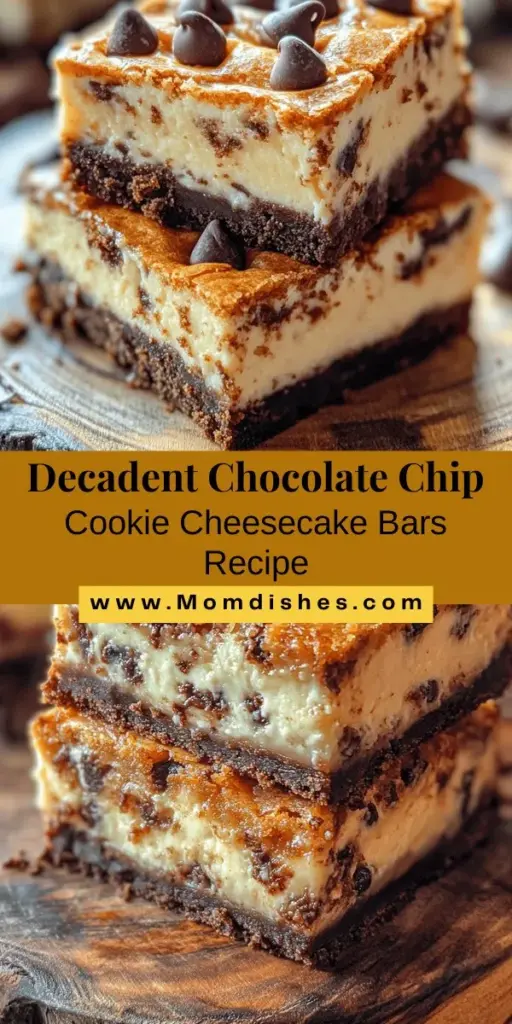
Delightful, rich, and utterly indulgent, Chocolate Chip Cookie Cheesecake Bars are a heavenly treat that combines two beloved desserts into one irresistible bite. Imagine sinking your teeth into a soft and chewy cookie layer, generously studded with semi-sweet chocolate chips, only to discover a creamy, luscious cheesecake filling beneath. Topped with a sprinkle of cookie crumbles, these bars are a delightful experience for the senses and are sure to satisfy any sweet tooth.
These bars are perfect for any occasion, whether it’s a casual family gathering, a festive celebration, or simply a cozy night in. With their unique combination of flavors and textures, they are bound to be a hit with both kids and adults alike. In this blog post, we will guide you through the process of creating these mouthwatering bars from scratch, ensuring that you achieve the perfect balance of cookie and cheesecake in every bite.
Understanding the Ingredients
Before diving into the recipe, it is essential to understand the ingredients that make up these delectable Chocolate Chip Cookie Cheesecake Bars. Each component plays a crucial role in the overall taste and texture, contributing to the delightful experience that these bars offer.
Exploring the Cookie Layer Ingredients
Unsalted Butter
The foundation of any great cookie layer begins with butter. In this recipe, we use unsalted butter, which allows for better control over the overall saltiness of the final product. Butter adds richness and moisture, creating a soft and chewy texture that is essential for a perfect cookie. When creamed with sugar, it aerates the mixture, resulting in a light and fluffy dough.
Brown Sugar vs. Granulated Sugar
Sugar is not just a sweetener; it also impacts the texture and flavor of the cookies. In our Chocolate Chip Cookie Cheesecake Bars, we use a combination of brown sugar and granulated sugar. Brown sugar, with its molasses content, adds moisture and a deeper flavor, resulting in a chewy cookie. Granulated sugar, on the other hand, helps achieve the right level of crispness. The combination of both sugars creates a well-rounded cookie layer that is soft yet slightly crispy on the edges.
The Role of Eggs and Vanilla Extract
Eggs are a vital ingredient in cookie recipes, providing structure and stability. They help bind the mixture together and add moisture to the dough. Additionally, the flavor of our bars is enhanced by vanilla extract, which adds a warm, aromatic quality that complements the sweetness of the chocolate and the richness of the cheesecake filling.
Flour, Baking Soda, and Salt
Flour is the backbone of any baked good, providing structure and stability. In this recipe, we will be using all-purpose flour, which strikes the perfect balance between tenderness and strength. Baking soda acts as a leavening agent, helping the bars rise slightly and become fluffy. Salt, although it may seem counterintuitive, is crucial in enhancing the overall flavors of the cookies by balancing the sweetness.
The Magic of Semi-Sweet Chocolate Chips
No chocolate chip cookie is complete without chocolate chips! In our bars, we use semi-sweet chocolate chips for their perfect balance of sweetness and richness. They melt beautifully during baking, creating pockets of gooey chocolate that elevate the overall flavor of the dessert. Feel free to substitute with dark chocolate or milk chocolate, depending on your preference.
Exploring the Cheesecake Layer Ingredients
Cream Cheese
The star of the cheesecake layer is undoubtedly the cream cheese. It provides the rich, creamy texture that is synonymous with cheesecake. Using softened cream cheese ensures that it blends smoothly into the mixture without lumps, creating a velvety filling that complements the cookie layer perfectly.
Sweetness Balance: Granulated Sugar and Sour Cream
To achieve the right level of sweetness in the cheesecake layer, we use granulated sugar along with sour cream. The sour cream not only adds creaminess but also a slight tang that helps balance the sweetness from the sugar and chocolate. This contrast elevates the flavor profile, making each bite a delightful experience.
Eggs as a Binding Agent
Similar to the cookie layer, eggs play a crucial role in the cheesecake filling. They act as a binding agent, helping to set the cheesecake as it bakes. This ensures that the filling remains cohesive and creamy, allowing for a smooth slice when the bars are cut.
Importance of Vanilla Extract and Flour
Just as in the cookie layer, vanilla extract is important in the cheesecake filling, imbuing it with a warm flavor that enhances the overall taste. A small amount of flour is also added to the filling to provide a bit of structure and stability, ensuring that the cheesecake layer holds its shape when sliced.
The Crucial Touch of Salt for Flavor Enhancement
Finally, a pinch of salt is essential in the cheesecake layer as well. It serves to enhance the flavors and balance the sweetness, providing a well-rounded taste that prevents the filling from becoming overly cloying.
Step-by-Step Guide to Making Chocolate Chip Cookie Cheesecake Bars
Now that we have a solid understanding of the ingredients, let’s dive into the step-by-step process of creating these delicious Chocolate Chip Cookie Cheesecake Bars.
Preheating the Oven and Preparing Your Baking Dish
Before you begin mixing your ingredients, it’s crucial to preheat your oven to the correct temperature. This ensures that your bars bake evenly and thoroughly. For this recipe, preheat your oven to 350°F (175°C).
Next, you will need to prepare your baking dish. You can either grease the dish with cooking spray or butter, or you can line it with parchment paper for easy removal once the bars are baked. Lining the dish with parchment paper is often preferred as it allows for easy lifting and cutting of the bars. If you choose to grease the dish, be sure to use a generous amount to prevent sticking.
Creating the Cookie Layer
With your oven preheated and your dish prepared, it’s time to create the cookie layer.
1. Creaming Butter and Sugars: Start by placing your softened unsalted butter in a large mixing bowl. Using an electric mixer, beat the butter until it is light and fluffy. Gradually add both the brown sugar and granulated sugar, continuing to beat the mixture until it is well combined and creamy. This process typically takes about 2-3 minutes.
2. Incorporating the Eggs and Vanilla Extract: Next, add in the eggs, one at a time, ensuring that each egg is fully incorporated before adding the next. Follow this with the vanilla extract, mixing until everything is well blended.
3. Mixing Dry and Wet Ingredients: In a separate bowl, whisk together the all-purpose flour, baking soda, and salt. Gradually add the dry ingredients to the wet ingredients, mixing on low speed until just combined. Be careful not to overmix; this could result in tough bars. The dough should be soft and slightly sticky.
4. Folding in the Chocolate Chips: Finally, gently fold in the semi-sweet chocolate chips using a spatula or wooden spoon. This ensures that the chocolate is evenly distributed throughout the cookie layer without overworking the dough.
Assembling the Layers
Once your cookie layer is ready, it’s time to assemble the layers in your prepared baking dish.
1. Layering the Cookie Dough: Take about two-thirds of the cookie dough and press it evenly into the bottom of the baking dish, creating a smooth, even layer. Make sure to spread it to the edges for uniform baking.
2. Preparing the Cheesecake Layer: In a separate bowl, beat the softened cream cheese until smooth. Gradually add granulated sugar, sour cream, and the remaining ingredients for the cheesecake layer, mixing until well combined. Be sure to scrape down the sides of the bowl to ensure everything is incorporated.
3. Spreading the Cheesecake Filling: Pour the cheesecake mixture over the cookie layer, spreading it evenly with a spatula.
4. Topping with Cookie Crumbles: Finally, take the remaining cookie dough and crumble it over the top of the cheesecake filling. It doesn’t have to be uniform; a rustic look adds to the homemade charm of the bars.
Now that you have assembled the layers, it’s time for the final bake.
Baking Your Chocolate Chip Cookie Cheesecake Bars
Place the baking dish in the preheated oven and bake for approximately 30-35 minutes, or until the edges are lightly golden and the center is set but still slightly jiggly. Allow the bars to cool completely in the dish before slicing into squares. This cooling period is essential for the cheesecake to firm up, allowing for clean cuts and beautiful presentation.
Stay tuned for the next part of this article, where we will delve into tips for achieving the best results and answer some common questions about these delicious bars.
{{image_1}}
Spreading the Cookie Dough into the Baking Dish
To start off, preheat your oven to 350°F (175°C) and prepare an 8×8-inch baking dish by lining it with parchment paper, allowing some overhang for easy removal later. This step is crucial as it prevents the bars from sticking and makes cleanup a breeze.
Once your baking dish is ready, take half of your prepared chocolate chip cookie dough and press it evenly into the bottom of the dish. Use the back of a spatula or your hands to create a smooth and even layer. Ensure the dough reaches all corners of the dish and is evenly distributed to avoid any undercooked or overdone parts. The dough layer should be about 1/4 inch thick. This base will act as the foundation for your cream cheese filling, so it’s important to get it right.
Techniques for Creating an Even Cheesecake Layer
Now, it’s time to prepare the cheesecake filling. In a mixing bowl, beat together the softened cream cheese, granulated sugar, and vanilla extract until the mixture is smooth and creamy. Use a hand mixer or stand mixer on medium speed for about 2-3 minutes. This process incorporates air into the filling, which is essential for a light and fluffy texture.
Once you achieve a creamy consistency, add in the eggs, one at a time, mixing well after each addition. Overmixing at this stage can incorporate too much air, leading to cracks in your cheesecake layer. Once the eggs are fully incorporated and the mixture is smooth, carefully spread the cheesecake filling over the cookie dough base using a spatula.
For an even layer, start at the center and gently push the filling towards the edges. Take your time to ensure it’s evenly spread across the cookie dough. The cheesecake layer should cover the dough completely.
How to Crumble the Remaining Cookie Dough for Topping
With the cheesecake layer in place, it’s time to prepare the topping. Take the remaining cookie dough and crumble it into small pieces with your hands or a fork. Aim for a mix of larger chunks and smaller crumbles to create a delightful texture contrast on top of the cheesecake.
Sprinkle the crumbled cookie dough evenly over the cheesecake filling, ensuring that it’s well-distributed. This not only adds a beautiful visual appeal but also enhances the flavor profile with that extra cookie crunch on top.
Baking the Bars
Understanding Baking Times and Doneness Indicators
Place the baking dish in the preheated oven and bake for 30-35 minutes. Keep a close eye on the bars as they bake. The edges should be set and slightly golden, while the center may still have a slight jiggle. It’s essential not to overbake; an overcooked cheesecake can become dry and lose its creamy texture.
The Science Behind Baking: What Happens in the Oven
While baking, the heat causes the proteins in the cream cheese and eggs to coagulate, setting the cheesecake. The sugar caramelizes, contributing to the flavor, while the cookie dough base transforms from a raw state into a delicious, chewy layer. Understanding this process can help you adjust baking times in your own oven, as different appliances can vary in temperature accuracy.
Cooling and Chilling Process
Why Cooling is Vital for the Best Texture
Once baked, remove the bars from the oven and allow them to cool in the pan for about 10-15 minutes. This initial cooling period is essential as it helps the cheesecake layer firm up slightly before moving it to the refrigerator.
Optimal Chilling Time for Cheesecake Bars
After cooling, transfer the baking dish to the refrigerator and chill for at least 4 hours, though overnight is preferable. Chilling not only helps the flavors meld together but also allows the cheesecake to set properly, making it easier to cut into neat squares. Patience is key here; skipping this step can result in a messy presentation.
Serving Suggestions and Presentation Ideas
How to Cut and Serve the Bars
Once the bars are fully chilled, it’s time to cut and serve them. To achieve clean cuts, use a sharp knife and warm it under hot water before slicing. Wipe the knife clean between cuts to prevent the cheesecake from sticking, ensuring each piece looks neat and appetizing.
When it comes to serving temperatures, these cheesecake bars are delightful when chilled, though some may prefer them slightly closer to room temperature to enhance the flavors further. Experiment to find your ideal serving temperature.
Presentation Tips
For an elegant presentation, consider placing the bars on a decorative platter. You can dust the top with a light sprinkle of powdered sugar or cocoa powder for an extra touch.
Creative Serving Ideas: Plating and Garnishing
To elevate your dessert experience, serve the bars with a dollop of whipped cream and fresh berries on the side. The tartness of the berries complements the sweetness of the cheesecake, creating a well-rounded flavor profile.
Pairing Suggestions: Beverages that Complement the Bars
For beverage pairings, consider a rich coffee or espresso, which enhances the chocolate flavors in the bars. Alternatively, a glass of milk or a scoop of vanilla ice cream would also make for a comforting accompaniment.
Nutritional Information and Variations
Nutritional Breakdown
Each serving of Chocolate Chip Cookie Cheesecake Bars contains approximately 250 calories, with a breakdown of 15g of fat, 30g of carbohydrates, and 3g of protein. Given the richness of the ingredients, moderation is key. These bars are a delicious indulgence, perfect for special occasions or as a sweet treat after a long day.
Health Considerations and Indulgence Moderation
While these bars are certainly a treat, being mindful of portion sizes can help you enjoy them without straying too far from your dietary goals. Consider sharing them with friends or family to spread the joy!
Variations to Experiment With
If you’re feeling adventurous in the kitchen, here are some variations you might consider:
– Alternative Cookie Flavors: Swap out traditional chocolate chip cookie dough for other flavors like oatmeal raisin or peanut butter for a unique twist.
– Cheesecake Flavor Variations: Experiment with different cheesecake flavors by adding melted chocolate for a chocolate cheesecake or caramel sauce for a salted caramel version.
– Gluten-Free and Dairy-Free Adaptations: For a gluten-free version, use gluten-free flour in the cookie dough and almond or coconut cream cheese for a dairy-free adaptation.
Conclusion: The Joy of Chocolate Chip Cookie Cheesecake Bars
In conclusion, the Chocolate Chip Cookie Cheesecake Bars are a delightful treat that brings together the best of both worlds—rich, creamy cheesecake and chewy, chocolatey cookie. With simple ingredients and straightforward steps, these bars are accessible for bakers of all skill levels. Whether you’re sharing them with friends or enjoying them on your own, you’re sure to find joy in every bite.
Embrace this baking journey and savor the delicious results! These bars are not just a dessert; they are an experience that combines the nostalgia of cookie baking with the elegance of cheesecake. So roll up your sleeves, gather your ingredients, and get ready to indulge in this heavenly creation that will surely impress family and friends alike.