Introduction
There’s something truly magical about the aroma of homemade doughnuts wafting through your kitchen. The joy of biting into a freshly made, airy, and fluffy doughnut is an experience that brings a smile to anyone’s face. Whether enjoyed as a breakfast treat, a sweet afternoon snack, or a dessert, doughnuts hold a special place in our hearts—and our taste buds. Making doughnuts at home not only allows you to indulge in this delightful pastry but also empowers you to customize flavors, toppings, and textures to your liking.
At the heart of a fantastic doughnut is yeast, which plays a crucial role in achieving that desirable fluffy texture. Unlike cake doughnuts, which rely on baking powder for leavening, yeast doughnuts are light and airy due to the fermentation process. This process not only helps the dough rise but also adds a depth of flavor that is simply irresistible. Imagine biting into a warm, perfectly glazed doughnut, with a soft and pillowy interior—this is the heavenly experience that awaits you when you master the art of yeast doughnut making.
In this article, we will delve into the world of Heavenly Yeast Doughnuts, guiding you through the process of creating these delectable treats from scratch. You’ll learn the importance of each ingredient, how yeast functions in the dough, and follow a step-by-step guide to making your own doughnuts that will impress family and friends alike.
Understanding Yeast in Baking
Yeast is a living organism that is essential in many baking recipes, especially those requiring fermentation, such as bread and doughnuts. It is a type of fungus that consumes sugars and, through a process called fermentation, produces carbon dioxide gas and alcohol. This carbon dioxide gas is what causes the dough to rise, resulting in that wonderfully fluffy texture we all crave in a doughnut.
For our Heavenly Yeast Doughnuts, we will be using active dry yeast, which is one of the most common forms of yeast used in baking. Before it can work its magic, active dry yeast needs to be activated. This is typically done by dissolving it in warm water or milk with a bit of sugar, allowing the yeast to “wake up” and start feeding on the sugars. You’ll know your yeast is activated when it begins to foam and bubble—this is a sure sign that it’s ready to be added to your dough.
Using yeast as a leavening agent offers several advantages over other options like baking powder. The slow fermentation process not only creates a light texture but also develops complex flavors in the dough. Yeast doughnuts have a distinct taste that is warm and slightly sweet, which is difficult to achieve with chemical leaveners. Additionally, the process of kneading and allowing the dough to rise helps to develop gluten, giving the doughnuts their structure and chewiness.
Ingredients Breakdown
To create Heavenly Yeast Doughnuts, you’ll need a selection of essential ingredients, each playing a vital role in the final product. Here’s a closer look at what you’ll need and why each ingredient is important:
1. Active Dry Yeast
The star of the show, active dry yeast, is crucial for achieving that fluffy texture. It ferments the sugars in the dough, producing carbon dioxide that causes the dough to rise. Make sure to check the expiration date on your yeast for optimal results.
2. Sugar
Sugar serves a dual purpose in this recipe. Not only does it add sweetness to the doughnuts, but it also helps to activate the yeast. When sugar is mixed with warm liquid and yeast, it provides the necessary food for fermentation, leading to a successful rise.
3. Whole Milk
Whole milk adds richness and moisture to the dough, contributing to its soft and tender texture. The fat in the milk enhances the flavor of the doughnuts, making them even more indulgent.
4. Eggs
Eggs play a significant role in the structure and flavor of the dough. They provide moisture, richness, and help bind the ingredients together. The protein in eggs also contributes to the doughnut’s overall texture, ensuring they hold their shape during frying.
5. Unsalted Butter
Adding unsalted butter to the dough enhances both the taste and texture of the doughnuts. The butter contributes to the richness and helps achieve a tender crumb.
6. All-Purpose Flour
All-purpose flour is the backbone of the dough. It provides structure and stability, allowing the doughnuts to maintain their shape. The gluten in the flour also traps the gases produced during fermentation, helping the dough rise.
7. Salt
Salt may seem like a simple addition, but it plays a crucial role in flavor enhancement and strengthens gluten. A small amount of salt brings out the sweetness in the dough and balances the flavors.
8. Oil for Frying
Choosing the right oil for frying is essential for achieving the perfect doughnut. Oils with a high smoke point, like vegetable or canola oil, are ideal for frying as they can withstand the high temperatures without burning.
9. Powdered Sugar and Toppings
Once your doughnuts are fried and cooled, the fun part begins—customizing them with powdered sugar or various toppings! From classic glazes to sprinkles or even chocolate ganache, the possibilities are endless, allowing you to personalize your doughnuts to suit your tastes.
Step-by-Step Guide to Making Heavenly Yeast Doughnuts
Now that we’ve covered the ingredients, it’s time to get into the nitty-gritty of making your Heavenly Yeast Doughnuts. Follow this detailed step-by-step guide to ensure your doughnuts turn out perfectly every time.
Step 1: Activating the Yeast
Begin by activating your active dry yeast. In a small bowl, combine 1/4 cup of warm whole milk (around 110°F or 43°C) with 1 tablespoon of granulated sugar. Sprinkle the yeast over the top and let it sit for about 5-10 minutes until it becomes frothy. This is a sign that your yeast is alive and ready to work its magic in the dough.
Step 2: Mixing Wet Ingredients
In a large mixing bowl, combine the activated yeast mixture, 1/2 cup of whole milk, 2 beaten eggs, and 1/4 cup of melted unsalted butter. Whisk these ingredients together until they are well combined. The warmth of the melted butter and milk is essential, as it will help to keep the dough at an optimal temperature for yeast activation.
Step 3: Combining Dry Ingredients
In a separate bowl, whisk together 4 cups of all-purpose flour, 1/2 cup of granulated sugar, 1 teaspoon of salt, and the remaining 1 tablespoon of sugar. This will help to evenly distribute the salt and sugar throughout the flour, ensuring that your doughnuts are perfectly flavored.
Step 4: Forming the Dough
Gradually add the dry ingredients to the wet mixture, stirring with a wooden spoon or spatula until a shaggy dough begins to form. Once the dough starts to come together, place it on a lightly floured surface and knead it for about 5-7 minutes. Kneading helps to build gluten, which is essential for the structure of your doughnuts. The dough should be smooth and elastic when finished.
Step 5: First Rise
Once your dough is kneaded, shape it into a ball and place it in a lightly greased bowl. Cover the bowl with a clean kitchen towel or plastic wrap and let it rise in a warm, draft-free area for about 1 to 1.5 hours, or until it has doubled in size.
Step 6: Shaping the Doughnuts
After the first rise, punch down the dough to release any air bubbles. Transfer it to a floured surface and roll it out to about 1/2-inch thickness. Using a doughnut cutter or two round cookie cutters (one larger and one smaller), cut out doughnut shapes. Place the cut-out doughnuts on a parchment-lined baking sheet and cover them with a towel. Let them rise for another 30-45 minutes until they are puffy.
Step 7: Frying the Doughnuts
While the doughnuts are undergoing their second rise, heat your oil in a deep fryer or a large, heavy-bottomed pot to 350°F (175°C). Carefully fry the doughnuts in batches, being sure not to overcrowd the pot. Fry each doughnut for about 1-2 minutes on each side until they are golden brown. Use a slotted spoon to transfer the fried doughnuts to a paper towel-lined plate to drain excess oil.
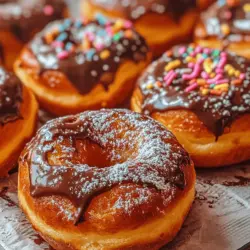
Step 8: Glazing and Topping
Once the doughnuts are cooled slightly, it’s time to glaze them with powdered sugar or your favorite toppings. For a simple glaze, mix powdered sugar with a splash of milk or water until you reach your desired consistency. Dip the warm doughnuts in the glaze, allowing any excess to drip off before placing them on a wire rack to set.
Now that you have the first part of the Heavenly Yeast Doughnuts recipe completed, you’re well on your way to creating a batch of delicious, fluffy doughnuts that are sure to impress. Stay tuned for the next part, where we will explore more tips for achieving the best results and answer some common questions about yeast doughnut making.
{{image_1}}
Combining Mixtures for a Smooth Dough
Once your yeast mixture is frothy and bubbly, it’s time to combine it with the dry ingredients to create a smooth dough. In a large mixing bowl, pour the yeast mixture over the flour mixture. Use a wooden spoon or spatula to combine the ingredients until they start to come together. As you mix, gradually add in the melted butter and eggs, ensuring each addition is fully incorporated before adding more. The goal here is to create a cohesive, slightly sticky dough.
Once the mixture is combined, it’s time to knead. Transfer the dough onto a lightly floured surface and begin kneading. If the dough is too sticky, sprinkle a little flour on top, but be careful not to add too much, as this can result in dense doughnuts. Knead the dough for about 8-10 minutes, until it becomes smooth and elastic. You can perform the “windowpane test” to check for proper gluten development: stretch a small piece of dough between your fingers; if it forms a thin translucent membrane without tearing, you’re good to go.
Tips on Kneading for the Right Dough Consistency
Kneading is crucial for developing the gluten structure that gives your doughnuts their delightful chewiness. Here are some tips to ensure your dough achieves the perfect consistency:
1. Use the Right Technique: Push the dough away from you with the palm of your hand, then fold it back over itself. Rotate the dough a quarter turn and repeat. This motion helps develop the gluten effectively.
2. Keep it Floured: While you want to avoid adding too much flour, a little can help prevent sticking. Dust your work surface lightly as needed.
3. Check for Elasticity: Properly kneaded dough should spring back when poked. If it doesn’t, continue kneading for another minute or two.
4. Don’t Rush: Take your time. Rushing through the kneading process can lead to doughnuts that are tough instead of tender.
Importance of First and Second Rises
After kneading, place the dough in a greased bowl, cover it with a clean kitchen towel or plastic wrap, and let it rise in a warm, draft-free place until it doubles in size—about 1 to 2 hours. This first rise is essential as it allows the yeast to ferment, creating the light, airy texture characteristic of yeast doughnuts.
Once the dough has risen, gently punch it down to release the gas. Then, divide it into equal pieces, and shape each piece into balls. Cover them again and let them rise a second time for about 30-45 minutes. This second rise is equally important; it allows the doughnuts to become light and fluffy. Skipping this step will result in denser doughnuts.
Shaping the Doughnuts for Perfect Consistency
To shape the doughnuts, you can use a doughnut cutter or simply your hands. If using a cutter, roll out the dough to about ½ inch thickness on a lightly floured surface. Cut out your doughnuts using the cutter, then use a smaller round cutter or the cap of a bottle to cut holes in the center. If forming them by hand, pinch off pieces of dough, shape them into balls, and then poke a hole in the center and gently stretch it.
After shaping, place the doughnuts on a lined baking sheet with parchment paper, ensuring there is enough space between each to allow for expansion during the second rise. Cover them again with a towel and let them rest for the final rise.
Proper Frying Techniques for Crispy Outside and Soft Inside
Frying doughnuts is an art, and mastering it will yield delicious results. Here are some essential techniques:
1. Frying Temperature: Heat your oil to 350°F (175°C) for the best frying results. Using a thermometer is crucial to maintain consistency and avoid undercooked or burnt doughnuts.
2. Choose the Right Oil: Use oils with high smoke points, such as vegetable oil, canola oil, or peanut oil, to achieve the ideal frying temperature without burning.
3. Fry in Batches: To prevent overcrowding, fry only a few doughnuts at a time. Overcrowding lowers the oil temperature, resulting in greasy, unevenly cooked doughnuts.
4. Timing is Key: Doughnuts should fry for about 1-2 minutes on each side. You’ll know they’re done when they turn a golden brown color. Use a slotted spoon to gently flip them halfway through.
5. Drain Properly: Once fried, transfer doughnuts to a wire rack lined with paper towels to drain excess oil. This step ensures they remain crisp rather than soggy.
The Art of Frying Doughnuts
Frying doughnuts perfectly is a combination of technique and timing. Here are some additional tips for achieving the ideal fry:
– Maintaining Oil Temperature: Keep a close eye on the oil temperature as you fry. If it drops too low, your doughnuts will absorb too much oil; if it’s too high, they will burn on the outside before cooking through.
– Using a Thermometer: A good kitchen thermometer is essential for frying. It ensures you hit the sweet spot of 350°F consistently throughout the frying process.
– Frying Without Overcrowding: Fry in small batches to maintain the oil temperature. If the pot is too crowded, the doughnuts will steam rather than fry, leading to a less-than-desirable texture.
– Determining Doneness: Look for a deep golden color and a slight puff. You can also test by breaking one open—if it’s cooked through and fluffy, you’re ready to glaze.
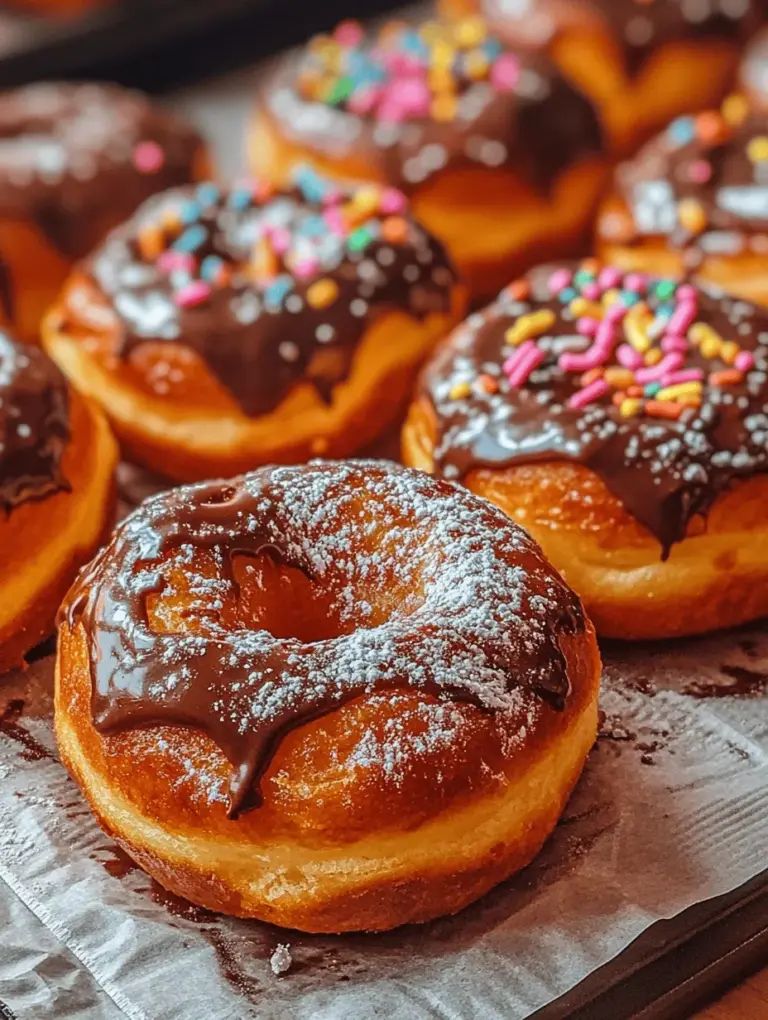
Creative Glazing and Topping Ideas
Once your doughnuts are fried and cooled, it’s time to add some flair! Here’s an overview of popular glaze recipes and topping suggestions to personalize your creations:
1. Classic Glazes:
– Chocolate Glaze: Melt together 1 cup of powdered sugar, 2 tablespoons of cocoa powder, and 2-3 tablespoons of milk until smooth.
– Vanilla Glaze: Combine 1 cup of powdered sugar with 2-3 tablespoons of milk and a teaspoon of vanilla extract.
– Maple Glaze: Mix 1 cup of powdered sugar with 2-3 tablespoons of maple syrup and a splash of milk for a rich, sweet finish.
2. Topping Suggestions:
– Sprinkles: Rainbow or chocolate sprinkles add a festive touch.
– Nuts: Chopped pecans, almonds, or walnuts can add a delightful crunch.
– Coconut Flakes: Toasted coconut flakes complement the sweetness beautifully.
3. Customization: Feel free to experiment! Infuse glazes with flavors like matcha, espresso, or even citrus zest for unique twists. You can also stuff your doughnuts with custard, jam, or cream for an added surprise.
Serving Suggestions and Occasions
Doughnuts are versatile treats that can elevate any gathering. Here are some ideas for serving them:
– Breakfasts and Brunches: Serve your doughnuts alongside coffee or tea for a delightful breakfast spread. Pair them with fresh fruits or yogurt for a balanced meal.
– Parties: Create a doughnut bar at your next gathering. Offer a variety of glazes, toppings, and fillings so guests can customize their own treats.
– Special Occasions: Doughnuts are perfect for celebrations! Consider themed decorations or unique flavors for holidays, birthdays, or anniversaries.
– Beverage Pairings: Doughnuts pair excellently with a range of beverages. Try serving them with freshly brewed coffee, hot chocolate, or a chilled glass of milk.
Storage and Reheating Tips
To maintain the freshness of leftover doughnuts, follow these best practices:
– Storing: Place any leftover doughnuts in an airtight container at room temperature for up to 2 days. For longer storage, keep them in the refrigerator for up to a week.
– Freezing: Doughnuts can be frozen for up to 3 months. Wrap them individually in plastic wrap and place them in a freezer-safe bag. When ready to enjoy, thaw them at room temperature.
– Reheating: To reheat, place doughnuts in a preheated oven at 350°F (175°C) for about 5-10 minutes. This method ensures they regain their original texture and warmth.
Conclusion
Making homemade yeast doughnuts is a rewarding experience that brings joy not only through the cooking process but also in sharing them with loved ones. From the delicate texture to the endless possibilities of flavors and toppings, these doughnuts are truly heavenly. Don’t hesitate to experiment with different glazes and fillings to find your perfect combination.
Invite family and friends to join in the fun, turning the process of making doughnuts into a cherished tradition. The warmth and comfort that baking brings can create lasting memories, making your kitchen the heart of the home. So gather your ingredients, roll up your sleeves, and start making these delightful treats—each bite is a testament to your creativity and culinary skills!