Introduction
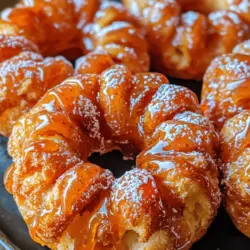
When it comes to pastries, few can match the allure of crullers. These delightful treats have a rich history, woven into the fabric of various cultures. Originating from a simple fried dough, crullers have evolved over the centuries into the decadent pastries we enjoy today. Among the myriad of cruller varieties, the strawberry glazed French crullers stand out as a particularly enchanting option. With their light and airy texture, complemented by a vibrant strawberry glaze, they are the perfect indulgence for special occasions or a well-deserved everyday treat.
Homemade pastries, like these strawberry glazed French crullers, hold a special place in our hearts and kitchens. They not only allow you to customize flavors and ingredients but also offer a sense of accomplishment that store-bought pastries simply can’t match. Whether you’re celebrating a birthday, hosting a brunch, or simply treating yourself, making crullers from scratch is an experience that brings joy and satisfaction.
Understanding Crullers
To fully appreciate strawberry glazed French crullers, it’s essential to understand what crullers are and how they fit into the broader category of pastries. A cruller is a type of fried pastry that can take various forms, depending on the culture and preparation method. They are typically made from a dough that is rich and tender, resulting in a delightful texture that melts in your mouth.
Historically, crullers have been a part of European and American culinary traditions for centuries. The term “cruller” is believed to have originated from the Dutch word “krullen,” meaning “to curl,” which refers to the twisted shape of the pastry. Different cultures have their own variations; for example, the German “krapfen” and the Polish “pączki” are both types of fried dough that share similarities with crullers.
One of the distinguishing features of French crullers is their use of choux pastry, a unique dough that is also the foundation for eclairs and profiteroles. Choux pastry is made by cooking flour and butter in water, then adding eggs to create a light and airy texture. This method results in a pastry that puffs up beautifully when fried, creating a delicate outer shell with a soft, custard-like interior. The process of making choux pastry is vital for achieving the signature texture of French crullers.
Ingredients Breakdown
Now that we’ve explored the history and significance of crullers, let’s dive into the ingredients that make up our strawberry glazed French crullers. Each component contributes to the overall flavor, texture, and appearance of the finished pastry.
Choux Pastry Ingredients:
1. All-Purpose Flour: The backbone of the choux pastry, all-purpose flour provides structure and stability. It absorbs moisture and helps create the desired texture.
2. Butter: Unsalted butter adds richness and flavor to the dough. It’s essential to use high-quality butter for the best results.
3. Water: Water is the base for the choux pastry. It helps dissolve the flour and butter, creating a smooth mixture that will puff up during frying.
4. Eggs: Eggs are crucial for creating the light, airy texture of the crullers. They provide moisture, structure, and richness to the dough. The incorporation of eggs is a delicate process that requires attention to achieve the perfect consistency.
5. Salt: A pinch of salt enhances the flavor of the dough, balancing the richness of the butter and eggs.
Strawberry Glaze Ingredients:
1. Powdered Sugar: This is the main ingredient for the glaze, providing sweetness and a smooth texture. Using powdered sugar helps achieve a glossy finish.
2. Fresh Strawberries: Fresh strawberries are the star of the glaze, adding vibrant color and fruity flavor. For a more intense strawberry taste, you can puree the strawberries before incorporating them into the glaze.
3. Milk or Cream: Adding a splash of milk or cream to the glaze helps achieve the desired consistency. It’s important to add it gradually to ensure the glaze isn’t too runny.
4. Vanilla Extract: A dash of vanilla extract enhances the overall flavor of the glaze, complementing the sweetness of the strawberries.
Ingredient Substitutes
For those with dietary restrictions or preferences, there are several substitutes you can consider:
– Gluten-Free Flour: If you need a gluten-free option, a 1:1 gluten-free flour blend can be used in place of all-purpose flour. Ensure the blend contains xanthan gum for the best texture.
– Dairy-Free Options: To make the crullers dairy-free, you can use vegan butter and substitute the milk in the glaze with almond milk or coconut milk.
– Egg Alternatives: If you’re looking for an egg substitute, consider using flax eggs (1 tablespoon ground flaxseed mixed with 2.5 tablespoons water, left to sit until gelatinous) or commercial egg replacers.
By understanding the ingredients that go into these crullers, you can appreciate the complexity and versatility of this pastry while also tailoring it to your dietary needs.
Step-by-Step Guide to Making Strawberry Glazed French Crullers
Making strawberry glazed French crullers at home may seem intimidating, but with a careful approach and detailed instructions, you can achieve pastry perfection. Below is a step-by-step guide to help you navigate the process:
Preparing the Choux Pastry
The first step in creating your crullers is to prepare the choux pastry. This is where the magic begins, and it’s crucial to follow the instructions closely to achieve the right consistency.
1. Preheat Your Oven: Before you begin, preheat your oven to 400°F (200°C). This will ensure that your crullers fry evenly and thoroughly.
2. Combine Water and Butter: In a medium saucepan, combine the water and unsalted butter. Place the saucepan over medium heat and bring the mixture to a gentle boil. It’s essential to ensure that the butter is completely melted before proceeding.
3. Add Flour: Once the mixture is boiling, remove the saucepan from heat and quickly stir in the all-purpose flour and salt. Use a wooden spoon to mix vigorously until the dough forms a ball and pulls away from the sides of the pan. This step is crucial, as it activates the gluten in the flour, creating structure for the crullers.
4. Cook the Dough: Return the saucepan to the heat and continue to cook the dough for about 1-2 minutes. This helps to dry out the mixture slightly, ensuring the crullers will have the right texture when fried.
5. Incorporating Eggs: Transfer the dough to a mixing bowl and allow it to cool for a few minutes. Once it has cooled slightly, it’s time to incorporate the eggs. This step is vital for achieving the ideal dough consistency.
– Add Eggs Gradually: Begin adding the eggs one at a time, mixing well after each addition. The dough will initially appear to separate, but with continued mixing, it will come together into a smooth, glossy paste. You may not need all the eggs, so keep an eye on the texture. The final dough should be thick yet pipeable—think of a soft ice cream consistency.
Visual Cues for Knowing When the Dough is Ready
Achieving the perfect choux pastry dough is all about understanding the visual cues. Here are some signs that indicate your dough is ready:
– The dough should be smooth and shiny, with no lumps.
– When you lift the dough with a spoon, it should hold its shape but fall back down slowly.
– If you pipe the dough, it should maintain its shape without collapsing.
Forming the Crullers
Now that your choux pastry is ready, it’s time to form the crullers. This step is where you can get creative and have fun with the piping process.
1. Prepare Piping Bags: Fit a piping bag with a large star tip (such as a Wilton 1M or 2D) for creating the cruller shape. If you don’t have a piping bag, you can use a large resealable plastic bag with the corner snipped off.
2. Pipe the Cruller Shapes: On a baking sheet lined with parchment paper, pipe the dough into circular shapes, creating a ring or spiral. Each cruller should be about 3 inches in diameter. Remember, the dough will puff up while frying, so leave some space between each cruller to allow for expansion.
3. Chill Before Frying: After piping, allow the crullers to chill in the refrigerator for about 30 minutes. Chilling helps them hold their shape better during frying.
By following these detailed steps, you’ll be well on your way to mastering the art of making strawberry glazed French crullers. The combination of the light and airy choux pastry with the sweet and fruity glaze creates an irresistible treat that will delight anyone lucky enough to indulge in them. As we continue, we will explore the frying process, glaze preparation, and tips for achieving the perfect finish. Stay tuned for the next part of this delicious journey!
{{image_1}}
Suggestions for Achieving the Perfect Spiral Form
Creating the perfect spiral form in your French crullers is essential for that classic look and texture. Here are some key tips:
1. Consistent Piping: Use a piping bag fitted with a star tip. This helps create the signature ridges of the cruller. Make sure to hold the bag perpendicular to the surface for even spirals.
2. Practice Your Technique: Start by squeezing the bag gently to form the base, then slowly lift it while creating a spiral motion. Maintain uniform pressure to ensure that each layer adheres well to the previous one.
3. Use Parchment Paper: Pipe your crullers onto parchment paper for easy transfer to the hot oil. This prevents sticking and allows for precise shapes.
Heating the Oil Safely
Safety is paramount when frying at home. Here’s how to ensure you heat the oil safely:
1. Choose the Right Oil: Use a neutral oil with a high smoke point, such as canola or vegetable oil. This will help prevent burning and imparting unwanted flavors.
2. Use a Deep Fry Thermometer: Monitoring the oil temperature is crucial. Heat the oil to 350°F (175°C) before adding the crullers. A thermometer will help you maintain this temperature.
3. Avoid Water: Ensure that your frying equipment and ingredients are dry. Water can cause oil to splatter dangerously.
Importance of Oil Temperature in Frying
Maintaining the correct oil temperature is vital for frying crullers:
– Too Low Temperature: If the oil is not hot enough, your crullers will absorb too much oil, resulting in a greasy texture.
– Too High Temperature: Conversely, if the oil is too hot, the outside will cook rapidly while the inside remains raw. Aim to keep the temperature stable throughout the frying process.
Safety Tips for Frying at Home
Frying can be intimidating, but following these tips will help you stay safe:
1. Stay Attentive: Never leave hot oil unattended. Keep a watchful eye on the temperature and the crullers as they fry.
2. Have a Lid Handy: Keep a lid nearby to cover the pot in case of a fire. This can smother flames quickly.
3. Use a Frying Basket: If possible, use a frying basket to lower and lift the crullers safely from the hot oil.
Frying the Crullers to Perfection
When it’s time to fry, follow these best practices:
1. Fry in Batches: Avoid overcrowding the pot, as this can cause the oil temperature to drop. Fry 2-3 crullers at a time depending on the size of your pot.
2. Monitor Cooking Time: Fry the crullers for about 3-4 minutes on each side or until they are golden brown. Use a slotted spoon to carefully flip them halfway through for even cooking.
3. Check for Doneness: The crullers are perfectly cooked when they are golden brown and float to the surface. You can also use a toothpick; if it comes out clean, the crullers are ready.
Crafting the Strawberry Glaze
A beautiful glaze can elevate your crullers. Here’s how to make a glossy strawberry glaze from scratch:
1. Ingredients: You will need 1 cup of powdered sugar, 2 tablespoons of fresh strawberry puree, and 1 tablespoon of milk or water for adjusting consistency.
2. Mix the Ingredients: In a bowl, combine the powdered sugar and strawberry puree. Whisk until there are no lumps, adding milk or water gradually until the desired consistency is achieved. It should be thick enough to coat the cruller but not so thick that it doesn’t drip slightly.
3. Adjust Flavor: For a twist, consider adding a splash of lemon juice for acidity or a dash of vanilla extract for added depth.
Variations to Enhance the Flavor of the Glaze
Get creative with your glaze by trying different flavors:
– Other Fruit Purees: Substitute strawberries with raspberries, blueberries, or mango for a unique taste. Each fruit will provide its distinct flavor profile.
– Spices: Add a pinch of cinnamon or nutmeg to the glaze for an aromatic twist.
– Chocolate Drizzle: For an indulgent touch, melt some dark chocolate and drizzle it over the glazed crullers for a beautiful contrast.
Glazing the Crullers
Once your crullers are fried and cooled, it’s time to glaze them:
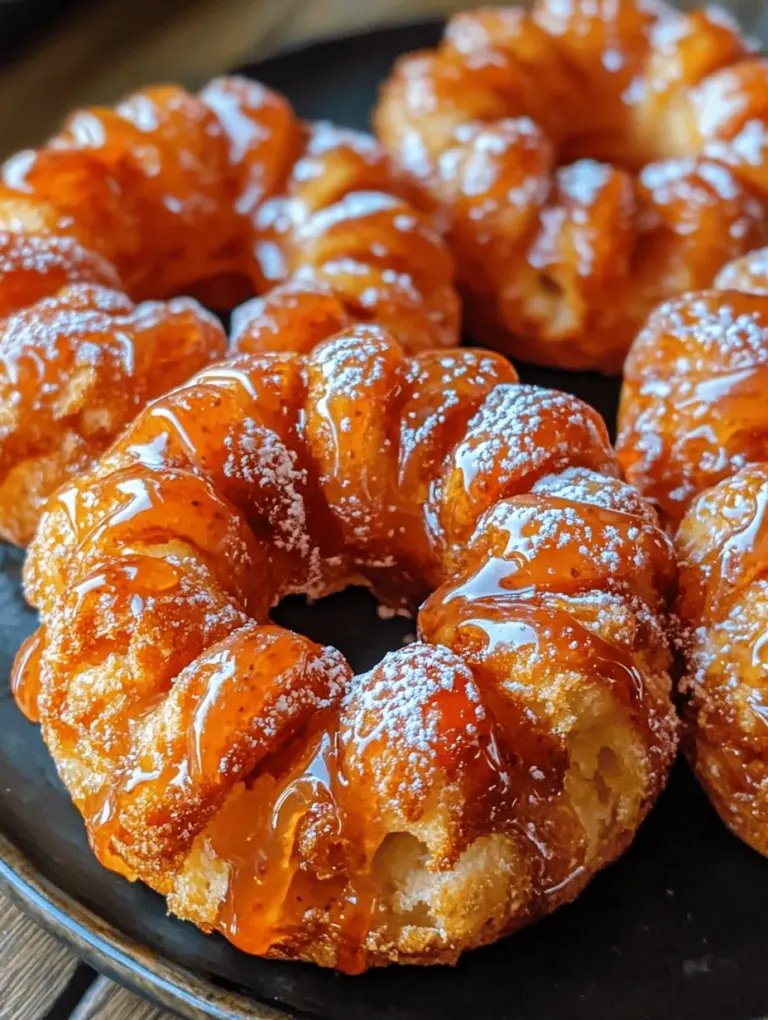
1. Coat Thoroughly: Dip the top half of each cruller into the glaze, allowing excess to drip back into the bowl.
2. Double Dip: For a thicker layer, consider a second dip once the first layer has set slightly.
3. Set the Glaze: Place the glazed crullers on a wire rack to allow the glaze to set without sticking to surfaces.
Suggestions for Presentation and Serving
Presenting your crullers beautifully enhances the eating experience:
– Plate with Fresh Strawberries: Serve your crullers on a platter with fresh strawberries or a sprig of mint for a pop of color.
– Creative Arrangements: Stack crullers in a cone shape or use a cake stand to elevate your presentation.
Serving Suggestions
Pairing your strawberry glazed French crullers with the right beverages can enhance their delightful flavors:
– Coffee Pairing: A cup of freshly brewed coffee, especially a rich espresso, complements the sweetness of the crullers beautifully.
– Tea Accompaniment: Consider serving them with a light herbal or fruit tea, such as chamomile or berry-infused blends.
– Special Occasions: Crullers are perfect for brunch gatherings, birthday celebrations, or casual get-togethers. Consider serving them alongside other pastries for a delightful spread.
Nutritional Information
While indulging in delicious crullers, it’s essential to be mindful of their nutritional aspects:
– Calories: A standard cruller can range from 150-250 calories, making them a sweet treat best enjoyed in moderation.
– Portion Control: Consider limiting yourself to one or two crullers, especially if they are part of a larger meal or dessert assortment.
– Healthier Alternatives: If you are looking to lighten the recipe, consider using whole wheat flour and reducing sugar in the glaze while maintaining the cruller’s deliciousness.
Conclusion
Making strawberry glazed French crullers is not just about creating a delightful treat; it’s an experience that can fill your kitchen with sweet aromas and joy. The satisfaction of frying them to perfection and glazing them beautifully will surely impress your family and friends. Whether enjoyed with a morning coffee or as a sweet indulgence at a gathering, these crullers offer a unique combination of flavor and texture that is hard to resist. So, gather your ingredients, follow these steps, and embrace the delightful journey of making your own crullers at home. They are sure to become a favorite in your dessert repertoire.