Tuna melts are a beloved classic, known for their comforting flavors and satisfying textures. But have you ever considered enjoying them in a wrap? The Tuna Melt Wrap offers a creative twist on this timeless dish, combining the savory goodness of tuna, the creaminess of mayonnaise, and the delightful melt of cheese, all wrapped up in a warm tortilla. This recipe is not only a fantastic option for a quick lunch or a light dinner, but it also packs a nutritional punch that makes it a smart choice for any meal. In this article, we will delve into the essential ingredients, step-by-step instructions, and the health benefits of Tuna Melt Wraps, guiding you through the process of creating this delightful dish at home.
Understanding the Ingredients of Tuna Melt Wraps
To master the Tuna Melt Wrap, it’s crucial to understand the role of each ingredient. Here’s a breakdown of the core components that make up this delicious recipe:
The Core Ingredients of Tuna Melt Wraps
1. Tuna: The star of the show, tuna is not only rich in flavor but also a powerhouse of nutrition. It provides a significant source of protein and omega-3 fatty acids, which are essential for heart health and brain function. Whether you use canned or fresh tuna, this ingredient forms the foundation of your wrap.
2. Mayonnaise: This creamy condiment adds moisture and flavor to the tuna mixture. While traditional recipes often call for regular mayonnaise, you can opt for low-fat or vegan alternatives to suit dietary preferences without sacrificing taste.
3. Dijon Mustard: A spoonful of Dijon mustard offers a tangy kick that elevates the overall flavor profile of the wrap. It balances the richness of the mayonnaise and tuna, creating a delightful taste experience.
4. Vegetables: Chopped celery and finely diced red onion contribute crunch and additional flavor. Their freshness complements the creamy tuna and cheese, adding layers of texture and taste to every bite.
5. Cheddar Cheese: The melting quality of cheddar cheese is essential for achieving that gooey, comforting effect typical of a tuna melt. You can choose sharp or mild cheddar based on your flavor preference.
6. Tortillas: The vehicle for your filling, tortillas can be made from flour or corn. Flour tortillas provide a soft, pliable wrap, while corn tortillas offer a more robust flavor. Choose the type that best suits your taste and dietary needs.
7. Spinach or Mixed Greens: Adding a handful of spinach or mixed greens introduces a fresh element to the wrap. These greens are not only nutritious but also add a pleasant crunch that contrasts beautifully with the creamy filling.
Health Benefits of Tuna Melt Wraps
When it comes to nutrition, Tuna Melt Wraps deliver a wealth of benefits:
Nutritional Profile Overview
– High Protein Content: Tuna is an excellent source of protein, making this wrap a filling option that can help keep you satisfied throughout the day. High-protein meals can aid in muscle repair and growth, making this wrap ideal for active individuals.
– Healthy Fats from Tuna: The omega-3 fatty acids found in tuna are essential fats that contribute to heart health. These healthy fats help reduce inflammation, lower blood pressure, and may even improve cognitive function.
– Vitamins and Minerals from Vegetables: The addition of vegetables like celery and onion not only enhances flavor but also adds essential vitamins and minerals to the dish. Celery is a good source of vitamin K, while red onion contains antioxidants that may offer health benefits.
– Caloric Breakdown: A Tuna Melt Wrap can be a balanced meal option, depending on the ingredients you choose. By controlling the quantities of mayonnaise and cheese or opting for low-fat alternatives, you can create a nutritious wrap that fits your dietary goals.
Step-by-Step Guide to Making Tuna Melt Wraps
Now that you understand the ingredients and their benefits, let’s dive into the preparation of your Tuna Melt Wraps. The following steps will guide you through making the perfect tuna mixture and assembling your wraps.
Preparing the Tuna Mixture
1. Combining Ingredients for Flavor: Start by draining the tuna thoroughly and placing it in a mixing bowl. Use a fork to flake the tuna into smaller pieces. Next, add mayonnaise and Dijon mustard to the bowl. The ratio of mayonnaise to tuna can be adjusted based on your preference for creaminess; a common starting point is 1 part mayonnaise for every 2 parts tuna.
2. Adding Vegetables: Finely chop your celery and red onion, and add them to the bowl. These vegetables not only add flavor but also enhance the texture of the tuna mixture. Stir the mixture gently to ensure that the ingredients are well combined without over-mixing, which can make the tuna mixture mushy.
3. Cheese Preparation: Grate or slice your cheddar cheese, and set it aside. This will be used later when assembling the wraps.
4. Taste Testing: Before proceeding to assembly, it’s a good idea to taste the tuna mixture. Adjust the seasoning if needed—adding salt, pepper, or even a dash of hot sauce for those who enjoy a bit of heat can enhance the overall flavor.
Assembling the Wraps
1. Preparing Your Workspace: Lay out your tortillas on a clean surface or cutting board. Ensure that you have all your ingredients ready for assembly: the tuna mixture, cheese, and fresh greens.
2. Layering the Ingredients: Start by placing a generous scoop of the tuna mixture in the center of each tortilla. You want enough filling to provide flavor and substance without overstuffing, which can make rolling difficult.
3. Adding Cheese and Greens: Sprinkle a layer of grated cheddar cheese over the tuna mixture. Follow this with a handful of spinach or mixed greens. The greens should be added last to prevent them from getting soggy and to maintain their fresh crunch.
4. Rolling the Wrap: To roll the wrap, start by folding in the sides of the tortilla over the filling, then carefully roll from the bottom up, encasing the filling as you go. Ensure the wrap is tight enough to hold everything together without bursting but not so tight that it squishes the ingredients.
5. Heating the Wrap (Optional): For an extra touch of indulgence, consider toasting your wraps in a skillet over medium heat. This step enhances the flavor of the cheese and gives the tortilla a delightful crispness. Simply place the wrap seam-side down in a non-stick skillet, cooking for 2-3 minutes on each side until golden brown and the cheese is melted.
By following these steps, you’ll have delicious Tuna Melt Wraps ready to be enjoyed. The combination of creamy tuna, melted cheese, and fresh greens wrapped in a warm tortilla makes for a satisfying meal that can be prepared in no time. In the next part of the article, we will explore tips for achieving the best results with your Tuna Melt Wraps and address some common questions about this fantastic dish. Stay tuned for more insights and culinary tips!
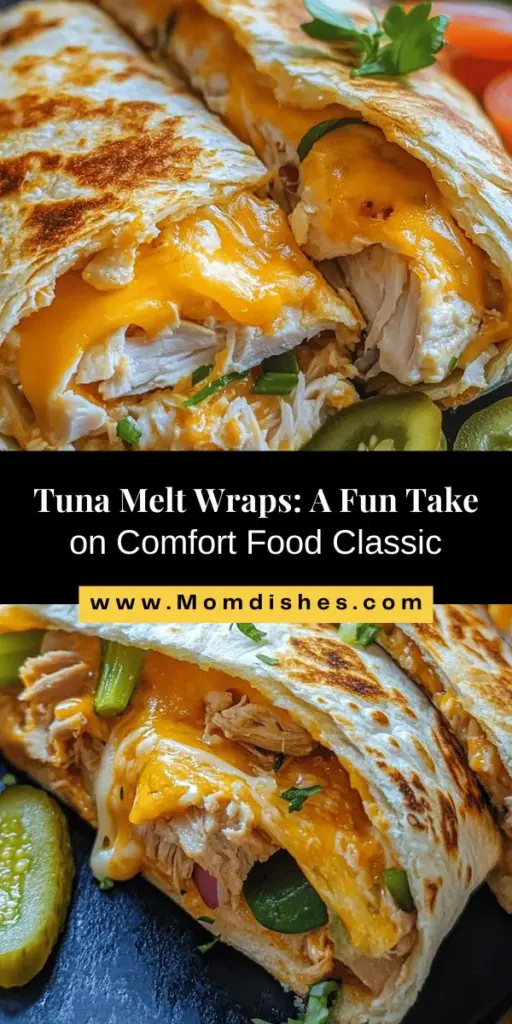
{{image_1}}
Tortilla Selection: Flour vs. Whole Wheat
When it comes to selecting the perfect tortilla for your Tuna Melt Wrap, the choice between flour and whole wheat tortillas can significantly influence the final dish. Flour tortillas are soft, pliable, and offer a neutral flavor that allows the tuna and cheese to shine. They are particularly ideal for those who prefer a classic taste. On the other hand, whole wheat tortillas bring a nuttier flavor and additional fiber to your meal, making them a healthier option.
For a more wholesome wrap, consider using whole wheat tortillas. They provide a heartier texture and can enhance the nutritional value of your meal. However, if you’re after that classic comfort food feel, opt for the traditional flour tortilla. Ultimately, the choice between flour and whole wheat comes down to personal preference and dietary needs.
Layering Techniques for Optimal Flavor
Layering is crucial in achieving a well-balanced Tuna Melt Wrap. Start by spreading a generous layer of tuna mixture, which typically includes tuna, mayonnaise, diced onions, celery, and seasonings, over the entire surface of the tortilla. Make sure to leave about an inch of space around the edges to prevent spillage when you fold the wrap.
Next, add a layer of shredded cheese—cheddar or mozzarella are popular choices. The cheese not only enhances the flavor but also acts as a glue to hold everything together. After the cheese, sprinkle some fresh herbs like parsley or dill for an added burst of freshness. This layering technique ensures that every bite is packed with flavor and texture.
Wrapping Techniques
How to Fold and Roll for a Secure Wrap
Folding and rolling your wrap properly is essential to keep all the delicious ingredients contained. Start by folding two opposite sides of the tortilla inward, covering the filling. This creates a pocket for the tuna and cheese. Next, grab the edge closest to you and begin to roll the tortilla away from you, tucking in the filling as you go. Roll tightly but not so much that the tortilla tears. Once rolled, you can secure it with a toothpick if needed, or place it seam-side down on your grill or pan to hold it together.
Tips for Preventing Spillage
To minimize the risk of spillage, avoid overfilling your wrap. It’s tempting to load it up with all your favorite ingredients, but less is often more. If using juicy ingredients, like tomatoes or pickles, consider patting them dry with a paper towel to reduce excess moisture. Additionally, the folding technique plays a crucial role; make sure to fold tightly and ensure all edges are sealed properly.
Grilling the Wraps
Choosing the Right Cooking Method
Grilling your Tuna Melt Wraps can elevate their flavor profile and provide a delightful crispiness. You can choose to grill them on an outdoor grill, a stovetop grill pan, or even in a skillet. Each method has its advantages. A stovetop grill pan allows for easy monitoring, while an outdoor grill gives your wraps a smoky flavor. If you prefer a quicker method, a skillet is perfect for achieving that golden-brown finish.
Achieving the Perfect Crispiness
To achieve the perfect crispiness, preheat your grill or skillet over medium heat. Lightly brush the outside of each wrap with olive oil or butter before placing them on the heat. This not only helps to create a lovely golden-brown crust but also enhances the flavor. Grill the wraps for about 3-4 minutes on each side, flipping carefully to avoid spilling the contents. Keep an eye on them to prevent burning; the goal is a crisp exterior while ensuring the cheese melts inside.
Tips for Melting Cheese
For perfectly melted cheese, consider covering the wraps while they cook. This traps heat and steam, helping the cheese to melt evenly. If you’re using a skillet, you can place a lid on top for a few minutes. Alternatively, if you’re grilling outdoors, you can create a makeshift cover with aluminum foil. Keep in mind that different cheeses melt at different rates, so adjust your cooking time based on the type of cheese you’ve chosen.
Serving Suggestions for Tuna Melt Wraps
Ideal Pairings for Tuna Melt Wraps
Tuna Melt Wraps are versatile and can be paired with a variety of sides to create a complete meal. Consider serving them with crispy potato chips for a satisfying crunch, a fresh garden salad for a light and healthy accompaniment, or a warm bowl of soup for a comforting option. Each pairing complements the flavors of the wrap while adding texture and variety to your meal.
Dipping Sauces: Options to Enhance Flavor
Enhance your Tuna Melt Wrap experience with delicious dipping sauces. A classic ranch or thousand island dressing can add a creamy tang that pairs beautifully with the wrap. For those who enjoy a bit of spice, try a sriracha mayo or a zesty chipotle sauce. These sauces not only enhance the flavor but also provide a fun interactive element to your meal.
Garnishing Ideas
Using Fresh Vegetables
Garnishing your Tuna Melt Wraps adds an appealing touch and enhances their nutritional value. Top your wraps with fresh greens like arugula or spinach, or add slices of ripe avocado for creaminess. You can also sprinkle some diced tomatoes or cucumbers for a burst of freshness that complements the savory tuna and cheese.
Creative Presentation Techniques
Presentation can elevate your meal from ordinary to extraordinary. Serve your Tuna Melt Wraps cut diagonally and arranged neatly on a plate. Drizzle with a balsamic reduction or a sprinkle of sesame seeds for visual appeal. Using colorful plates or adding a side of vibrant vegetables can also enhance the presentation, making your meal not only delicious but visually enticing.
Variations on the Classic Tuna Melt Wrap
Exploring Flavorful Alternatives
One of the best aspects of Tuna Melt Wraps is their adaptability. While the classic version is delicious, there are numerous variations you can explore to suit your taste preferences.
Different Protein Options (Chicken, Turkey, etc.)
If you’re not a fan of tuna or want to mix things up, consider using other proteins. Shredded chicken or turkey can be substituted for tuna to create a new flavor profile. Simply mix the cooked chicken or turkey with the same mayonnaise and seasonings, and follow the same layering and wrapping techniques.
Vegan Substitutes (Tofu, Chickpeas)
For a vegan twist on this recipe, replace the tuna with mashed chickpeas or crumbled tofu mixed with vegan mayo and spices. This alternative not only retains the creamy texture but also offers a delicious plant-based option. Add some nutritional yeast for a cheesy flavor without the dairy.
Spice It Up: Adding Jalapeños or Hot Sauce
If you enjoy a bit of heat, spice up your Tuna Melt Wrap with the addition of jalapeños or hot sauce. Incorporating sliced jalapeños into the filling or drizzling hot sauce over the finished wrap can add a delightful kick that enhances the overall flavor.
Conclusion
In summary, the Tuna Melt Wrap is a deliciously versatile dish that combines familiar flavors with a modern twist. With its easy preparation and customizable nature, it is perfect for anyone looking for a quick meal that doesn’t compromise on taste or nutrition. Whether you stick to the classic recipe or explore variations, this Tuna Melt Wrap is sure to become a favorite in your household. Enjoy the delightful combination of flavors and textures in every bite, and share the joy of cooking with family and friends.