Introduction
In the realm of baking, mini desserts have carved out a delightful niche that appeals to both the eyes and the palate. Mini soft cakes, in particular, have surged in popularity, captivating dessert lovers with their charming size and exquisite flavor. These delightful confections have become a staple at gatherings, from elegant afternoon teas to lively birthday parties, and even as a sweet indulgence to enjoy at home. Their versatility makes them an ideal choice for any occasion, inviting creativity in both presentation and flavor.
This article will take you on a journey through the process of creating your own heavenly mini soft cakes. You will find a detailed recipe that guides you through each step, tips for customization to suit your preferences, and serving suggestions to impress your guests. Whether you are an experienced baker or a novice in the kitchen, this guide will ensure your mini soft cakes are a hit!
The Allure of Mini Soft Cakes
The appeal of mini soft cakes lies in their bite-sized nature, making them a perfect treat for modern dining experiences. As trends shift towards smaller, more refined portions, these cakes allow guests to indulge without the guilt of overindulgence. With their visually appealing presentation, they can elevate any dessert table, transforming a simple gathering into a festive occasion.
One of the most enticing aspects of mini soft cakes is their adaptability. You can easily cater to various dietary preferences with simple substitutions, whether you’re accommodating gluten-free, dairy-free, or vegan diets. This inclusivity not only provides a sense of community around the dessert table but also showcases your baking prowess. No matter the occasion, there’s a mini soft cake recipe waiting to be customized to perfection.
Ingredients Breakdown
Creating the perfect mini soft cakes starts with understanding the essential ingredients and their roles in the recipe. Here’s a detailed breakdown of each component that contributes to the cake’s delightful texture and flavor:
All-Purpose Flour
All-purpose flour is the foundation of our mini soft cakes, providing structure and stability. When choosing flour, look for a high-quality brand that has a good protein content, which will help the cakes rise without becoming dense. Sifting the flour before measuring is also crucial, as it aerates the flour and prevents clumping, ensuring a lighter cake.
Baking Powder
Baking powder acts as a leavening agent, helping the cakes to rise and achieve that soft, airy texture we all love. It contains both an acid and a base, which react when moistened and heated to produce carbon dioxide bubbles. If you’re out of baking powder, you can use baking soda in combination with an acid like vinegar or lemon juice as an alternative.
Salt
Though it may seem counterintuitive to add salt to a sweet recipe, it plays an essential role in enhancing flavors. A pinch of salt can elevate the sweetness of the sugar and balance the overall flavor profile of the cake. Opt for fine sea salt for the best results, as it dissolves easily into the batter.
Unsalted Butter
In baking, unsalted butter is preferred because it allows you to control the amount of salt in your recipe. It also contributes to the cake’s rich flavor and tender texture. Be sure to use butter at room temperature, which makes it easier to cream with sugar and results in a lighter cake.
Granulated Sugar
Granulated sugar is the primary sweetener in our mini soft cakes. Different types of sugar can affect texture and flavor. While granulated sugar provides the classic sweetness, using a combination of brown sugar can add moisture and a hint of caramel flavor. Experiment with ratios to find your ideal balance.
Eggs
Eggs are vital in baking; they bind the ingredients together and provide moisture. They also help with leavening, as they trap air during mixing, contributing to the cake’s rise. For best results, use large eggs at room temperature, which will incorporate more easily into the batter.
Vanilla Extract
Quality vanilla extract enhances the flavor profile of our mini soft cakes. Opt for pure vanilla extract over imitation for a richer taste. You can also experiment with other extracts like almond or lemon for a unique twist on the classic flavor.
Milk
Milk adds moisture to the batter and helps to achieve the desired consistency. Depending on your preference, you can use whole milk for a richer flavor or alternatives like almond milk or oat milk for a lighter option. The choice of milk can subtly impact the taste and texture of your cakes.
Mini Chocolate Chips (Optional)
For those who crave a bit of decadence, mini chocolate chips are an optional ingredient that can be folded into the batter. They contribute a delightful burst of chocolate flavor, elevating the soft cakes to a new level of indulgence.
Powdered Sugar
Powdered sugar serves as a finishing touch, often used for dusting the tops of the mini soft cakes or for making a simple glaze. Its fine texture allows for a delicate presentation, making your cakes look as good as they taste.
Step-by-Step Instructions for Heavenly Mini Soft Cakes
Now that we’ve covered the essential ingredients, it’s time to dive into the step-by-step process for creating these heavenly mini soft cakes. Follow these clear and concise instructions to ensure your baking success.
Preheating the Oven and Preparing the Muffin Tin
1. Preheat Your Oven: Start by preheating your oven to 350°F (175°C). This step is crucial for ensuring that your cakes bake evenly and rise properly.
2. Prepare the Muffin Tin: Grease a standard 12-cup muffin tin with cooking spray or line it with paper liners. If you’re using liners, be sure to press them down firmly to avoid any gaps that could cause the batter to spill.
Mixing Dry Ingredients
1. Sift the Dry Ingredients: In a medium bowl, sift together the all-purpose flour, baking powder, and salt. Sifting is important as it breaks up any clumps and ensures that the leavening agent is evenly distributed throughout the flour.
2. Measure Accurately: When measuring your flour, use the spoon-and-level method—spoon the flour into your measuring cup and level it off with a knife. This will prevent your cakes from becoming dense due to excess flour.
Creaming Butter and Sugar
1. Cream the Butter and Sugar: In a large mixing bowl, combine the room-temperature unsalted butter and granulated sugar. Using an electric mixer, beat the mixture on medium speed until it becomes light and fluffy, about 3-5 minutes. This process incorporates air into the batter, leading to a tender cake.
2. Add Eggs and Vanilla: Once the butter and sugar are well combined, add the eggs one at a time, mixing thoroughly after each addition. Then, mix in the vanilla extract until fully incorporated. The mixture should be smooth and creamy.
With these initial steps, you’re well on your way to creating delightful mini soft cakes. In the following sections, we will explore how to combine the wet and dry ingredients, bake the cakes to perfection, and add finishing touches for an impressive presentation. Stay tuned for the continuation of this heavenly dessert journey!
{{image_1}}
Incorporating Eggs and Vanilla
To achieve a perfectly blended batter for your Heavenly Mini Soft Cakes, start by incorporating the eggs and vanilla extract smoothly. Begin by cracking the eggs into a separate bowl and whisking them lightly before adding them to the mixture. This step helps break down the egg whites and yolks, ensuring a more uniform consistency throughout your batter. Once you have added the eggs, pour in the vanilla extract. The key here is to blend these wet ingredients thoroughly with the sugar and butter mixture until they are fully integrated. This will not only enhance the flavor but also contribute to the light and airy texture of the cakes.
Combining Wet and Dry Ingredients
When it comes to mixing wet and dry ingredients, the goal is to avoid overworking the batter. Overmixing can lead to dense cakes, which is not the desired outcome for our soft and fluffy mini cakes. Start by adding your dry ingredients (flour, baking powder, and salt) to the wet mixture in thirds. Gently fold the ingredients using a spatula or a wooden spoon. The folding technique is crucial; it involves lifting the batter from the bottom and turning it over rather than stirring vigorously. This method preserves the air bubbles formed during the creaming stage and ensures a light texture.
Folding in Chocolate Chips
Once the batter is well combined, it’s time to fold in the chocolate chips. This is where you can get creative by using milk, semi-sweet, or even white chocolate chips, depending on your preference. To incorporate the chocolate chips gently, sprinkle them over the surface of the batter and use the same folding technique as before. Be cautious not to overmix; you just want to see the chocolate chips evenly distributed throughout the batter. This gentle incorporation maintains the fluffiness of the cake while ensuring each bite is filled with chocolatey goodness.
Filling the Muffin Tin
For portion control and consistent baking, it’s essential to fill the muffin tin correctly. Using a standard ice cream scoop or a spoon, fill each muffin cup about two-thirds full. This allows enough space for the cakes to rise without overflowing. If you prefer a more precise approach, consider using a kitchen scale to measure out the batter evenly for each cup. To prevent sticking, you can line the muffin tin with paper liners or grease the cups lightly with cooking spray. This step not only ensures easy removal but also adds a decorative touch to your mini soft cakes.
Baking Process
The baking process is crucial for achieving the perfect texture and flavor. Preheat your oven to 350°F (175°C) and place the muffin tin in the center of the oven for even heat distribution. Bake the mini soft cakes for about 15-20 minutes, or until the tops are golden and a toothpick inserted into the center comes out clean or with just a few moist crumbs. Avoid opening the oven door too frequently, as this can cause the cakes to sink. Instead, rely on visual and scent cues; you should notice a delightful aroma wafting through your kitchen, signaling that your cakes are nearly done.
Cooling and Serving
Once baked to perfection, remove the mini soft cakes from the oven and let them cool in the pan for about 5-10 minutes. This step is crucial; allowing them to cool slightly will help them set and maintain their shape when removed. After that, transfer the cakes to a wire rack to cool completely. Cooling not only affects the texture but also allows the flavors to develop fully. Serve these delightful mini soft cakes as they are, or consider adding a dusting of powdered sugar for a touch of elegance.
Customization and Variations of Mini Soft Cakes
One of the most appealing aspects of the Heavenly Mini Soft Cakes recipe is its versatility. You can easily customize the base recipe to suit your taste preferences or dietary needs:
– Adding Fruits: For a fresh twist, consider incorporating fruits such as blueberries or raspberries into the batter. These can be added during the folding stage for a burst of flavor and color.
– Experimenting with Spices: Adding spices like cinnamon or nutmeg can enhance the warmth of your cakes, creating a comforting dessert that’s perfect for any occasion.
– Alternative Mix-Ins: Get creative with mix-ins such as nuts or dried fruits, which can add texture and additional flavor dimensions to your mini cakes.
– Gluten-Free Options: If you or your guests require a gluten-free dessert, substitute regular flour with a gluten-free flour blend. Be sure to check the blend’s specific measurements for the best results.
– Dairy-Free Adaptations: For a dairy-free version, using plant-based butter and milk will maintain the integrity and flavor of your cakes without the use of dairy products.
Presentation Ideas for Serving Mini Soft Cakes
Elevating your dessert experience doesn’t stop at baking; presentation plays a significant role in delighting your guests:
– Plating Techniques: Use attractive plates to showcase your mini soft cakes. Consider stacking them or arranging them in a circle for visual appeal.
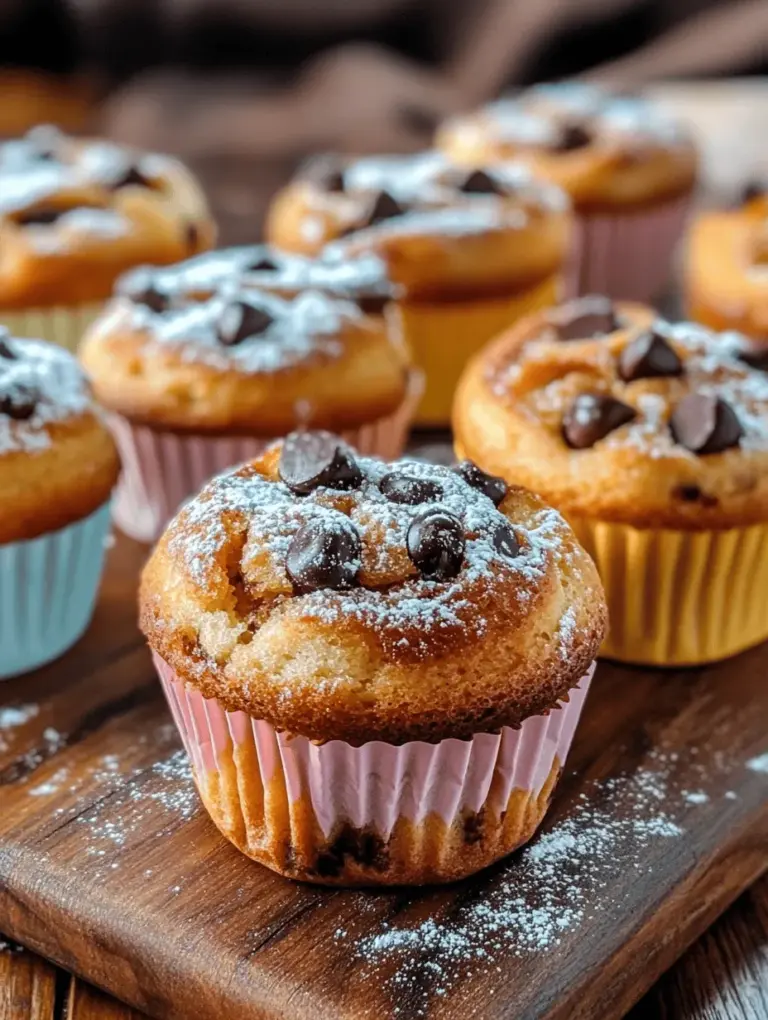
– Decorative Liners: Using decorative muffin liners adds a touch of charm. Opt for colors or patterns that match your event theme.
– Dusting with Powdered Sugar: A light dusting of powdered sugar just before serving can transform your cakes into an elegant dessert.
– Pairing with Sauces: Enhance the indulgence by serving your mini soft cakes with a side of chocolate sauce or whipped cream. This not only complements the flavor but also adds a delightful contrast in texture.
– Themed Presentations: For special occasions like birthdays or holidays, consider themed presentations. Decorate the cakes with sprinkles, fresh fruits, or themed toppers to fit the celebration.
Nutritional Insights
Understanding the nutritional profile of your Heavenly Mini Soft Cakes can help you enjoy them mindfully:
– Nutritional Profile: These cakes are indulgent but can be made with wholesome ingredients depending on your substitutions. For instance, using whole grain flour can increase fiber content.
– Portion Control: Mini cakes are perfect for portion control, allowing you to satisfy your sweet tooth without overindulging.
– Balancing Treats: Incorporating desserts into a balanced diet can be achieved by enjoying these mini cakes occasionally and pairing them with healthier meals throughout the day.
Conclusion
Baking Heavenly Mini Soft Cakes is not just about creating a delicious dessert; it’s an experience that brings joy and satisfaction to both the baker and the consumer. The ease of this recipe makes it accessible for all skill levels, encouraging even novice bakers to explore their culinary creativity. With the ability to customize flavors, presentation, and dietary adaptations, these mini cakes can cater to any occasion or personal preference. So, gather your ingredients, embrace the joy of baking, and create delightful moments for yourself and your loved ones with these versatile mini soft cakes.