Introduction
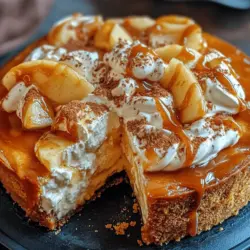
Desserts have an incredible ability to evoke emotions and memories, often taking us back to cherished moments around the family table. One such dessert that brings together nostalgia and modern culinary creativity is the Salted Caramel Apple Pie Cheesecake. This delectable treat is a beautiful fusion of two classic desserts: the creamy richness of cheesecake and the warm, spiced goodness of apple pie. Imagine sinking your fork into a slice that boasts layers of velvety cheesecake, spiced apple filling, and a luscious salted caramel drizzle – it’s an experience that tantalizes the taste buds and warms the heart.
The use of salted caramel in this recipe adds a contemporary twist, elevating the traditional apple pie flavors to new heights. The sweetness of the caramel is perfectly balanced by a hint of salt, creating a depth of flavor that is both indulgent and sophisticated. In this article, we will embark on a detailed exploration of how to create this decadent dessert, diving into the ingredients, preparation steps, and cooking techniques that will ensure your Salted Caramel Apple Pie Cheesecake is nothing short of spectacular.
Understanding the Ingredients
To craft the perfect Salted Caramel Apple Pie Cheesecake, it is essential to understand the role each ingredient plays in creating a harmonious balance of flavors and textures. Here, we will break down the key components that make this dessert so special.
Graham Cracker Crust
The foundation of any great cheesecake starts with the crust, and for this recipe, we will use a graham cracker crust. This crust not only adds a delightful crunch but also serves as a sturdy base for the creamy cheesecake filling. The sweetness of the graham crackers complements the rich flavors of the cheesecake, while the buttery notes enhance the overall taste. When prepared correctly, the graham cracker crust should be firm enough to support the cheesecake without crumbling when sliced. Achieving the right texture is crucial for the success of this dessert.
Apple Varieties
When it comes to selecting apples for the filling, the choice of variety can significantly influence the flavor and texture of the cheesecake. For this recipe, a combination of Granny Smith and Honeycrisp apples works exceptionally well. Granny Smith apples are known for their tartness, which beautifully contrasts the sweetness of the caramel and the creaminess of the cheesecake. On the other hand, Honeycrisp apples add a touch of sweetness and juiciness, creating a well-rounded filling that is both flavorful and satisfying.
Cream Cheese and Sour Cream
The stars of the cheesecake filling are cream cheese and sour cream. Cream cheese provides the signature silky texture and richness that we associate with cheesecake, while sour cream adds a subtle tang that balances the sweetness of the caramel and apples. This combination ensures that each bite is creamy and luscious, with just the right amount of acidity to keep the dessert from being overly rich.
Salted Caramel
No Salted Caramel Apple Pie Cheesecake would be complete without a generous drizzle of salted caramel. This decadent sauce not only adds a layer of sweetness but also introduces a delightful contrast with its salty undertones. The salted caramel serves as the perfect finishing touch, enhancing the overall flavor profile and elevating the dessert to an entirely new level. The interplay of sweet and salty is what makes this cheesecake so irresistible.
Crafting the Perfect Crust
Now that we have a better understanding of the ingredients, let’s dive into the process of crafting the perfect graham cracker crust. Follow these detailed steps to ensure your crust is not only delicious but also sturdy enough to hold the cheesecake filling.
Step 1: Gather Your Ingredients
For the graham cracker crust, you will need:
– 1 ½ cups of graham cracker crumbs
– ½ cup of granulated sugar
– ½ cup of unsalted butter, melted
– A pinch of salt
Step 2: Preheat the Oven
Before you start preparing the crust, preheat your oven to 350°F (175°C). This will ensure that your crust sets perfectly once it’s in the oven.
Step 3: Combine the Ingredients
In a large mixing bowl, combine the graham cracker crumbs, granulated sugar, and a pinch of salt. Mixing these dry ingredients together ensures that the sugar and salt are evenly distributed throughout the crust.
Step 4: Add the Melted Butter
Next, pour the melted butter into the mixture. The butter acts as a binding agent, helping the crumbs hold together when baked. Mix everything thoroughly until the graham cracker crumbs are completely coated in butter, and the mixture resembles wet sand.
Step 5: Press the Crust into the Pan
Transfer the crumb mixture into a 9-inch springform pan. Using the back of a measuring cup or your fingers, firmly press the mixture into the bottom of the pan and up the sides. It’s essential to create an even layer, as this will provide stability for the cheesecake filling. Make sure to press down firmly to avoid any crumbling when you slice into the dessert.
Step 6: Bake the Crust
Once the crust is evenly pressed, place it in the preheated oven and bake for about 8-10 minutes, or until it is lightly golden and fragrant. Baking the crust helps to set it, giving it a firmer texture that will hold up well against the cheesecake filling. After baking, allow the crust to cool completely before adding the filling.
Creating the Apple Pie Filling
While the crust is cooling, it’s the perfect time to prepare the apple pie filling. This step is crucial as it adds a burst of flavor and texture to the cheesecake. Follow these in-depth instructions to create a delicious apple filling that complements the other elements of the dessert.
Step 1: Prepare the Apples
For this filling, you will need:
– 3 cups of peeled and sliced Granny Smith apples
– 2 cups of peeled and sliced Honeycrisp apples
– ½ cup of granulated sugar
– 1 tablespoon of lemon juice
– 1 teaspoon of ground cinnamon
– ¼ teaspoon of ground nutmeg
– 2 tablespoons of cornstarch
– A pinch of salt
Start by peeling and slicing the apples into thin, uniform pieces. This ensures even cooking and a beautiful presentation. The combination of Granny Smith and Honeycrisp apples will provide a delightful contrast of tart and sweet flavors.
Step 2: Mix the Ingredients
In a large mixing bowl, combine the sliced apples with granulated sugar, lemon juice, ground cinnamon, ground nutmeg, cornstarch, and a pinch of salt. The sugar will draw out the natural juices from the apples, while the spices add warmth and depth to the filling. The lemon juice not only enhances the flavor of the apples but also helps to prevent them from browning.
Step 3: Cook the Filling
Transfer the apple mixture to a large skillet over medium heat. Cook the apples for about 5-7 minutes, stirring occasionally, until they begin to soften. The cornstarch will thicken the juices released from the apples, creating a luscious filling that is not overly watery. Once the apples are tender but still hold their shape, remove the skillet from the heat and allow the filling to cool slightly before layering it over the cheesecake.
Making the Cheesecake Filling
With both the crust and apple filling prepared, it’s time to create the star of the show: the cheesecake filling. This step is straightforward but requires attention to detail to achieve that perfect creamy consistency.
Step 1: Gather Your Ingredients
For the cheesecake filling, you will need:
– 24 ounces of cream cheese, softened
– 1 cup of granulated sugar
– 1 teaspoon of vanilla extract
– ½ cup of sour cream
– 3 large eggs
Step 2: Beat the Cream Cheese
In a large mixing bowl, beat the softened cream cheese with an electric mixer on medium speed until it is smooth and creamy. This process is crucial as it helps to break down any lumps, resulting in a silky cheesecake filling.
Step 3: Add the Sugar and Vanilla
Once the cream cheese is smooth, gradually add the granulated sugar and vanilla extract. Continue beating until the mixture is well combined and fluffy. The sugar not only adds sweetness but also helps to aerate the mixture, giving the cheesecake a light texture.
Step 4: Incorporate the Sour Cream
Next, add the sour cream to the mixture and blend until fully incorporated. The sour cream adds richness and a slight tanginess that balances the sweetness of the caramel and apples.
Step 5: Add the Eggs
Finally, add the eggs one at a time, beating on low speed after each addition until just combined. Overbeating the eggs can lead to a dense cheesecake, so it’s essential to mix gently at this stage.
Step 6: Layer the Cheesecake
Now that the cheesecake filling is ready, it’s time to layer it in the springform pan. Pour half of the cheesecake filling over the cooled graham cracker crust, followed by a generous layer of the prepared apple pie filling. Finally, pour the remaining cheesecake filling over the apples, spreading it evenly to cover them completely.
With these initial steps complete, your Salted Caramel Apple Pie Cheesecake is well on its way to becoming a show-stopping dessert that will impress family and friends alike. The combination of flavors and textures, from the creamy cheesecake to the spiced apple filling and the crunch of the graham cracker crust, creates a truly unforgettable experience. In the next part of this article, we’ll guide you through the baking process and the finishing touches that will elevate this dessert and make it truly spectacular.
{{image_1}}
Importance of Room Temperature Cream Cheese for a Smooth Texture
When preparing a cheesecake, the texture is critical to its success, and room temperature cream cheese plays a crucial role in achieving that smooth, velvety consistency. Cold cream cheese can lead to lumps in your batter, which can ruin the overall texture of your cheesecake. To prevent this, take your cream cheese out of the refrigerator at least an hour before you begin your preparation. This simple step allows the cream cheese to soften, making it easier to blend into a creamy, homogeneous mixture with the other ingredients.
Additionally, blending room temperature cream cheese with the sugars and eggs will ensure an even distribution of sweetness and richness throughout the batter. This will result in a cheesecake that is not only creamy but also light and airy, providing a delightful mouthfeel that perfectly complements the apple filling and salted caramel.
Discussion on the Balance of Sugars and the Role of Eggs
Achieving the perfect custard-like consistency in your cheesecake relies heavily on the balance of sugars and the incorporation of eggs. For this salted caramel apple pie cheesecake, granulated sugar and brown sugar are used in the filling. The granulated sugar brings sweetness while the brown sugar adds a deeper, molasses-like flavor, echoing the essence of caramel and apple pie.
Eggs are essential in this recipe as they act as a binding agent, giving structure to the cheesecake while contributing to its creamy texture. Be sure to use large eggs, and incorporate them one at a time into the cream cheese mixture, mixing on low speed to avoid too much aeration. Overmixing can lead to cracks during baking, so a gentle touch is key.
Layering the Cheesecake
Detailed Guidance on How to Layer the Cheesecake and Apple Filling
Layering your cheesecake and apple filling is an art that can elevate the aesthetic appeal of your dessert. Start by pouring half of your cheesecake batter into the prepared crust, smoothing it out evenly. Next, carefully spoon a layer of the spiced apple filling over the cheesecake batter. Make sure to leave some space around the edges, as the batter will expand slightly during baking.
Once your apple layer is in place, gently add the remaining cheesecake batter on top. To create a marbled effect, you can use a knife or a skewer to swirl the top layer of cheesecake batter into the apple filling, but be cautious not to overdo it; you want to maintain distinct layers for visual appeal.
Techniques for Even Distribution of Both Fillings
To ensure that both the cheesecake and apple filling are evenly distributed, it helps to prep the apple filling ahead of time. Once you have your apple filling ready, allow it to cool slightly before layering. This prevents the heat from the filling from cooking the cheesecake batter prematurely.
When layering, use a spatula to spread the batter gently to the edges, ensuring even coverage. For the apple filling, you can use an ice cream scoop or a large spoon to dollop it onto the cheesecake. The key is patience; take your time to create an even and visually appealing distribution.
Tips for Achieving a Beautiful Presentation
Presentation is everything when it comes to desserts. After you have layered your cheesecake and apple filling, consider smoothing the top layer of the cheesecake batter with a spatula. You can also use a parchment paper circle cut to fit your pan to help keep the edges neat.
After baking, let the cheesecake cool in the pan for a while before removing it. This will help maintain its shape. Once cooled, you can garnish the top with additional sliced apples, a drizzle of salted caramel, or even a sprinkle of cinnamon for that extra touch.
Baking the Cheesecake
Explanation of the Baking Process
Baking a cheesecake may seem daunting, but with the right approach, it can be a straightforward process. Preheat your oven to the desired temperature, typically around 325°F (160°C). It’s recommended to bake your cheesecake in a water bath (bain-marie), which helps regulate the temperature and provides moisture, resulting in a creamier texture.
To create a water bath, wrap the outside of your springform pan with aluminum foil to prevent water from seeping in. Place your cheesecake into a larger baking pan and fill it with hot water, ensuring it reaches halfway up the side of the springform pan.
Ideal Temperature and Baking Time for Achieving the Desired Texture
Bake your salted caramel apple pie cheesecake for about 60-70 minutes, or until the edges are set and the center still has a slight jiggle. It’s important not to overbake the cheesecake, as it will continue to firm up as it cools. Keep an eye on it during the last few minutes of baking to ensure it doesn’t crack.
Importance of Residual Heat in Cooling the Cheesecake Gradually
After baking, turn off the oven and crack the door open slightly, allowing the cheesecake to cool gradually in the oven for about an hour. This step is crucial for preventing cracks, as a sudden change in temperature can cause the cheesecake to shrink and crack. Once the cheesecake has cooled in the oven, transfer it to the counter to cool completely before refrigerating.
Preparing Salted Caramel Sauce
Step-by-Step Instructions for Making Homemade Salted Caramel
Homemade salted caramel sauce is the perfect finishing touch for your cheesecake. To make it, you’ll need granulated sugar, butter, heavy cream, and flaky sea salt.
1. In a medium saucepan over medium heat, add the granulated sugar. Stir constantly until it melts and turns a deep amber color. Be careful; sugar can burn quickly.
2. Once melted, remove it from heat and add the butter. Stir until the butter is fully melted and incorporated.
3. Gradually pour in the heavy cream while stirring. The mixture will bubble vigorously, so be cautious.
4. Return to low heat and stir until smooth. Remove from heat and mix in a pinch of flaky sea salt, adjusting to taste. Allow it to cool slightly before drizzling over your cheesecake.
Discussion on Caramelization and the Importance of Temperature Control
Caramelization is a delicate process that transforms sugar into a rich, complex flavor. The key to successful caramel is maintaining the right temperature. Use a candy thermometer if you have one; the sugar should reach around 350°F (175°C) for perfect caramelization. If you don’t have a thermometer, watch for the color change and the aroma of the sugar—this will guide you in achieving that sweet, nutty flavor without burning.
Tips for Achieving the Perfect Balance of Sweet and Salty
The balance of sweet and salty in your caramel sauce is essential. Start with a small amount of salt and taste the sauce as you go. You want the salt to enhance the flavor without overpowering the sweetness. Flaky sea salt is recommended for its texture and ability to dissolve easily into the warm sauce, providing a delightful burst of salty flavor with each bite of cheesecake.
Chilling and Serving the Cheesecake
Importance of Chilling for the Best Flavor and Texture
Chilling your cheesecake is a crucial step that allows the flavors to meld and the texture to set properly. Once your cheesecake has cooled to room temperature, cover it with plastic wrap and refrigerate for at least 4 hours, or preferably overnight. This resting period ensures that the cheesecake firms up and develops its signature creamy texture.
Recommended Chilling Times for Optimal Results
For the best results, aim for a chilling time of at least 8 hours. This longer time will not only enhance the flavor but also make slicing easier. A well-chilled cheesecake will hold its shape beautifully, making for clean, elegant slices when served.
Ideas for Serving and Garnishing the Cheesecake for an Impressive Presentation
When ready to serve, remove the cheesecake from the springform pan and place it on a serving platter. Drizzle generously with your homemade salted caramel sauce and sprinkle with additional sea salt for an eye-catching finish. For added flair, consider garnishing with thinly sliced apples or a dollop of whipped cream.
You can also dust the top with a light sprinkle of cinnamon or finely chopped nuts for added texture and flavor. Serve with forks and napkins, and prepare for the delighted reactions of your guests!
Conclusion
Creating a salted caramel apple pie cheesecake is a rewarding culinary journey that delights the senses from start to finish. The process, though detailed, allows for creativity and personalization, making it a perfect dessert for any occasion.
With each layer of creamy cheesecake and spiced apple filling, paired with the indulgent salted caramel, you will experience a harmonious blend of flavors that satisfy both the palate and the soul. Taking the time to prepare this dessert from scratch not only showcases your baking skills but also brings a sense of accomplishment.
Embrace the experience, savor the flavors, and enjoy the delightful end result with family and friends. There’s nothing quite like sharing a homemade dessert that elevates any gathering, creating memories that linger long after the last bite. So roll up your sleeves, gather your ingredients, and embark on this delicious adventure!