Introduction: Discovering the Delight of Browkies
Indulging in the world of desserts often leads us to a delightful intersection of flavors and textures, and few treats embody this better than browkies—an irresistible fusion of brownies and cookies. The Best Fudgy Chewy Browkies, often affectionately known as “brookies,” are a perfect marriage of rich, fudgy brownie layers and soft, chewy cookie tops. These delightful desserts not only satisfy the cravings of brownie lovers but also captivate cookie enthusiasts, making them a versatile treat for any occasion.
Whether you’re hosting a gathering, preparing a sweet surprise for your loved ones, or simply treating yourself to something delicious, browkies are a go-to option that never disappoints. Their unique combination of flavors and textures creates a sensational dessert experience that is both indulgent and comforting. In this article, we will guide you through every step of creating these delectable treats, ensuring that you can impress friends and family with your baking prowess.
Understanding Browkies: The Perfect Dessert Mashup
Examining the Origin of Browkies
The concept of browkies has taken the baking world by storm in recent years, yet their origins can be traced back to the classic dessert staples of brownies and cookies. The brownie itself, believed to have been invented in the late 19th century in the United States, is characterized by its dense, fudgy texture and rich chocolate flavor. Meanwhile, cookies have been enjoyed for centuries, with their roots stemming from various cultures around the globe. The union of these beloved desserts into the browkie has allowed bakers to explore an innovative and delightful way to enjoy two favorites in one bite.
Exploring the Popularity of Browkies in Modern Baking
The rise of social media and food blogs has significantly contributed to the popularity of browkies. Bakers and dessert enthusiasts have taken to platforms such as Instagram and Pinterest to share their creations, showcasing the stunning visual appeal of these layered treats. Their eye-catching appearance, often featuring swirls of brownie and cookie batters, makes them a favorite for dessert tables and celebrations.
Moreover, the versatility of browkies allows for endless variations to suit different tastes and dietary preferences. From adding nuts to incorporating flavors like peanut butter or caramel, the possibilities are limited only by one’s imagination. This adaptability has solidified browkies as a staple in modern baking, appealing to a wide audience of dessert lovers.
The Appeal of Combining Brownies and Cookies
The allure of browkies lies in their ability to combine the best features of both brownies and cookies. The fudgy brownie base provides a rich, dense foundation that contrasts beautifully with the soft, chewy texture of the cookie layer. This delightful interplay of flavors and textures creates an indulgent experience that is hard to resist.
Moreover, browkies offer a unique way to satisfy two cravings at once. Whether you prefer the deep, chocolatey goodness of brownies or the comforting sweetness of cookies, browkies deliver both in a single dessert. This duality not only makes them a hit at gatherings but also ensures that they are an enjoyable treat for a variety of palates.
Ingredients Breakdown: What You Need for the Best Browkies
To create the best fudgy chewy browkies, it is essential to understand the ingredients you’ll be working with. Each component plays a critical role in achieving the perfect texture and flavor. Below, we break down the ingredients for both the brownie and cookie layers, highlighting their significance in this delightful dessert.
The Brownie Layer: Essential Ingredients and Their Roles
1. Unsalted Butter: The Foundation of Richness
Unsalted butter is the base of the brownie layer, providing richness and depth of flavor. It is important to use unsalted butter so you can control the saltiness of the dessert.
2. Granulated Sugar: Sweetness and Texture
Granulated sugar adds sweetness to the brownies while also contributing to their chewy texture. It helps create a moist and fudgy consistency that is characteristic of a perfect brownie.
3. Eggs: Binding and Moisture
Eggs are crucial for binding the ingredients together and adding moisture. They also help achieve a tender, fudgy texture that complements the brownie layer.
4. Cocoa Powder: The Heart of the Brownie Flavor
Cocoa powder imparts the rich chocolate flavor that defines brownies. It is important to use high-quality cocoa powder for the best results.
5. All-Purpose Flour: Structure and Stability
All-purpose flour provides the necessary structure and stability to the brownie layer. It helps create a dense, fudgy texture while allowing the brownies to hold their shape during baking.
6. Baking Powder and Salt: Essential Leavening Agents
Baking powder acts as a leavening agent, helping the brownies rise slightly while baking. A pinch of salt enhances the flavor and balances the sweetness.
7. Semi-Sweet Chocolate Chips: Adding Chocolatey Goodness
Semi-sweet chocolate chips are the finishing touch to the brownie layer, providing pockets of melty chocolate that enhance the overall flavor and texture.
The Cookie Layer: Key Ingredients for Chewy Perfection
1. Unsalted Butter: Softened for Creaminess
Similar to the brownie layer, softened unsalted butter is essential for the cookie layer. It adds creaminess and flavor while ensuring a chewy texture.
2. Granulated and Brown Sugar: Balancing Sweetness and Flavor
A combination of granulated and brown sugars provides the perfect balance of sweetness and flavor. Brown sugar adds moisture and a hint of caramel flavor, contributing to the chewy texture.
3. Egg: For Binding and Moisture
Like in the brownie layer, an egg is necessary for binding the cookie ingredients together and providing moisture, resulting in a tender cookie.
4. Vanilla Extract: Enhancing Overall Flavor
Vanilla extract elevates the flavor profile of the cookie layer, adding a warm and inviting aroma that complements the chocolate.
5. All-Purpose Flour: For Chewy Texture
All-purpose flour is the primary dry ingredient in the cookie layer, contributing to its chewy texture. It helps create a structure that holds the cookie together.
6. Baking Soda and Salt: Leavening and Flavor
Baking soda serves as a leavening agent, helping the cookies rise slightly while baking. A pinch of salt enhances the flavor and balances the sweetness.
7. Semi-Sweet Chocolate Chips: A Chocolate Lover’s Dream
Just like in the brownie layer, semi-sweet chocolate chips are a must for the cookie layer. They provide bursts of chocolatey goodness that make each bite irresistible.
Step-by-Step Instructions: How to Make Fudgy Chewy Browkies
Creating the best fudgy chewy browkies begins with proper preparation. Follow these initial steps to set yourself up for success:
Preheating and Preparing Your Baking Dish
Importance of Preheating the Oven
Before diving into the recipe, it’s crucial to preheat your oven. Preheating ensures that your browkies cook evenly and achieve the perfect texture. Set your oven to 350°F (175°C) and allow it to fully preheat while you prepare your batters. This step is essential for achieving that sought-after fudgy consistency in the brownies and the chewy texture in the cookies.
Preparing the Baking Dish for Easy Removal
Next, prepare your baking dish to ensure an easy release of the finished browkies. Line a 9×13-inch baking pan with parchment paper, leaving some overhang on the sides. This will allow you to lift the browkies out of the pan effortlessly after baking. Lightly grease the parchment paper with cooking spray or butter to further prevent sticking.
Once your oven is preheated and your baking dish is ready, you can begin crafting the delicious brownie and cookie layers that will come together to form your delightful browkies!
Stay tuned for the next part of this article, where we will dive into the detailed instructions for creating the fudgy brownie layer, followed by the chewy cookie layer, culminating in the perfect assembly of your browkies.
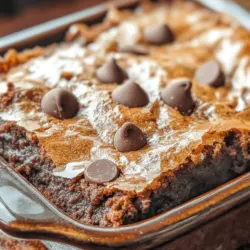
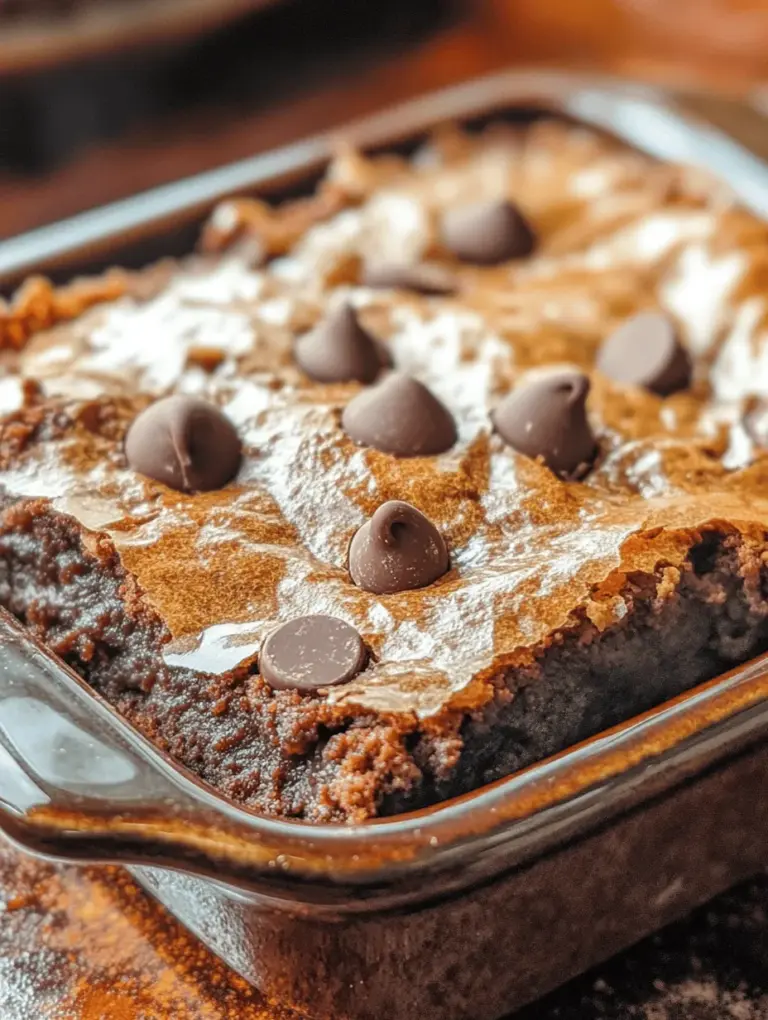
{{image_1}}
Creating the Brownie Layer
Melting the Butter: Techniques and Tips
To begin crafting the brownie layer of your Browkies, start by melting the butter. This can be done using two effective methods: the stovetop or the microwave. If you choose the stovetop, place your butter in a small saucepan over low heat, stirring constantly until it is completely melted. Be cautious to avoid browning it, as this can alter the flavor of your brownies.
Alternatively, if you opt for the microwave, cut the butter into small cubes and place it in a microwave-safe bowl. Heat in short bursts of 15 seconds, stirring in between until fully melted. This method is quick and ensures that the butter doesn’t burn. Once your butter is melted, allow it to cool slightly before continuing with the next steps. This will prevent the heat from cooking the eggs when you mix them in.
Mixing Ingredients: Achieving the Perfect Brownie Batter
With your melted butter ready, it’s time to create the brownie batter. In a large mixing bowl, combine the melted butter with granulated sugar and brown sugar. The combination of these sugars creates a rich, fudgy texture that is the hallmark of a great brownie. Use a whisk or electric mixer on medium speed to blend these ingredients until they are well incorporated and smooth.
Next, add in the eggs, one at a time, mixing well after each addition. This step is crucial as it introduces air into the batter, allowing it to rise slightly while baking. Follow this with a splash of vanilla extract for added depth of flavor. Once the wet ingredients are combined, sift in your dry ingredients: all-purpose flour, unsweetened cocoa powder, baking powder, and salt. Gently fold the dry ingredients into the wet mixture using a spatula or wooden spoon, being careful not to overmix, as this can lead to a denser brownie.
Tips for Folding in Chocolate Chips
Now comes the exciting part—folding in the chocolate chips! Use semi-sweet or dark chocolate chips for a more intense flavor, or opt for milk chocolate if you prefer a sweeter treat. Gently fold the chocolate chips into your brownie batter, ensuring they are evenly distributed throughout the mixture. This step should be done carefully to maintain the texture of your batter. Once completed, set your brownie batter aside while you prepare the cookie layer.
Crafting the Cookie Layer
Creaming Butter and Sugars: Achieving the Right Texture
To make the cookie layer, start with softened butter in a large mixing bowl. Use an electric mixer to cream the butter until it is light and fluffy, which typically takes about 2-3 minutes. This process incorporates air into the butter, leading to a softer cookie texture. Gradually add granulated sugar and brown sugar to the creamed butter, mixing until combined and creamy.
Next, add in your eggs and vanilla extract, mixing thoroughly until well combined. The eggs give the cookie dough structure and moisture, while the vanilla adds a wonderful aromatic flavor.
Combining Wet and Dry Ingredients: Techniques for Best Results
In a separate bowl, whisk together the dry ingredients: all-purpose flour, baking soda, and a pinch of salt. Slowly add this dry mixture to the wet ingredients, mixing on low speed until just combined. Be cautious not to overwork the dough, as this can lead to tougher cookies.
Ensuring Even Distribution of Chocolate Chips
Finally, fold in your choice of chocolate chips—milk, dark, or even white chocolate can be delicious. Ensure that the chips are evenly distributed throughout the cookie dough for that perfect bite of chocolate in every piece. This will enhance the overall flavor and texture of your Browkies.
Assembling Your Browkies
Layering Techniques: Achieving the Perfect Ratio of Brownie to Cookie
Now that you have both your brownie batter and cookie dough prepared, it’s time to assemble your Browkies. Preheat your oven to 350°F (175°C) and prepare a baking pan by greasing it or lining it with parchment paper. Start by pouring half of the brownie batter into the bottom of the prepared pan, spreading it evenly with a spatula.
Next, take spoonfuls of the cookie dough and drop them over the brownie layer, ensuring an even distribution. This method allows the cookie dough to spread out as it bakes, creating a delightful contrast between the chewy brownie and cookie layers.
Spreading the Cookie Layer: Tips for an Even Spread
Once the cookie dough is dropped onto the brownie layer, use a spatula or your fingers to gently spread it out. Be careful not to disturb the brownie layer too much; you want to maintain the distinct layers while allowing them to meld slightly during baking.
Finally, pour the remaining brownie batter over the cookie layer, smoothing it out to create a beautiful top layer. This method ensures that each bite of your Browkies has the perfect balance of chewy brownie and delicious cookie.
Baking to Perfection
Ideal Baking Times and Temperature
Place your assembled Browkies in the preheated oven and bake for 25-30 minutes. The exact baking time may vary depending on your oven and the type of pan you use, so it’s essential to keep an eye on them as they bake.
Recognizing When Browkies Are Done: The Toothpick Test
To determine if your Browkies are perfectly baked, perform the toothpick test. Insert a toothpick into the center of the pan; if it comes out with a few moist crumbs but not wet batter, your Browkies are ready. Keep in mind that they will continue to cook slightly from residual heat after being removed from the oven.
Cooling and Serving Your Browkies
Importance of Cooling: Texture and Flavor Development
Once your Browkies are out of the oven, allow them to cool in the pan on a wire rack for at least 15-20 minutes. This cooling period is crucial for the texture and flavor to develop. If you cut them too early, they may crumble or fall apart.
Tips for Cutting Browkies into Perfect Squares
After the cooling period, it’s time to cut your Browkies into squares. To achieve clean cuts, use a sharp knife and wipe it clean between cuts to prevent sticking. Aim for bite-sized pieces to make them easy to serve and enjoy.
Flavor Variations and Customization: Making Browkies Your Own
Exploring Flavor Add-Ins: Nuts, Caramel, and More
Feel free to get creative with your Browkies! Consider adding chopped nuts like walnuts or pecans for an extra crunch. If you’re a caramel lover, swirl in some caramel sauce before baking for a rich, gooey texture that complements the chocolate beautifully.
Adjusting the Sweetness: Balancing Sugar Levels
If you prefer a less sweet treat, you can reduce the sugar in either layer of the Browkies. However, keep in mind that the balance of flavors is essential, so consider taste testing as you adjust.
Experimenting with Different Types of Chocolate Chips
Don’t hesitate to experiment with different types of chocolate! Mixing semi-sweet, dark, and white chocolate chips can create a delightful medley of flavors and textures. You can even try flavored chocolate chips, like mint or peanut butter, to elevate your Browkies even further.
Storing and Serving Suggestions for Browkies
Proper Storage Techniques to Maintain Freshness
To keep your Browkies fresh, store them in an airtight container at room temperature for up to one week. If you want to keep them longer, consider freezing them. Wrap individual pieces in plastic wrap, then place them in a freezer-safe bag. They can be frozen for up to three months.
Ideas for Serving: Pairing Browkies with Ice Cream or Whipped Cream
Browkies are delicious on their own, but for an extra special treat, serve them warm with a scoop of vanilla ice cream or a dollop of whipped cream. The contrast of warm Browkies with cold toppings creates a delightful dessert experience.
Creative Presentation Tips for Special Occasions
For special occasions, consider dusting your Browkies with powdered sugar or drizzling them with a chocolate ganache. You can also serve them on a beautiful platter with fresh berries for a pop of color. These presentation tips will impress your guests and make your Browkies the star of any dessert table.
Conclusion: The Joy of Baking and Sharing Browkies
The journey of creating The Best Fudgy Chewy Browkies is not just about following a recipe; it’s about indulging in the joy of baking and the satisfaction of sharing delicious treats with loved ones. With this detailed guide, you are now equipped to create these delightful desserts that are sure to become a favorite in your household. Enjoy the process and the delicious results! Whether you’re celebrating a special occasion or simply satisfying your sweet tooth, these Browkies are bound to bring smiles and satisfaction to everyone who tries them. Happy baking!