Introduction
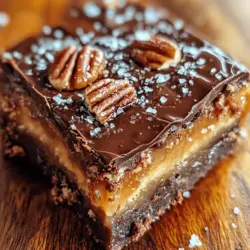
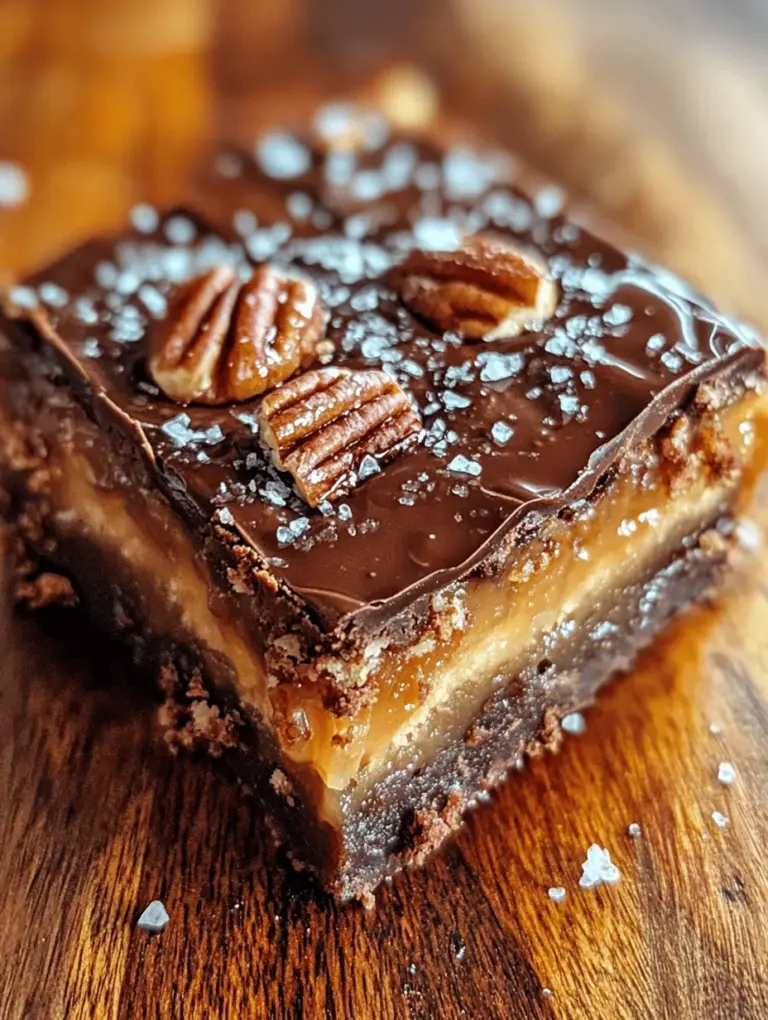
Turtle bars are a beloved dessert that perfectly captures the essence of indulgence. With their rich layers of chocolate, gooey caramel, and crunchy pecans, these bars offer a symphony of flavors and textures that is hard to resist. Whether you’re hosting a gathering or simply looking to satisfy your sweet tooth, turtle bars are a delightful treat that brings joy not only to the maker but also to those who enjoy them. The beauty of homemade treats lies in the personal touch—sharing these decadent bars with friends and family creates lasting memories and warms the heart.
Understanding Turtle Bars
The origin of turtle bars can be traced back to the classic turtle candy, which consists of caramel and nuts coated in chocolate. This delightful confection has been a favorite for generations, inspiring the creation of turtle bars that embody the same delicious components in a convenient, easy-to-eat form. The combination of the smooth chocolate layer, the sweet and sticky caramel, and the crunchy pecans makes turtle bars an irresistible dessert that appeals to a wide audience.
When you take a bite of a turtle bar, you’re met with a complex interplay of flavors: the rich chocolate melts in your mouth, while the caramel provides a sweet, gooey contrast, and the pecans add a satisfying crunch. Each layer contributes to a delightful experience that leaves you wanting more. To achieve the best results, it is crucial to use high-quality ingredients, as they significantly impact the final taste and texture of the bars.
Ingredient Breakdown
Creating the perfect turtle bars requires a harmonious blend of ingredients, each playing a vital role in achieving that sought-after decadence. Here’s a closer look at the essential components of this recipe:
– Unsalted Butter: This ingredient not only adds richness but also contributes moisture to the bars, ensuring they remain soft and chewy.
– Brown and Granulated Sugar: The combination of these sugars sweetens the bars while also influencing their texture. Brown sugar, with its molasses content, adds a deeper flavor and chewiness.
– Eggs: Eggs are integral for binding the ingredients together and providing structure. They help the bars rise and maintain their shape during baking.
– Vanilla Extract: A splash of vanilla extract enhances the overall flavor profile, rounding out the sweetness and adding a subtle warmth.
– All-Purpose Flour and Cocoa Powder: These ingredients form the base of the bars, with cocoa powder infusing a rich chocolate flavor that complements the other components.
– Baking Powder and Salt: Baking powder acts as a leavening agent, ensuring the bars rise properly, while salt balances the sweetness and enhances the flavors.
– Pecans: Chopped pecans introduce a delightful crunch and nuttiness, which are essential to the turtle experience.
– Caramel Sauce: The star of the show, caramel sauce brings a sticky sweetness that binds the layers together and adds a gooey texture.
– Chocolate Chips: A generous layer of chocolate chips adds an extra dimension of chocolate flavor, creating a luscious topping for the bars.
– Flaky Sea Salt: Though optional, a sprinkle of flaky sea salt on top elevates the flavor, providing a contrast to the sweetness of the chocolate and caramel.
Step-by-Step Instructions
Now that we’ve explored the tantalizing world of turtle bars and their key ingredients, let’s dive into the step-by-step process of preparing these delightful treats.
Preparing the Baking Pan and Preheating the Oven
1. Preheat Your Oven: Start by preheating your oven to 350°F (175°C). This ensures that your bars will bake evenly and reach the perfect texture.
2. Prepare the Baking Pan: Line an 8×8-inch baking pan with parchment paper, allowing some overhang on the sides. This will make it easier to lift the bars out once they are baked. If you don’t have parchment paper, you can lightly grease the pan with butter or cooking spray.
With your oven heated and your baking pan prepared, you’re ready to start mixing the ingredients. The next steps will guide you through creating the decadent base for your turtle bars, layering in the caramel, and topping them off with rich chocolate. Stay tuned for the complete recipe and transformation of your kitchen into a sweet haven!
{{image_1}}
Combining the Wet Ingredients for a Rich Batter
To create the decadent base for your Turtle Bars, start by combining the wet ingredients. In a medium mixing bowl, whisk together 1 cup of softened unsalted butter and 1 cup of brown sugar until the mixture is creamy and well-blended. This step is crucial as it not only adds richness but also creates a smooth texture that will hold the bars together. Next, add in 4 large eggs, one at a time, ensuring each egg is fully incorporated before adding the next. This gradual mixing helps to create an airy batter that will rise beautifully in the oven. Finally, add 1 teaspoon of vanilla extract for an aromatic lift that enhances the overall flavor profile of the bars.
Sifting and Combining Dry Ingredients for a Smooth Texture
While your wet ingredients are coming together, it’s a great time to focus on the dry ingredients. In a separate bowl, sift together 2 cups of all-purpose flour, 1 teaspoon of baking powder, and ½ teaspoon of salt. Sifting these ingredients is essential as it removes any clumps and incorporates air, leading to a fluffier texture in the final product. Once sifted, gently fold the dry mixture into the wet batter using a spatula. Be careful not to overmix; you want to combine the ingredients just until no streaks of flour remain. This will ensure that your Turtle Bars have a tender crumb.
Folding in Pecans for Added Crunch
Now comes the exciting part—adding pecans! Fold in 1 cup of coarsely chopped pecans into the batter. The pecans not only provide a delightful crunch but also contribute to the overall flavor, making these Turtle Bars reminiscent of the classic turtle candies. Make sure to distribute the pecans evenly throughout the mixture so that each bite is filled with that nutty goodness.
Layering the Batter and Caramel for a Marbled Effect
To achieve the hallmark marbled effect of Turtle Bars, prepare your baking pan by lining it with parchment paper and preheating your oven to 350°F (175°C). Pour half of the batter into the prepared pan and spread it evenly. Next, drizzle 1 cup of prepared caramel sauce over the batter. You can either make your own caramel sauce or use store-bought for convenience. Using a knife or a toothpick, gently swirl the caramel into the batter, creating a beautiful marbled design. Once you’ve added the caramel layer, pour and spread the remaining batter on top, using a spatula to seal in the caramel layer beneath. This layering technique not only looks stunning but also ensures that the caramel melts beautifully into the bars as they bake.
Baking Tips: Signs of Doneness and Testing with a Toothpick
Place the pan in the preheated oven and bake for about 30-35 minutes. The key to achieving perfectly baked Turtle Bars lies in knowing when they are done. Look for a golden brown edge with a slightly soft center. The bars will continue to set as they cool, so don’t worry if they seem a tad undercooked in the middle. To test for doneness more accurately, insert a toothpick into the center of the bars. If it comes out clean or with just a few moist crumbs (but not wet batter), your Turtle Bars are ready to come out of the oven.
Adding Chocolate and Caramel After Baking for a Gooey Finish
Once the bars are baked to perfection, remove them from the oven and let them cool for about 10 minutes. While they are still warm, drizzle additional caramel sauce and ½ cup of melted chocolate (dark or milk chocolate, depending on your preference) over the top. This step not only adds an extra layer of richness but also makes for an irresistible gooey finish. Allow the bars to cool completely in the pan before removing them to ensure that the toppings set properly.
Cooling and Cutting for the Perfect Presentation
After letting your Turtle Bars cool in the pan for at least an hour, carefully lift them out using the parchment paper. Place them on a cutting board and use a sharp knife to cut them into squares or rectangles, depending on your serving preference. For an elegant touch, consider wiping the knife with a damp cloth between cuts to maintain clean edges. The presentation is just as important as the taste, so arrange the bars on a platter or serve them individually wrapped in parchment paper for a delightful treat that guests will admire.
Baking Tips and Techniques
Best Practices for Achieving a Perfect Bake
Achieving the perfect Turtle Bars requires attention to detail. Here are some best practices to keep in mind:
– Accurate Measurements: Always use precise measurements for your ingredients. Baking is a science, and even slight variations can affect the final product. Use a kitchen scale for the most accurate results, especially with flour and sugar.
– Marbling Technique: For the ideal marbled effect, don’t over-swirl the caramel into the batter. A few gentle swirls will create a beautiful design while maintaining distinct layers.
– Cooling Methods: Allow the bars to cool in the pan for at least 10 minutes before transferring them to a wire rack. This helps them firm up, making them easier to cut and serve.
Suggestions for Customizing the Bars
Feel free to get creative! You can customize your Turtle Bars by substituting different nuts such as walnuts or almonds, or experimenting with various chocolate types, like white chocolate or dark chocolate. For a twist on flavor, consider incorporating a tablespoon of espresso powder into the batter for a mocha flavor or adding a sprinkle of sea salt on top of the chocolate drizzle for a sweet-salty balance.
Storage and Serving Suggestions
Best Ways to Store Turtle Bars to Maintain Freshness
To keep your Turtle Bars fresh, store them in an airtight container at room temperature for up to five days. If you want to extend their shelf life, they can also be refrigerated for up to two weeks. For longer storage, consider freezing them. Wrap each bar individually in plastic wrap and then place them in a freezer-safe container; they’ll stay fresh for up to three months. When you’re ready to enjoy them, simply thaw at room temperature for a few hours.
Ideas for Serving: Pairing with Coffee or Ice Cream
Turtle Bars make a delightful treat on their own, but they can be even more enjoyable when paired with a warm beverage or dessert. Serve them alongside a cup of freshly brewed coffee or a scoop of vanilla ice cream for a classic combination. The contrast between the warm bars and the cold ice cream creates a mouthwatering experience that is hard to resist.
Presentation Tips for Special Occasions or Gatherings
If you’re serving Turtle Bars for a special occasion, consider garnishing them with additional pecans or a sprinkle of sea salt for a gourmet touch. Arrange the bars on a decorative platter, and place some fresh fruit, like strawberries or raspberries, around the edges for a pop of color. This not only enhances the presentation but also adds a refreshing contrast to the rich flavors of the bars.
Health Considerations
Indulgence and Moderation in Desserts
While Turtle Bars are a delicious indulgence, it’s important to enjoy them in moderation. They are rich in flavor and calories, making them a perfect treat for special occasions or as a sweet reward after a long day. Consider sharing them with friends or family to spread the joy and reduce the temptation to overindulge.
Potential Substitutions for Healthier Versions
For those looking to enjoy a slightly healthier version of Turtle Bars, consider these substitutions:
– Lower Sugar: You can reduce the amount of brown sugar in the recipe by up to a third without significantly impacting the texture.
– Alternative Flours: Experiment with whole wheat flour or almond flour for added fiber and nutrients.
– Dark Chocolate: Using dark chocolate over milk chocolate can provide antioxidants and reduce sugar content.
Conclusion
Making Turtle Bars is not just about creating a delicious dessert; it’s about the joy of baking and the satisfaction of sharing homemade treats with loved ones. These rich, gooey bars are perfect for celebrations, special occasions, or simply as a weekend baking project. Remember to savor the process, from combining the ingredients to drizzling the chocolate and caramel. Don’t forget to share this delightful recipe with friends and family, inviting them to join you in creating sweet memories. Homemade treats like Turtle Bars have a special place in our hearts and kitchens, bringing comfort and happiness to everyday life. Enjoy the baking adventure, and relish every bite of your decadent Turtle Bars!