Introduction
Imagine a blissful escape to a tropical paradise with every bite of a delicious dessert. Introducing Pineapple Bliss Bars—a delectable treat that brings the sunshine of the tropics straight to your kitchen. These bars are not only mouthwatering but also a celebration of tropical flavors that have gained immense popularity in the dessert world. From fruity cakes to refreshing sorbets, tropical flavors, particularly pineapple, have become a staple for those looking to indulge their sweet tooth while relishing a taste of the islands.
The allure of Pineapple Bliss Bars lies not only in their vibrant taste but also in the health benefits of their natural ingredients. Pineapple, for instance, is packed with vitamins, minerals, and enzymes that aid digestion and boost immunity. The combination of wholesome ingredients like oats, nuts, and coconut adds a nutritional punch, making these bars not just a guilty pleasure but a healthier dessert option too. In this article, we will explore the irresistible charm of Pineapple Bliss Bars, offering a detailed breakdown of their components and a step-by-step guide to creating this tropical delight.
Why Pineapple Bliss Bars are Irresistible
One bite of these Pineapple Bliss Bars will convince you of their irresistible nature. The flavor profile is a delightful symphony, combining the sweetness of ripe pineapple, the nuttiness of almonds, and the richness of coconut. Each ingredient harmonizes perfectly, creating a dessert that feels both indulgent and refreshing. The sweetness of the pineapple is complemented by the natural flavors of coconut flakes and honey or maple syrup, resulting in a treat that dances on your palate.
Moreover, the texture contrast in these bars is nothing short of fantastic. The chewy rolled oats offer a hearty base, while the crunchy nuts add an enjoyable crunch. Smooth chocolate chips can be mixed in for those who love an extra layer of richness, creating a delightful experience with every bite. The combination of textures makes these bars not only satisfying but also fun to eat.
What’s more, Pineapple Bliss Bars cater to various dietary preferences, making them an inclusive treat for everyone. They can easily be adapted to be gluten-free, dairy-free, and refined sugar-free. This versatility ensures that whether you are following a specific diet or simply trying to make healthier choices, you can still enjoy a slice of tropical bliss.
Ingredient Breakdown
To create these delightful Pineapple Bliss Bars, it is essential to understand the role of each ingredient in contributing to flavor, texture, and health benefits. Below is a breakdown of the primary ingredients that make these bars truly special:
Crushed Pineapple
Crushed pineapple is the star ingredient of this recipe, adding a burst of tropical flavor and natural sweetness. Beyond its delightful taste, pineapple is rich in vitamin C, manganese, and bromelain, an enzyme known for its anti-inflammatory properties. This fruit not only enhances the flavor of the bars but also provides a good dose of nutrients that support overall health.
Coconut Flakes
Coconut flakes bring a natural sweetness and chewy texture to the bars. They complement the pineapple beautifully, creating a cohesive tropical flavor. Coconut is also a source of healthy fats, specifically medium-chain triglycerides (MCTs), which can provide a quick source of energy. Additionally, the fiber content in coconut aids in digestion, making it a beneficial addition to this recipe.
Almond Flour
Using almond flour instead of traditional wheat flour offers a gluten-free alternative, making these bars accessible to those with gluten sensitivities. Almond flour is high in protein, healthy fats, and vitamin E, contributing to heart health and providing a satisfying texture. It also imparts a subtle nutty flavor that enhances the overall taste of the bars.
Rolled Oats
Rolled oats are a fantastic source of dietary fiber, which is essential for maintaining good digestive health. They also help to keep you feeling full longer, making these bars a great snack option. The soluble fiber in oats can aid in lowering cholesterol levels and promoting heart health. When baked, oats yield a chewy texture that is delightful and satisfying.
Honey or Maple Syrup
For sweetness, you can choose between honey or maple syrup, both of which are natural sweeteners that add flavor without the refined sugars found in many desserts. Honey has antibacterial properties and can soothe sore throats, while maple syrup is rich in antioxidants and has a lower glycemic index than regular sugar, making it a healthier choice. Both options provide moisture to the bars and enhance their overall taste.
Coconut Oil
Coconut oil plays a dual role in this recipe—it serves as a healthy fat and contributes to the bars’ moistness. Rich in medium-chain fatty acids, coconut oil can boost metabolism and provide sustained energy. Its subtle coconut flavor also complements the other tropical ingredients, ensuring a cohesive taste throughout the bars.
Vanilla Extract
Vanilla extract is a key ingredient that enhances the flavors of baked goods. Its aromatic qualities elevate the taste profile of Pineapple Bliss Bars, making them more enjoyable. Additionally, it has been linked to various health benefits, including antioxidant properties and mood enhancement.
Baking Powder, Salt, and Cinnamon
Baking powder is essential for helping the bars rise and achieve the perfect texture. A pinch of salt balances the sweetness and enhances the overall flavor. Cinnamon, a warm and fragrant spice, adds depth and complexity to the bars, complementing the tropical ingredients beautifully. It also has anti-inflammatory properties and can help regulate blood sugar levels.
Optional Ingredients: Chopped Walnuts and Mini Chocolate Chips
To add texture and richness, you can include optional ingredients like chopped walnuts and mini chocolate chips. Walnuts are an excellent source of omega-3 fatty acids, promoting heart health, while chocolate chips can elevate the flavor, making these bars even more indulgent. These optional ingredients allow for customization and enable you to tailor the bars to your taste preferences.
Step-by-Step Instructions
Creating Pineapple Bliss Bars is straightforward, and following these detailed steps will ensure you achieve the best results.
Preheating the Oven and Preparing the Baking Dish
Before diving into mixing the ingredients, preheat your oven to 350°F (175°C). Proper oven temperature is crucial for even baking and achieving the desired texture. While the oven is heating, prepare your baking dish by lining it with parchment paper. This will prevent the bars from sticking and make it easier to remove them from the dish once baked. For best results, leave a little overhang of parchment paper on the sides, which will act as a handle when you lift the bars out.
Mixing Dry Ingredients
In a large mixing bowl, combine your dry ingredients: almond flour, rolled oats, baking powder, salt, cinnamon, and coconut flakes. It’s important to mix these ingredients thoroughly to ensure they are evenly distributed. This will help to achieve consistent baking results, as uneven distribution can lead to some areas being overly dry while others remain too moist. Use a whisk or a fork to break up any clumps and ensure that the dry ingredients are well incorporated.
Combining Wet Ingredients
In a separate bowl, mix your wet ingredients: crushed pineapple (drained), coconut oil, honey or maple syrup, and vanilla extract. Whisk these together until well combined. The crushed pineapple should be evenly blended with the other wet ingredients, allowing for a consistent flavor throughout the bars. Once combined, pour the wet mixture into the bowl of dry ingredients and stir until just combined. Be careful not to overmix, as this could result in dense bars rather than the light, chewy texture we desire.
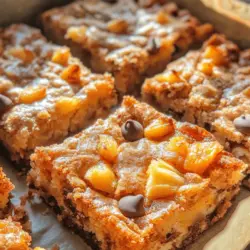
As you embark on this tropical baking adventure, the anticipation of enjoying your very own Pineapple Bliss Bars will surely build. Each step brings you closer to an irresistible treat that embodies the essence of summer, no matter the season. So gather your ingredients, preheat your oven, and get ready to indulge in a delightful baking experience that will transport your taste buds to a sun-soaked paradise. Stay tuned for the next part, where we will explore the remaining steps to perfect these bars and offer additional tips for the best results.
{{image_1}}
Significance of Temperature in Melted Ingredients
When preparing Irresistible Pineapple Bliss Bars, the temperature of your melted ingredients plays a crucial role in achieving the desired texture and flavor. Ingredients such as butter, chocolate, or coconut oil should be melted gently to avoid any separation or graininess. Use a double boiler or a microwave at low power to ensure even melting. This approach not only preserves the integrity of the ingredients but also helps them blend seamlessly into the mixture, resulting in a smooth, luscious batter that sets beautifully once baked.
How to Achieve a Smooth Mixture
To achieve a smooth mixture, it’s essential to blend your melted ingredients with precision. Start by whisking the melted butter (or oil) with sugar until well combined. This process aerates the mixture, creating a lighter batter. Gradually incorporate your eggs, one at a time, ensuring that each egg is fully mixed in before adding the next. This step helps in emulsifying the mixture, leading to a creamy consistency. A hand mixer or stand mixer can simplify this process, but be careful not to overmix, as this can lead to a denser texture.
Incorporating Pineapple and Optional Ingredients
The star of our recipe, the pineapple, should be prepared properly to prevent excess moisture from ruining the texture of the bars. Use fresh pineapple for the best flavor, and ensure it is finely chopped. If using canned pineapple, drain it well and pat it dry with paper towels to remove excess juice. When incorporating the pineapple into your batter, fold it in gently after you’ve combined the wet and dry ingredients. This method ensures that the pineapple is evenly distributed without deflating the batter.
Optional ingredients such as shredded coconut, nuts, or chocolate chips can also be added at this stage. If you choose to include these extras, note that nuts should be chopped into small pieces, and chocolate chips should be measured out to avoid overpowering the tropical flavors of the pineapple.
Techniques for Folding in Additional Ingredients Without Losing Air
Folding is a gentle technique designed to keep the air you’ve incorporated into the batter intact. To fold in your chosen ingredients, use a spatula or a wooden spoon. Start by adding a portion of your additional ingredients to the batter, then scoop from the bottom of the bowl and lift it over the top. Turn the bowl a quarter turn and repeat until the ingredients are just combined. This method prevents overmixing, which can lead to dense bars.
Combining All Ingredients
Once you’ve successfully folded in the pineapple and any optional ingredients, it’s time to combine all the mixture components. Begin by mixing your dry ingredients—such as flour, baking powder, and salt—in a separate bowl. Gradually add these dry ingredients to your wet mixture, stirring gently. Ensure there are no dry pockets left, but also avoid overmixing. A well-combined batter should have a uniform consistency, free of lumps but still light and fluffy.
Ensuring a Uniform Mixture: Tips and Techniques
For the best results, use a whisk or a spatula to ensure a uniform mixture. Scrape down the sides of the bowl frequently to incorporate all ingredients. If you notice any flour clumps or unmixed ingredients at the bottom of the bowl, gently fold them back into the batter. The goal is to create a homogenous mixture that will bake evenly.
Transferring to Baking Dish
Once your batter is fully mixed, it’s time to transfer it into a prepared baking dish. Line the baking dish with parchment paper, allowing some overhang on the sides for easy removal later. This helps prevent sticking and makes cleanup easier. Pour the batter into the dish and spread it evenly using a spatula.
Packing the Mixture Tightly for Optimal Texture
To achieve the perfect texture, pack the mixture tightly into the baking dish. Use the spatula to press down firmly, ensuring the batter is level and compact. This step is essential as it helps the bars hold their shape and ensures they bake evenly. A well-packed batter will create a denser and more satisfying bar.
Baking Process
Preheat your oven to the temperature specified in your recipe—usually around 350°F (175°C). Place your baking dish in the center of the oven to promote even baking. The baking time will vary depending on your specific oven, but generally, Pineapple Bliss Bars take about 25-30 minutes to bake. As they bake, the edges will begin to pull away from the sides of the dish, and the top will develop a golden color.
Understanding Baking Times and Visual Cues for Doneness
Keep an eye on the bars as they approach the end of the baking time. A toothpick inserted into the center should come out clean or with a few moist crumbs attached, but not wet batter. If the toothpick comes out with wet batter, continue baking for an additional 5 minutes, checking periodically. It’s essential not to overbake, as this can lead to dry, crumbly bars.
Importance of Cooling Before Slicing
Once baked, remove the dish from the oven and allow the bars to cool in the pan for about 10-15 minutes. This cooling time is crucial as it helps the bars set up properly. After cooling slightly, use the parchment paper overhang to lift the bars out of the pan and onto a wire rack to cool completely. Cutting into warm bars can lead to a messy presentation, so patience is key here.
Serving Suggestions
When it comes to serving your Pineapple Bliss Bars, consider the ideal serving temperature. These bars can be enjoyed at room temperature or chilled in the refrigerator for a refreshing twist. For an extra layer of flavor, pair them with a scoop of vanilla ice cream or a dollop of whipped cream.
Pairing Ideas: Complementing Drinks or Additional Toppings
Enhance your serving experience by pairing the bars with complementary drinks. A tropical smoothie, coconut water, or even a refreshing iced tea can elevate your dessert experience. For additional toppings, consider a sprinkle of toasted coconut flakes, a drizzle of chocolate ganache, or fresh fruit slices to add visual appeal and flavor contrast.
Presentation Tips for Serving Guests
To impress your guests, consider cutting the bars into neat squares or triangles and arranging them on a decorative platter. A sprinkle of powdered sugar on top adds a touch of elegance. For a more tropical vibe, garnish with fresh mint leaves or edible flowers, creating an inviting presentation that showcases the vibrant flavors of the bars.
Nutritional Information
Understanding the nutritional content of your Pineapple Bliss Bars is essential, especially if you’re mindful of dietary choices. Each serving (1 bar) typically contains approximately 150-200 calories, depending on the specific ingredients used. Key nutrients include:
– Vitamins: Pineapple is rich in Vitamin C, which supports immune function and skin health.
– Minerals: The bars provide essential minerals such as manganese and potassium, beneficial for bone health and muscle function.
– Healthy Fats: If you incorporate nuts or coconut, you’ll also gain healthy fats, which are important for heart health.
When compared to traditional dessert bars, these Pineapple Bliss Bars tend to be lower in calories and sugar, especially when using natural sweeteners or reducing added sugars.
Storing and Reheating Tips
To keep your Pineapple Bliss Bars fresh, store them in an airtight container at room temperature for up to 3 days. If you’d like to extend their shelf life, consider refrigerating them, where they can last up to a week. For optimal texture and flavor, allow them to come to room temperature before serving.
If you need to reheat the bars, use the microwave in short intervals (10-15 seconds) or warm them in an oven set to low heat (around 300°F or 150°C) for about 5-10 minutes. This gentle reheating method helps maintain their moisture and prevent them from becoming tough.
Possible Variations or Adaptations for Different Dietary Needs
This recipe is versatile and can be adapted to suit various dietary needs. For a gluten-free version, substitute all-purpose flour with a gluten-free blend. To make the bars vegan, replace eggs with flax or chia eggs and use plant-based butter. You can also adjust the sweetness by using natural sweeteners like maple syrup or agave nectar for a healthier option.
Conclusion
Pineapple Bliss Bars are not just a treat; they embody the essence of tropical indulgence. With their sweet and tangy pineapple flavor, they make for a delightful dessert perfect for any occasion, be it a summer barbecue, a birthday celebration, or simply a cozy evening at home.
The recipe is not only easy to follow but also allows for creativity in terms of ingredient variations and serving suggestions. Whether you choose to serve them warm, cold, or with a scoop of ice cream, these bars are sure to impress your family and friends.
I encourage you to try making these Pineapple Bliss Bars at home and experience the deliciousness firsthand. Their versatility makes them a fantastic addition to your dessert repertoire, ensuring they will become a beloved favorite for years to come. Enjoy the process, savor the flavors, and indulge in the tropical bliss they bring to your table.