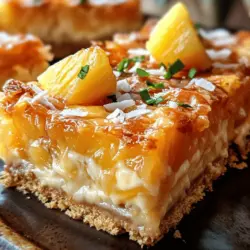
When it comes to desserts that embody the spirit of summer, few can rival the vibrant and refreshing Pineapple Bliss Bars. This delightful treat harmoniously combines the sweet and tangy flavors of pineapple with a creamy filling, all nestled atop a crunchy graham cracker crust. Whether you’re hosting a backyard barbecue, celebrating a birthday, or simply indulging in a sweet craving at home, these bars are sure to impress. Their cheerful appearance and tropical taste make them a perfect choice for gatherings, while their simplicity ensures that even novice bakers can whip them up with ease.
The appeal of Pineapple Bliss Bars lies not only in their flavors but also in the joy of using fresh, high-quality ingredients. The combination of textures—from the crumbly crust to the luscious filling and the optional fresh pineapple garnish—creates a satisfying experience for the palate. Each bite delivers a burst of tropical goodness, making them a crowd-pleaser for all ages. As you prepare these bars, you’ll find that they are not just a dessert; they are an invitation to savor the sunshine, even on the cloudiest of days.
Understanding the Ingredients for Pineapple Bliss Bars
To create the perfect Pineapple Bliss Bars, it’s essential to understand the role of each ingredient contributing to their unique flavor and texture. Let’s break down the key components that come together to form this delightful dessert.
Graham Crackers
The foundation of Pineapple Bliss Bars begins with crushed graham crackers. These sweet, crunchy biscuits provide a flavorful base that perfectly complements the creamy filling. The texture of the graham crackers adds a satisfying crunch, while their inherent sweetness balances the tangy notes of the pineapple. When crushed, they blend seamlessly with melted butter to create a crust that is both sturdy and delicious, making it the ideal vehicle for the luscious topping.
Granulated Sugar and Powdered Sugar
In this recipe, both granulated sugar and powdered sugar play crucial roles. Granulated sugar is typically used in the crust, helping to enhance the flavor and provide a slight sweetness that pairs well with the graham crackers. On the other hand, powdered sugar is used in the creamy filling. Its fine texture allows for smooth blending with the cream cheese, resulting in a velvety consistency. The powdered sugar also contributes to the sweetness of the filling without the graininess that can sometimes occur with granulated sugar.
Unsalted Butter
The richness of the crust is elevated by the use of unsalted butter. Choosing unsalted butter gives you control over the saltiness of the dessert, allowing the natural flavors of the other ingredients to shine through. When melted and combined with the crushed graham crackers, the butter binds the crust together while adding a luxurious richness that enhances the overall flavor profile of the bars.
Crushed Pineapple
Crushed pineapple is the star ingredient in this delightful dessert. Using crushed pineapple packed in juice ensures that you infuse your bars with natural sweetness and a burst of tropical flavor. The juiciness of the pineapple not only adds moisture to the filling but also a distinctive tang that balances the sweetness of the other components. This ingredient is what truly brings the essence of a tropical paradise to each bite.
Cream Cheese
Softened cream cheese is essential for creating the rich and creamy filling that defines Pineapple Bliss Bars. Its smooth texture melds beautifully with the other ingredients, providing a delightful creaminess that enhances the indulgent experience of the dessert. Cream cheese also adds a slight tang, complementing the sweetness of the pineapple and creating a harmonious flavor balance.
Whipped Topping
To achieve a light and airy texture in the filling, whipped topping is added. This ingredient brings an element of fluffiness that contrasts with the dense graham cracker crust and the creamy cream cheese. The whipped topping helps to create a dessert that feels indulgent without being too heavy, making it a perfect treat for warm weather.
Vanilla Extract
Every great dessert benefits from the addition of vanilla extract, and Pineapple Bliss Bars are no exception. Vanilla enhances the overall flavor profile, adding depth and warmth to the filling. Its aromatic qualities elevate the tropical flavors of the pineapple, making each bite even more enjoyable.
Shredded Coconut
To reinforce the tropical theme, shredded coconut is incorporated into the filling. This ingredient adds a delightful texture, providing a slight chewiness that contrasts beautifully with the creaminess of the filling. The coconut also contributes to the overall flavor, evoking memories of sun-soaked beaches and warm breezes.
Fresh Pineapple Chunks (optional)
For those looking to elevate both the presentation and flavor of their Pineapple Bliss Bars, garnishing with fresh pineapple chunks is a fantastic option. These juicy bites of pineapple add an extra burst of freshness, enhancing the tropical vibe of the dessert. They not only look appealing but also provide a refreshing contrast to the rich filling.
Step-by-Step Instructions for Preparing Pineapple Bliss Bars
Now that we’ve explored the ingredients that make up these delightful Pineapple Bliss Bars, let’s dive into the preparation process. Follow these detailed steps to create a dessert that is sure to be a hit at your next gathering.
Step 1: Prepare the Graham Cracker Crust
1. Start by preheating your oven to 350°F (175°C). This ensures that your crust will bake evenly and become golden brown.
2. In a mixing bowl, combine 1 ½ cups of crushed graham crackers with ½ cup of granulated sugar. Mix well to combine the dry ingredients.
3. Melt ¾ cup of unsalted butter in a microwave-safe bowl or on the stovetop. Once melted, pour the butter over the graham cracker and sugar mixture.
4. Stir the mixture until all the crumbs are evenly coated with butter. The mixture should resemble wet sand and hold together when pressed.
5. Press the graham cracker mixture firmly into the bottom of a 9×13-inch baking dish. Use the back of a measuring cup or your fingers to ensure an even and compact layer.
6. Bake the crust in the preheated oven for 8-10 minutes or until lightly golden. Remove it from the oven and allow it to cool while you prepare the filling.
Step 2: Make the Creamy Pineapple Filling
1. In a large mixing bowl, beat 8 ounces of softened cream cheese until smooth and creamy. This will help prevent lumps in your filling.
2. Gradually add 1 cup of powdered sugar, mixing until fully incorporated. Scrape down the sides of the bowl as needed to ensure everything is well blended.
3. Add the crushed pineapple (drained to remove excess juice), 1 cup of whipped topping, and 1 teaspoon of vanilla extract to the cream cheese mixture. Gently fold the ingredients together until fully combined. Be careful not to over-mix, as you want to maintain the light texture from the whipped topping.
4. If desired, mix in ½ cup of shredded coconut for added texture and flavor.
Step 3: Assemble the Bars
1. Once the graham cracker crust has cooled, pour the creamy pineapple filling over the crust. Use a spatula to spread it evenly, ensuring that it reaches all corners of the baking dish.
2. For an optional touch, sprinkle additional shredded coconut over the top of the filling for added texture and visual appeal.
3. Refrigerate the bars for at least 4 hours or until the filling is set. For best results, overnight chilling is recommended to allow the flavors to meld and develop.
With the bars chilling in the refrigerator, you’ll be well on your way to presenting a beautiful, tropical dessert that will have everyone asking for the recipe. The combination of flavors, textures, and the refreshing essence of pineapple makes these Pineapple Bliss Bars an irresistible treat that is perfect for any occasion.
Stay tuned for the next part of this article, where we will delve into additional tips for achieving the best results, common questions about the recipe, and how to serve and store these delightful bars.
{{image_1}}
Preheating the Oven
Preheating the oven is a crucial step in the baking process, especially for recipes like Pineapple Bliss Bars. This initial action ensures that the oven reaches the desired temperature before the crust goes in, promoting even baking. When the crust is placed in a preheated oven, it creates a crispy base that provides the perfect foundation for the creamy filling. An oven that isn’t properly preheated can lead to uneven baking, resulting in a soggy or overly chewy crust. To preheat your oven, set it to 350°F (175°C) and allow it to warm up for about 10-15 minutes while you prepare the crust and filling.
Preparing the Crust
To create a delicious crust for your Pineapple Bliss Bars, you will need graham cracker crumbs, granulated sugar, and melted butter. Start by placing the graham cracker sheets into a food processor and pulse until you achieve fine crumbs. Alternatively, you can place the crackers in a resealable plastic bag and crush them with a rolling pin.
In a mixing bowl, combine 1 ½ cups of graham cracker crumbs with ½ cup of granulated sugar. Stir these dry ingredients together to ensure even distribution. Next, pour in ½ cup of melted butter. It’s important that the butter is not too hot to prevent cooking any of the crumb mixture. Mix everything until the crumbs are well coated and the mixture resembles wet sand.
For a perfect texture, avoid over-mixing; you want to maintain some structure in the crumbs. Once the mixture is ready, press it firmly into the bottom of a greased 9×9-inch baking dish. Use the bottom of a glass or your hands to create an even layer that covers the entire base. This step is vital, as a well-packed crust will hold together beautifully after baking.
Baking the Crust
Once your crust is prepared, it’s time to bake it. Place the baking dish in your preheated oven and bake for 10 to 12 minutes, or until the crust is golden brown. Keep an eye on it to avoid over-baking, as a dark crust can impart a bitter taste. The aroma of the baking graham cracker crust will fill your kitchen, setting the stage for the delightful flavors to come.
After baking, remove the dish from the oven and allow the crust to cool completely. This cooling time is essential, as adding the filling to a warm crust can lead to a soggy bottom. Set the dish on a wire rack or a heat-resistant surface to cool while you prepare the creamy filling.
Making the Creamy Filling
To achieve the smooth and creamy filling that makes Pineapple Bliss Bars so irresistible, start with 8 ounces of softened cream cheese. It’s crucial to soften the cream cheese beforehand—this can be done by leaving it out at room temperature for about 30 minutes or microwaving it for about 10-15 seconds. The goal here is to ensure that the cream cheese blends easily without lumps.
In a mixing bowl, add the softened cream cheese along with 1 cup of granulated sugar and 1 teaspoon of vanilla extract. Using an electric mixer on medium speed, beat the mixture until it becomes smooth and creamy, which should take about 2-3 minutes. Be sure to scrape down the sides of the bowl as needed to incorporate all the ingredients fully.
Once the mixture is smooth, add in ½ cup of sour cream. Continue mixing until everything is well combined. The sour cream will lend a tangy flavor that balances the sweetness of the bars and enhances their creaminess.
Incorporating Pineapple and Topping
Next, it’s time to fold in the pineapple. Use one cup of crushed pineapple, drained well to remove excess moisture. Gently fold the crushed pineapple into the cream cheese mixture using a spatula. Be careful not to over-mix, as you want to maintain the light and airy texture of the filling.
For an added touch of flavor and texture, consider incorporating ½ cup of shredded coconut into the mixture at this stage. The coconut will add a delightful chewiness that complements the smooth filling and the juicy pineapple. Remember to fold it in gently to ensure an even distribution without deflating the mixture.
Spreading the Filling
With your filling fully prepared, it’s time to spread it over the cooled crust. Using a spatula, carefully distribute the filling evenly across the surface of the crust. Start from the center and work your way outwards to ensure even coverage. Take your time during this step, as an even layer will result in a beautifully presented bar once cut.
Once the filling is spread, smooth the top with the spatula or the back of a spoon for a polished finish.
Adding Coconut
After the filling has been evenly spread, it’s time to sprinkle the shredded coconut on top. Use about ½ cup of shredded coconut for this purpose. Evenly distribute it across the top of the filling, ensuring that every bite of the bars will have that delightful coconut flavor. This final touch not only enhances the taste but also adds a beautiful visual appeal, making the bars look inviting and tropical.
Chilling the Bars
One of the most important steps in making Pineapple Bliss Bars is chilling them. After adding the coconut, cover the baking dish with plastic wrap or aluminum foil and place it in the refrigerator. Chilling allows the filling to set properly and enhances the flavors, resulting in a refreshing treat.
For best results, chill the bars for at least 4 hours, or even overnight if time allows. If you prefer a softer texture, you can reduce the chilling time slightly, but keep in mind that the bars will be easier to cut and serve when they are fully set.
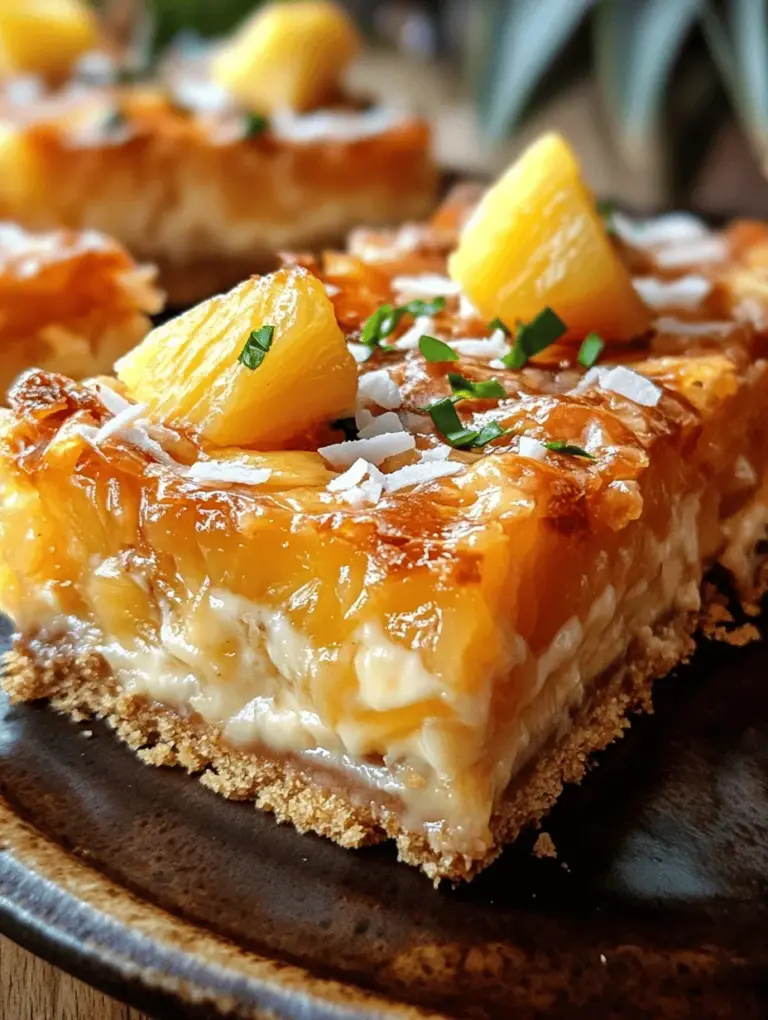
Serving and Garnishing
Once chilled, it’s time to cut your Pineapple Bliss Bars. Use a sharp knife to slice them into squares or rectangles, depending on your preference. For a clean cut, wipe the knife with a damp cloth between cuts.
For an appealing presentation, consider garnishing the bars with fresh pineapple slices or wedges. You can also add a sprinkle of toasted coconut on top for an extra touch of flavor. Serve the bars chilled, straight from the refrigerator, to fully enjoy their refreshing taste.
Nutritional Information and Serving Suggestions
Pineapple Bliss Bars are not only delicious but also offer a delightful balance of flavors. Each bar contains approximately 200 calories, 12 grams of sugar, and 8 grams of fat, making them a delightful treat without being overly indulgent.
For an elevated dessert experience, serve these bars alongside a scoop of vanilla ice cream or whipped cream. This combination enhances the tropical flavor profile and adds a creamy contrast to the bars. Pair them with a light tropical fruit salad for a well-rounded dessert that captures the essence of summer.
Why Pineapple Bliss Bars Are Perfect for Any Occasion
Pineapple Bliss Bars are a versatile dessert choice that can brighten up any occasion. Their tropical flavor makes them a perfect fit for summer picnics, barbecues, and beach parties. The bright, cheerful appearance of the bars adds a festive touch to birthday parties and holiday gatherings.
These bars are also easily transportable, making them an ideal dessert to bring to potlucks or gatherings. Their refreshing flavor and creamy texture are sure to impress friends and family alike, ensuring that they become a staple at your events.
Conclusion: Enjoying the Sweet Taste of Summer Year-Round
In conclusion, Pineapple Bliss Bars are not only simple to make but also offer a delightful, refreshing treat that captures the essence of summer. Their combination of creamy filling, tropical pineapple, and crunchy coconut makes them a standout dessert for any occasion. Whether you’re hosting a summer gathering or simply craving a sweet treat, these bars are sure to impress.
Encourage readers to try making these bars themselves and experience the blissful combination of flavors and textures. The easy-to-follow recipe ensures that anyone can create this delightful dessert, bringing a taste of the tropics to their table year-round.