
Banana Nut Bliss Pops Recipe: A Deliciously Healthy Treat
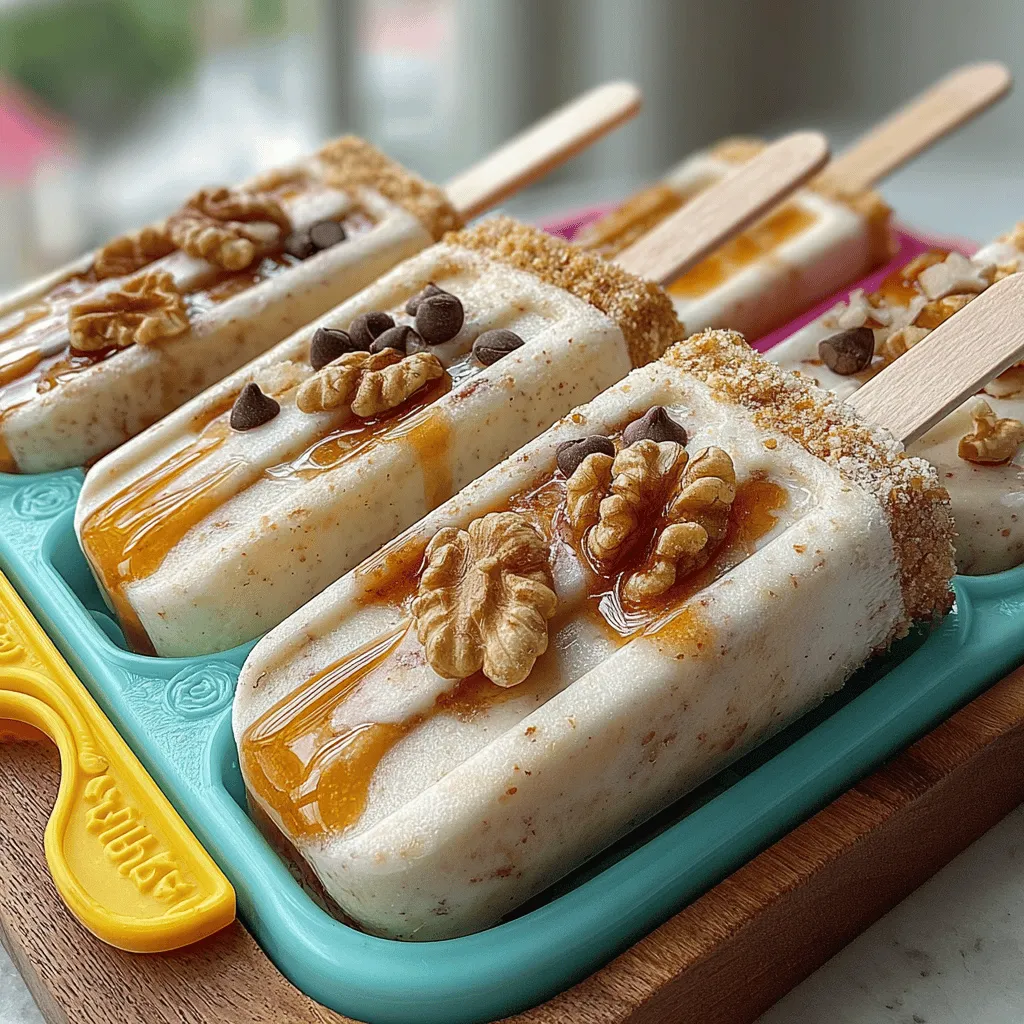
If you’re searching for a delightful frozen treat that combines health benefits with a satisfyingly sweet flavor, look no further than Banana Nut Bliss Pops. These popsicles are not only easy to make but also pack a nutritional punch, making them the perfect snack or dessert for both kids and adults alike. Imagine biting into a creamy, nutty popsicle that bursts with the flavor of ripe bananas, the crunch of walnuts, and a hint of chocolate. What’s not to love?
The Health Benefits of Banana Nut Bliss Pops
At the core of this delectable recipe are ingredients that are as wholesome as they are delicious. Ripe bananas provide natural sweetness and are an excellent source of potassium, crucial for maintaining healthy blood pressure and muscle function. Plain Greek yogurt adds a creamy texture while delivering a hefty dose of protein and probiotics, which are beneficial for gut health. Sweeteners like honey or maple syrup are not only natural but also come with their own array of health benefits, including antioxidants. The addition of vanilla extract enhances the flavor profile, while ground cinnamon offers anti-inflammatory properties and a warm flavor depth. Chopped walnuts not only contribute healthy fats and Omega-3s but also add a delightful crunch. Finally, mini chocolate chips (optional) bring just the right amount of indulgence to this guilt-free treat.
This recipe is more than just a tasty way to cool off; it’s an opportunity to savor the joy of creating something wholesome and delicious from scratch. Join us as we explore the delightful experience of making Banana Nut Bliss Pops, a treat that promises to please your palate and nourish your body.
The Joy of Homemade Popsicles
In recent years, there has been a significant uptick in the popularity of homemade frozen treats. More and more people are opting to create their own popsicles at home, and for good reason. Making popsicles allows you to have complete control over the ingredients and flavors, ensuring that you know exactly what goes into each bite. This is especially beneficial for those with dietary restrictions or specific health goals, as you can tailor each recipe to meet your needs.
Homemade popsicles are also a great way to experiment with a variety of flavors and textures. You can mix and match fruits, nuts, or even yogurt to create unique combinations that suit your taste. Whether you prefer a fruity explosion or a creamy, nutty indulgence, the possibilities are endless when it comes to homemade popsicles. Plus, they are incredibly easy to prepare, making them a fun activity for the whole family.
Ingredients Overview
Now, let’s dive deeper into the ingredients that make up our Banana Nut Bliss Pops. Each component brings its own unique set of benefits, ensuring that you’re not just enjoying a tasty treat, but also fueling your body with nutrients.
1. Ripe Bananas: The star of the show! Ripe bananas are naturally sweet and provide a healthy source of carbohydrates, making them an ideal energy booster. They are also rich in potassium, which helps maintain heart health and muscle function. Using ripe bananas not only enhances the sweetness of your pops but also gives them a smooth texture.
2. Plain Greek Yogurt: This ingredient is a powerhouse of nutrition. Greek yogurt is packed with protein, which is essential for muscle repair and growth. It also contains probiotics, beneficial bacteria that support gut health. The creamy texture of Greek yogurt helps create a rich mouthfeel in your pops.
3. Honey or Maple Syrup: These natural sweeteners bring a touch of sweetness without the refined sugars found in many store-bought treats. Honey is known for its antioxidant properties, while maple syrup is a source of minerals like zinc and manganese. Both options offer a healthier alternative for those looking to satisfy their sweet tooth.
4. Vanilla Extract: A simple yet effective flavor enhancer, vanilla extract adds a warm and inviting aroma to your pops. Beyond its flavor, vanilla has been linked to mood enhancement and has antioxidant properties.
5. Ground Cinnamon: This spice not only elevates the flavor profile of your pops but also provides a range of health benefits. Cinnamon is known for its anti-inflammatory properties and may help regulate blood sugar levels, making it a great addition to a healthy treat.
6. Chopped Walnuts: These nuts are an excellent source of healthy fats, particularly Omega-3 fatty acids, which are crucial for heart health. Walnuts also provide protein and fiber, contributing to a feeling of fullness. Their crunchiness adds a delightful texture to the creamy pops.
7. Mini Chocolate Chips (optional): A little bit of indulgence never hurt anyone! While optional, mini chocolate chips can enhance the flavor of your pops with a touch of sweetness and a delightful texture contrast. Choose dark chocolate chips for an even healthier option, as they contain antioxidants and less sugar.
Step-by-Step Instructions to Create Banana Nut Bliss Pops
Preparing the Bananas
To kick off your Banana Nut Bliss Pops, start by selecting ripe bananas. The more speckled the banana, the sweeter the flavor will be. Peel the bananas and break them into smaller pieces to make blending easier. This step is crucial, as ripe bananas will ensure that your pops have a luscious sweetness and smooth texture.
Blending the Mixture
Once your bananas are prepped, it’s time to blend! In a high-speed blender or food processor, combine the banana pieces, plain Greek yogurt, honey or maple syrup, and vanilla extract. If you’re feeling adventurous, you can also add a pinch of ground cinnamon at this stage for added flavor. Blend the mixture until it reaches a smooth and creamy consistency. If you prefer a thicker popsicle, you can adjust the amount of yogurt or add more bananas.
Mixing in Nuts and Chocolate
After achieving the desired consistency, it’s time to fold in the chopped walnuts and mini chocolate chips (if using). This step adds texture and an extra layer of flavor to your pops. Gently stir until the nuts and chocolate are evenly distributed throughout the mixture.
Now that you have the base ready, you’re just a few steps away from enjoying your homemade Banana Nut Bliss Pops. Stay tuned for the next part, where we will guide you through the final steps of pouring, freezing, and enjoying these delightful treats!
Exploring the Addition of Different Nuts or Other Mix-Ins for Variety
One of the great pleasures of making Banana Nut Bliss Pops is the versatility they offer. While this recipe primarily features bananas and nuts, you can easily customize your pops by incorporating a variety of other ingredients. For example, consider adding sliced almonds, chopped walnuts, or even pecans for a different flavor and texture. Each nut brings its unique crunch and taste, enriching the overall experience.
You can also experiment with mix-ins such as dark chocolate chips, shredded coconut, or even dried fruits like cranberries or raisins. Not only do these additions enhance the visual appeal of your pops, but they also provide additional nutrients and flavors that can delight your taste buds. Don’t hesitate to get creative—this is your chance to make these pops uniquely yours!
Filling the Molds
Properly filling your molds is crucial to achieving the perfect Banana Nut Bliss Pops. Start by preparing your banana mixture according to your recipe. Once your mixture is ready, it’s time to fill those molds.
Guidance on How to Properly Fill Molds for Best Results
1. Choose the Right Molds: Ensure you are using silicone molds or popsicle molds that are easy to remove. Silicone molds are particularly effective for frozen treats as they allow for easy release.
2. Spoon with Care: Using a small ladle or a measuring cup, carefully pour the banana mixture into each mold. Fill them to about ¾ full to allow space for expansion as the mixture freezes.
3. Tap to Remove Air Bubbles: After filling the molds, gently tap them on the counter. This step helps to eliminate any air bubbles trapped within the mixture, ensuring a smooth texture in your pops.
4. Insert Sticks: If your mold requires sticks, make sure to insert them right in the center of each pop. This will ensure stability during the freezing process.
5. Level Off: Use a spatula to level off the tops of your pops for a neat finish. This not only enhances the appearance but also makes them easier to remove later.
Freezing Process
Once your molds are filled, it’s time to freeze! The freezing process is essential for the texture and flavor of your Banana Nut Bliss Pops.
Explanation of the Freezing Time and Factors Affecting Freeze Quality
– Freezing Time: Generally, your pops will need at least 4 to 6 hours to freeze completely. However, for best results, consider leaving them overnight. This ensures that they are solid all the way through.
– Factors Affecting Freeze Quality: The freezing time can vary depending on several factors:
– Temperature: Ensure your freezer is at the optimal temperature (0°F or -18°C) to facilitate quick freezing.
– Ingredients: Ingredients with higher water content may take longer to freeze. The riper the bananas, the smoother the texture, but they may also require more time to solidify completely.
– Size of Molds: Larger molds will take longer to freeze than smaller ones. If you’re using larger molds, plan for additional freezing time.
Unmolding and Enjoying
After your pops have frozen solid, it’s time to enjoy the fruits of your labor.
Techniques for Easy Release of Pops from Molds
1. Warm Water Bath: Dip the bottom of the mold in warm water for about 10-15 seconds. This gentle heat helps to loosen the pops without melting them.
2. Twist and Pull: Gently twist the popsicle stick while pulling to help release the pop from the mold. If it feels stuck, don’t force it; instead, return it to the warm water briefly.
3. Silicone Molds: If you’re using silicone molds, simply flex the mold to release the pops. This is often the easiest method and minimizes the risk of damaging your treats.
Serving Suggestions
Your Banana Nut Bliss Pops are now ready to be served! Here are some delightful ideas to enhance your presentation:
– Garnish with Nuts: Roll the pops in crushed nuts for an extra crunch and a beautiful finish. This can be done right after unmolding while the pops are still a bit cold.
– Chocolate Drizzle: Melt some dark chocolate and drizzle it over the pops for a decadent touch. Let it harden before serving for a beautiful, glossy finish.
– Fruit Pairings: Serve your pops alongside fresh fruits like berries, sliced kiwi, or citrus segments. This adds color to your plate and provides a refreshing contrast.
– Make a Sundae: Consider creating a mini sundae by placing a pop in a bowl and topping it with yogurt or whipped cream, then adding fresh fruit or granola.
Health Benefits of Banana Nut Bliss Pops
Not only are these pops a delicious treat, but they also come packed with health benefits.
Overview of the Nutritional Profile of Each Ingredient
– Bananas: High in potassium, vitamin C, and dietary fiber, bananas contribute to heart health and support digestion.
– Nuts: Nuts are a great source of healthy fats, protein, and essential nutrients like vitamin E and magnesium. They can help lower cholesterol and promote heart health.
– Yogurt: If used in your recipe, yogurt adds probiotics, which are beneficial for gut health, along with additional protein and calcium.
Comparison with Store-Bought Frozen Treats
When compared to store-bought frozen treats, Banana Nut Bliss Pops shine in several ways:
– Ingredients Control: You know exactly what’s going into these pops, avoiding preservatives, artificial flavors, and added sugars often found in commercial products.
– Nutritional Value: Homemade pops can be tailored to be lower in sugar and higher in nutrients, making them a healthier option for both kids and adults.
– Cost-Effective: Making your own treats can save money in the long run, especially when feeding a family.
Discussion on the Benefits of Homemade Options for Families and Kids
Homemade treats like Banana Nut Bliss Pops promote healthier eating habits among children. They allow parents to involve their kids in the kitchen, teaching them about nutrition and cooking while having fun. Plus, knowing that these pops are made from wholesome ingredients makes it easier for parents to satisfy their children’s cravings without guilt.
Customization Ideas for Your Pops
The beauty of Banana Nut Bliss Pops lies in their adaptability. Here are some customization ideas to inspire your creativity:
Suggestions for Flavor Variations
– Berry Blast: Add fresh or frozen berries (like blueberries or strawberries) to the banana mixture for a burst of color and flavor.
– Spiced Delight: Experiment with spices such as cinnamon or nutmeg to give your pops a warm, aromatic twist.
– Nut-Free Options: If allergies are a concern, consider using sunflower seeds or pumpkin seeds as substitutes for nuts.
Exploring Dietary Substitutions
– Vegan Options: Replace yogurt with a plant-based yogurt or simply use coconut milk for a creamy base that is entirely vegan.
– Dairy-Free Alternatives: Use almond milk or oat milk instead of regular yogurt for a dairy-free version that’s just as delightful.
Creative Serving Ideas
– Chocolate Coating: Dipping your pops in melted chocolate and then rolling them in nuts or sprinkles adds an irresistible layer of flavor and visual appeal.
– Coconut Flakes: Roll the pops in shredded coconut for a tropical vibe that enhances both the taste and texture.
Storing and Freezing Your Pops
To ensure your Banana Nut Bliss Pops remain fresh and delicious, follow these storage tips:
Best Practices for Storing Banana Nut Bliss Pops
– Airtight Containers: Store the unmolded pops in an airtight container or freezer bag. Layer them with parchment paper to prevent sticking if you’re stacking them.
Tips on Maintaining Flavor and Texture During Storage
– Avoid Freezer Burn: Make sure to remove as much air as possible from the storage bags or containers before sealing. This helps preserve texture and flavor.
– Labeling: Always label your containers with the date of freezing. This way, you can keep track of their freshness and enjoy them within a reasonable time frame.
Safety Measures for Long-Term Freezing
– Storage Duration: For best quality, consume your pops within 2 months of freezing. While they can last longer, flavor and texture may begin to decline.
– Thawing: When ready to enjoy, remove the pops from the freezer and let them sit at room temperature for a few minutes to make unmolding easier.
Conclusion
Banana Nut Bliss Pops are not just a delightful frozen treat but also a wholesome dessert option packed with nutrients. With endless possibilities for customization and a straightforward preparation process, this recipe is perfect for families and kids alike. Encouraging creativity in the kitchen, these pops can be tailored to suit any taste or dietary requirement.
So, gather your ingredients and embark on this delicious journey of creating your very own Banana Nut Bliss Pops. Enjoy the satisfaction of making homemade treats that everyone will love, and don’t hesitate to experiment with flavors and add-ons to make them uniquely yours. Homemade treats bring joy not only to those who consume them but also to those who create them—so get popping!
