Introduction
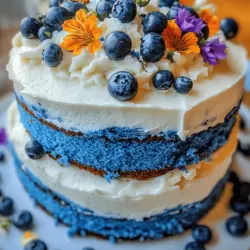
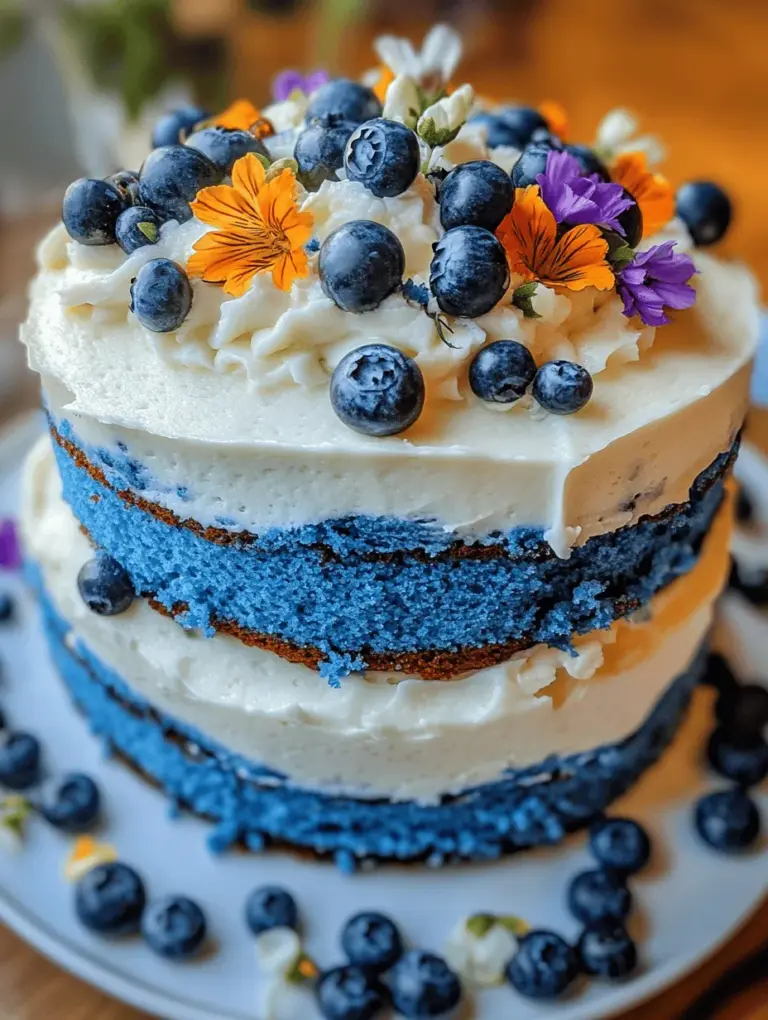
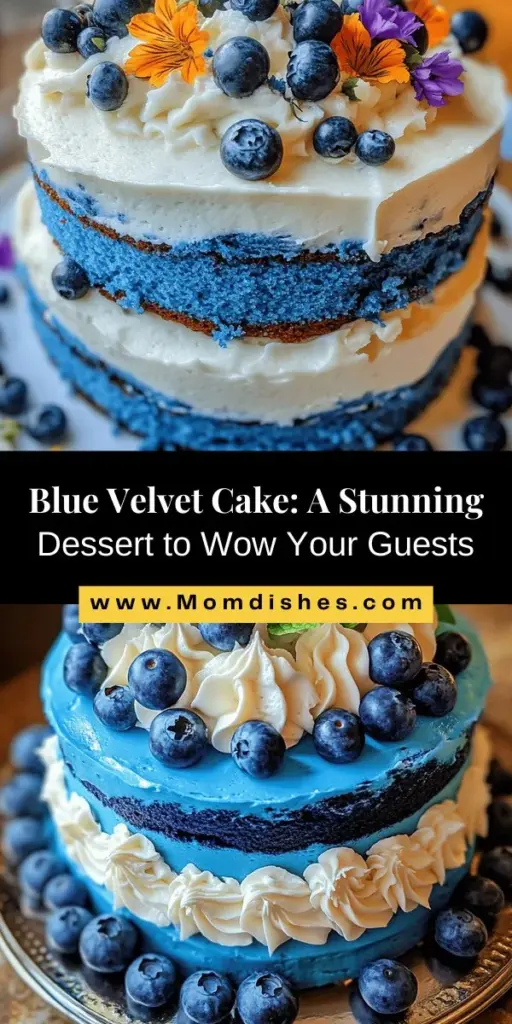
When it comes to desserts that not only please the palate but also dazzle the eyes, the Blue Velvet Cake stands out as an exceptional choice. This vibrant dessert, with its striking blue hue, has gained popularity among cake enthusiasts and is perfect for various celebrations. The appeal of the Blue Velvet Cake lies not only in its captivating color but also in the unique flavor profile and texture it offers. Unlike any traditional cake, the combination of flavors makes it a delightful treat for birthdays, weddings, and other special occasions.
The significance of color in baking cannot be overstated. While traditional cakes often rely on classic shades like brown or white, the Blue Velvet Cake introduces an element of surprise and whimsy. The vivid blue not only enhances the cake’s presentation but also sparks curiosity and excitement among guests. It invites them to indulge in a dessert that is as visually striking as it is delicious. As we delve deeper into the world of Blue Velvet Cake, you will discover the rich flavors and textures that make this cake a must-try for any dessert lover.
The Allure of Blue Velvet Cake
The roots of velvet cakes date back to the 19th century when they were characterized by their soft, velvety texture and rich flavor. Originally, velvet cakes were known for their reddish hue, thanks to the use of cocoa powder and sometimes a hint of beet juice. Over time, variations emerged, leading to the beloved Red Velvet Cake that we know today. However, the culinary world is ever-evolving, and the modern incarnation of the velvet cake has introduced the stunning Blue Velvet Cake.
This contemporary twist on the classic velvet cake has captured the hearts of bakers and dessert aficionados alike. The vibrant blue color not only distinguishes it from its red counterpart but also adds a fresh and modern touch to the traditional recipe. Blue Velvet Cake is often enjoyed in conjunction with cream cheese frosting, which beautifully complements its flavors and adds a creamy texture that enhances the overall experience.
Culturally, the Blue Velvet Cake has found its niche at special events and celebrations. Its unique color makes it a popular choice for baby showers, gender reveal parties, and even Fourth of July gatherings. The cake’s eye-catching appearance encourages creativity in decorating, allowing bakers to personalize it further with edible decorations, colored sprinkles, or themed toppings. Whether served at a formal event or a casual get-together, the Blue Velvet Cake never fails to leave a lasting impression.
Ingredients Breakdown
Creating a perfect Blue Velvet Cake requires a thoughtful selection of ingredients, each playing a crucial role in achieving the desired flavor, texture, and appearance. Here’s a detailed breakdown of the essential components:
– All-Purpose Flour: This staple ingredient provides the structure and texture needed for the cake. The right flour ensures that the cake rises properly and maintains its shape while remaining tender and moist.
– Granulated Sugar: Sugar is more than just a sweetener; it plays a vital role in moisture retention and contributes to the cake’s overall flavor. The right amount of sugar ensures a balance between sweetness and the cake’s other flavors.
– Baking Powder and Baking Soda: These leavening agents are crucial for giving the cake its rise and airy texture. They work together to create carbon dioxide when mixed with the other wet ingredients, resulting in a light and fluffy cake.
– Salt: While it may seem like a small addition, salt enhances the overall flavor of the cake, balancing the sweetness and bringing out the richness of the other ingredients.
– Vegetable Oil: The use of vegetable oil in baking contributes to the cake’s moistness. Unlike butter, oil remains liquid at room temperature, which helps retain moisture and keeps the cake tender for days.
– Buttermilk: This ingredient adds a delightful tanginess to the cake, enriching its flavor and contributing to its moist texture. The acidity of buttermilk reacts with the baking soda, aiding in the leavening process and resulting in a light cake.
– Eggs: Eggs are essential for binding the ingredients together and providing moisture. They also help create a stable structure in the cake, ensuring it holds its shape during baking.
– Cocoa Powder: While the Blue Velvet Cake is primarily known for its blue color, a hint of cocoa powder adds a subtle chocolate flavor that enhances the overall taste without overpowering the cake’s unique characteristics.
– Blue Food Coloring: The star of the show, blue food coloring, is what sets the Blue Velvet Cake apart. It transforms the batter into a visually stunning treat that is sure to captivate anyone who lays eyes on it.
– Vanilla Extract: Vanilla extract adds depth and warmth to the flavor profile of the cake. It’s a classic ingredient that complements the other flavors beautifully, making the cake even more appealing.
– White Vinegar: Often overlooked, white vinegar plays a significant role in the baking process. It reacts with the baking soda, promoting fluffiness and contributing to the overall light texture of the cake.
Preparing for Baking: Essential Steps
Before diving into the baking process, it is crucial to prepare properly to ensure the best results for your Blue Velvet Cake. Here are some essential steps to follow:
1. Proper Oven Temperature: Preheat your oven to 350°F (175°C) to ensure even baking. An accurate oven temperature is vital for the cake to rise properly; an oven that is too hot can lead to a dome-shaped top, while an oven that is too cool can result in a dense texture.
2. Pan Preparation: Greasing and flouring your cake pans is essential to prevent the cake from sticking. You can also line the bottom of the pans with parchment paper for added assurance. This step will ensure that your cake comes out easily and maintains its beautiful shape.
3. Sifting Dry Ingredients: Sifting your dry ingredients, including flour, cocoa powder, baking powder, and baking soda, is an important step that should not be skipped. Sifting aerates the ingredients and helps eliminate any lumps. This results in a lighter and more uniform cake texture, allowing the batter to mix more easily and evenly.
By following these initial steps, you’ll set the foundation for a successful Blue Velvet Cake that is not only visually stunning but also deliciously satisfying. The combination of flavors and textures promises a delightful experience that will keep friends and family coming back for more. As we continue exploring this recipe, we will delve into the detailed instructions for baking this show-stopping treat.
{{image_1}}
The Science Behind Combining Wet and Dry Ingredients
Understanding how to properly combine wet and dry ingredients is crucial for crafting a cake that is both delicious and beautifully textured. The science lies in the balance of moisture and structure. When you mix wet ingredients—like eggs, buttermilk, and oil—with dry ingredients—such as flour, sugar, and baking powder—you’re activating gluten, which gives your cake structure. However, overmixing can lead to a dense, tough cake instead of the light and fluffy texture we desire.
To achieve the perfect balance, start by thoroughly mixing your dry ingredients in one bowl. In a separate bowl, whisk together your wet ingredients until they’re smooth and homogenous. When you combine the two, do so gently and just until the dry ingredients are moistened. This method ensures that you develop the right amount of gluten without overmixing.
Crafting the Perfect Cake
Step-by-Step Instructions
1. Preheat Your Oven: Start by preheating your oven to 350°F (175°C). This step ensures that your cake bakes evenly.
2. Prepare Your Cake Pans: Grease two 9-inch round cake pans and line the bottoms with parchment paper. This prevents sticking and helps with easy removal later.
3. Mix the Dry Ingredients: In a large mixing bowl, whisk together 2 ½ cups of all-purpose flour, 1 ½ cups of granulated sugar, 1 teaspoon of baking soda, 1 teaspoon of baking powder, and ½ teaspoon of salt.
4. Combine the Wet Ingredients: In another bowl, mix 1 cup of vegetable oil, 1 cup of buttermilk, 3 large eggs, 1 teaspoon of vanilla extract, and 1 tablespoon of white vinegar. Don’t forget to add 1 tablespoon of blue food coloring to achieve that vibrant hue.
5. Combine Wet and Dry: Slowly add the wet ingredients to the dry ingredients. Use a spatula or wooden spoon to fold the mixture together until just combined. A few lumps are okay; overmixing will lead to a dense cake.
6. Pour and Bake: Divide the batter evenly between the prepared cake pans. Bake in the preheated oven for 25-30 minutes, or until a toothpick inserted in the center comes out clean.
7. Cooling Tips: Once baked, remove the cakes from the oven and allow them to cool in the pans for about 10 minutes. Then, transfer them to a wire rack to cool completely. This cooling step is crucial for optimal frosting application, as it helps prevent melting.
Creating the Cream Cheese Frosting
The tangy flavor of cream cheese frosting perfectly complements the sweetness of the blue velvet cake. The richness enhances the cake without overpowering its delicate flavor.
Step-by-Step Instructions for Frosting
1. Ingredients Needed: Gather 8 oz of cream cheese (softened), ½ cup of unsalted butter (softened), 4 cups of powdered sugar, and 1 teaspoon of vanilla extract.
2. Beat Together: In a mixing bowl, beat the softened cream cheese and butter together on medium speed until smooth and creamy.
3. Incorporate Sugar: Gradually add the powdered sugar, mixing on low speed to prevent a dust cloud. Once incorporated, turn up the speed to medium and add the vanilla extract.
4. Achieving Consistency: Continue to beat until the frosting is light and fluffy, about 3-5 minutes. If the frosting is too thick, add a tablespoon of milk to reach your desired consistency. If it’s too thin, add more powdered sugar gradually.
Variations and Alternatives
To add a twist to your cream cheese frosting, consider incorporating flavors such as lemon zest or almond extract. For a chocolate version, you can melt some dark chocolate and fold it into the frosting for a decadent touch. If you prefer an alternative to cream cheese, buttercream or whipped cream can also work, though they will offer different flavor profiles.
Assembling Your Blue Velvet Cake
Techniques for Layering and Frosting
1. Layering: Once the cakes are completely cooled, carefully level the tops of each layer with a serrated knife if necessary. This will help them stack evenly.
2. Frosting the Layers: Place one layer of the cake on a serving plate. Spread a generous amount of cream cheese frosting on top, using an offset spatula for a smooth application.
3. Add the Second Layer: Place the second cake layer on top and cover the top and sides of the cake with frosting.
Tips for Achieving a Smooth Finish
To achieve a smooth finish, apply a thin layer of frosting called a “crumb coat” first. This layer traps any loose crumbs. Chill the cake for about 30 minutes, then apply a final thick layer of frosting. Use a spatula or bench scraper to smooth the frosting as desired.
Decoration Ideas
For a stunning presentation, consider decorating your cake with fresh berries, edible flowers, or a drizzle of chocolate ganache. A sprinkle of blue sprinkles can also tie in the color theme beautifully.
Serving Suggestions and Pairings
The Blue Velvet Cake is a showstopper suitable for any occasion—birthdays, weddings, or festive gatherings. It not only tastes good but also looks appealing, making it a favorite centerpiece for dessert tables.
Beverage Pairings
To elevate the experience, serve slices of this cake alongside a cup of rich coffee, fragrant tea, or even a sweet dessert wine. The flavors harmonize beautifully, enhancing the overall enjoyment of your dessert.
Storage and Shelf Life
To maintain the freshness of your Blue Velvet Cake, store it in an airtight container at room temperature for up to three days. If you need to store it longer, refrigeration is a good option, though it may dry out the cake slightly.
Freezing Tips
For longer storage, you can freeze the cake. Wrap each layer tightly in plastic wrap followed by aluminum foil. This will keep the cake fresh for up to three months. When ready to enjoy, thaw in the refrigerator overnight before frosting and serving.
Conclusion
Creating a stunning Blue Velvet Cake is a rewarding experience that brings joy and satisfaction to both the baker and those who indulge in it. This cake not only makes a statement but also invites creativity in baking. Feel free to experiment with flavors—perhaps a hint of coconut or a layer of raspberry jam could add an exciting twist.
Ultimately, the Blue Velvet Cake can elevate any dessert table, leaving a lasting impression that will have your guests asking for seconds. So, gather your ingredients, embrace your inner baker, and enjoy the delightful process of creating this exquisite treat.