When it comes to delightful treats that combine rich flavors and satisfying textures, few desserts can compete with caramel chocolate crunch bars. This recipe encapsulates the perfect harmony of smooth chocolate, gooey caramel, and a satisfying crunch, making it an irresistible option for any dessert lover. Whether you’re hosting a party, preparing snacks for a family gathering, or simply craving something sweet, these bars are sure to please.
The combination of chocolate and caramel is a classic that evokes feelings of nostalgia and indulgence. From candy bars to gourmet desserts, the pairing has a special place in many hearts. What makes these bars stand out is not only their delicious flavor but also their versatility. You can easily customize them to suit various occasions, from birthdays to holiday celebrations or even a cozy night in.
Understanding the Ingredients
Before diving into the preparation of caramel chocolate crunch bars, let’s explore the key ingredients that contribute to their delightful flavor and texture. Each component plays a crucial role in creating a balance that makes these bars simply irresistible.
Graham Cracker Crumbs and Rolled Oats: The Base
At the heart of these bars lies a crumbly base made from graham cracker crumbs and rolled oats. The graham cracker crumbs provide a sweet and slightly nutty flavor, while the rolled oats add a wholesome, chewy texture. Together, they create a sturdy foundation that holds the bars together. The combination not only enhances the flavor profile but also gives the bars a satisfying crunch that contrasts beautifully with the smooth caramel and chocolate layers.
Cocoa Powder: Adding Depth of Flavor
Cocoa powder is another essential ingredient that elevates the taste of these bars. It introduces a rich chocolate flavor that complements the sweetness of the caramel. When selecting cocoa powder, opting for high-quality, unsweetened cocoa will yield the best results. This ingredient not only deepens the flavor but also contributes to the dark, luscious color of the bars, making them even more appealing.
Unsalted Butter: The Texture Enhancer
Unsalted butter is a key player in achieving the right texture for your bars. Its role goes beyond flavor; butter adds moisture and richness to the mixture, creating a melt-in-your-mouth experience. Using unsalted butter allows for better control over the overall saltiness of the bars, ensuring that the flavors remain balanced. When melted and combined with the dry ingredients, the butter helps bind everything together, resulting in a cohesive and delicious base.
Chocolate Chips: Choosing the Right Variety
Chocolate chips are a crucial element in this recipe, providing bursts of chocolatey goodness throughout the bars. You have a variety of options when it comes to chocolate chips: semi-sweet, dark, or even milk chocolate. Each type brings its unique flavor, so you can choose based on your personal preference. For a more decadent experience, dark chocolate chips can enhance the richness of the bars, while semi-sweet chips offer a more balanced sweetness. If you’re a fan of variety, consider mixing different types of chocolate chips for a delightful surprise in every bite.
Caramel Sauce: Store-Bought vs. Homemade
The star of the show in these crunch bars is undoubtedly the caramel sauce. It’s what ties all the flavors together, creating a luscious layer of sweetness. You can choose between store-bought caramel sauce for convenience or make your own homemade version for a more personalized touch. Homemade caramel sauce allows you to control the consistency and flavor, ensuring that it perfectly complements the bars. If you opt for store-bought, look for high-quality options that are thick and rich to achieve the best results.
Optional Nuts: Adding Extra Crunch
For those who enjoy a bit of extra texture, consider adding nuts such as almonds or walnuts. Chopped nuts not only enhance the crunch factor but also introduce additional flavors that pair wonderfully with chocolate and caramel. Nuts can be toasted for an even deeper flavor profile, making them a delightful addition to your bars. However, feel free to omit them if you prefer a nut-free treat.
Step-by-Step Preparation Guide
Now that we’ve explored the ingredients, it’s time to delve into the preparation process for these delectable caramel chocolate crunch bars. Follow these detailed instructions to ensure your bars turn out perfectly every time.
Preparing the Baking Dish
Start by preparing your baking dish. A 9×9-inch square pan is ideal for this recipe. To prevent sticking and ensure easy removal of the bars, line the bottom and sides of the pan with parchment paper. Leave some overhang on the edges, which will act as handles when you’re ready to lift the bars out of the pan. Lightly grease the parchment paper with a bit of cooking spray or butter to further prevent sticking.
Combining the Dry Ingredients
In a large mixing bowl, combine the graham cracker crumbs, rolled oats, cocoa powder, and a pinch of salt. Stir the dry ingredients together until they are evenly combined. This step is crucial as it ensures that the flavors and textures are distributed uniformly throughout the bars. The mixture should resemble a sandy texture when done.
Incorporating the Wet Ingredients
Next, melt the unsalted butter in a microwave-safe bowl or over low heat on the stovetop. Once melted, allow it to cool slightly before adding it to the dry mixture, followed by a splash of vanilla extract for added flavor. Mix everything together until the dry ingredients are fully coated in the melted butter. The mixture should start to clump together, indicating that it’s ready for the next step.
Pressing into the Dish
Transfer the mixture into the prepared baking dish, using your hands or a spatula to press it evenly into the bottom. Be sure to compact it well, as this will help the bars hold their shape after baking. Aim for an even layer, making sure there are no gaps or holes. A firm base will provide a sturdy foundation for the chocolate and caramel layers that will follow.
Baking the Base
Preheat your oven to 350°F (175°C) and place the baking dish in the oven. Bake the base for about 10-12 minutes, or until it’s lightly golden and set. This initial baking step is essential for achieving a crisp texture. Once baked, remove the dish from the oven and allow the base to cool completely before adding the caramel and chocolate layers. Cooling time ensures that the layers adhere properly and prevents them from sliding off when cut.
With these initial steps complete, you’re well on your way to creating tantalizing caramel chocolate crunch bars that will satisfy any sweet tooth. The next part of this recipe will guide you through the process of adding the caramel and chocolate layers, making these bars a truly indulgent treat. Stay tuned for the continuation of this delicious journey!
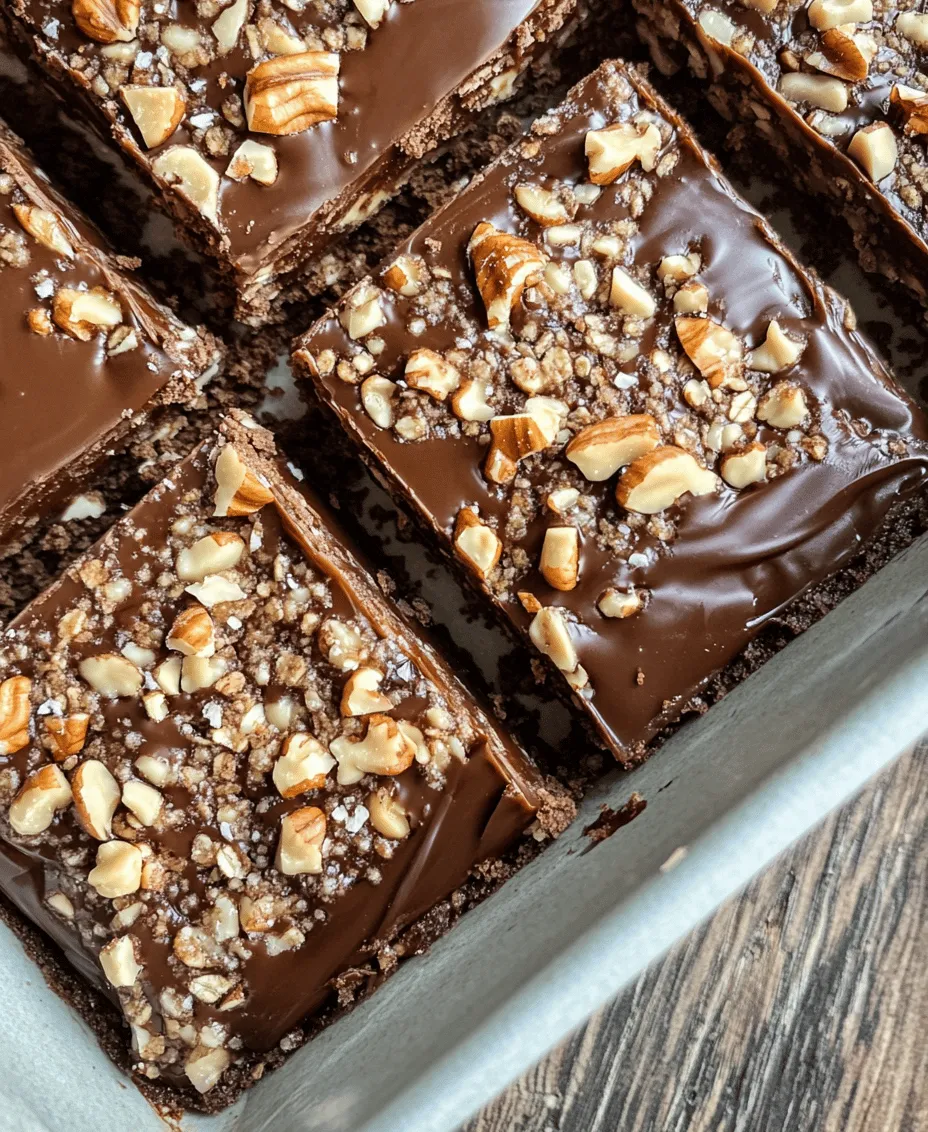
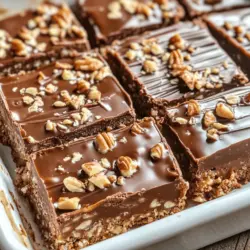
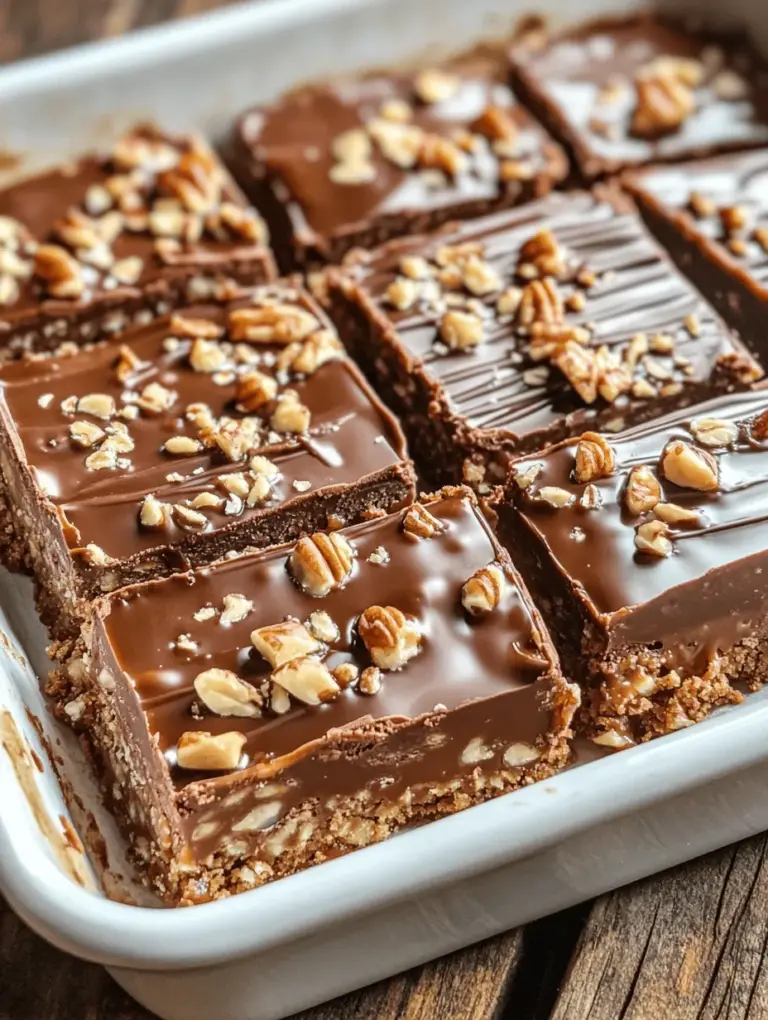
Adding Chocolate Chips: Best Practices for Melting and Spreading
To achieve the perfect layer of chocolate atop your Caramel Chocolate Crunch Bars, it’s essential to melt the chocolate chips properly. Start by choosing high-quality chocolate chips, whether semi-sweet, dark, or milk chocolate, depending on your preference. Place the chips in a microwave-safe bowl and heat them in 30-second intervals, stirring between each interval. This method helps prevent overheating, which can cause the chocolate to seize.
Once the chocolate is melted and smooth, pour it over the cooled caramel layer. Use an offset spatula or the back of a spoon to spread the chocolate evenly across the surface of the bars. For a more artistic touch, consider swirling the chocolate into the caramel slightly, creating a marbled effect that enhances both the appearance and flavor of the bars.
Drizzling Caramel Sauce: Creating the Perfect Marbled Effect
Drizzling caramel sauce over your chocolate layer adds both visual appeal and extra flavor depth. To create the marbled effect, wait until the chocolate has set slightly but is still warm to the touch. This allows the caramel to adhere better without sinking completely into the chocolate layer.
Using a squeeze bottle or a spoon, drizzle warm caramel sauce over the chocolate in a zigzag pattern. Then, take a toothpick or a skewer and gently swirl it through the chocolate and caramel, creating beautiful, wavy designs. This technique not only enhances the aesthetic of your bars but also ensures that each bite has a delightful mix of chocolate and caramel.
Optional Nut Addition: Ensuring They Stick to the Bars
If you love the crunch of nuts, adding them to your Caramel Chocolate Crunch Bars can elevate the flavors and textures. Almonds, pecans, or walnuts work particularly well. To ensure that nuts stick to the bars, chop them into small pieces and sprinkle them over the chocolate layer while it is still warm. Lightly press them into the chocolate to secure them in place.
Alternatively, you can mix the nuts into the caramel before spreading it onto the base layer, giving the bars a nutty flavor throughout. Make sure to choose nuts that complement the sweetness of the caramel and chocolate, adding a satisfying crunch to each bite.
Chilling and Setting: Why Refrigeration is Crucial for Texture
Refrigerating your Caramel Chocolate Crunch Bars is a critical step that affects both texture and taste. After layering the chocolate and caramel, cover the pan with plastic wrap or aluminum foil and place it in the refrigerator for at least 1-2 hours, or until fully set. This chilling process allows the chocolate to harden and the layers to meld together, making the bars easier to cut and enhancing their overall texture.
Avoid cutting the bars too soon, as they may crumble or fall apart. Patience is key here; letting them chill will ensure that each slice maintains its shape and showcases the beautiful layers of caramel and chocolate.
Serving Suggestions: Cutting Techniques for Optimal Presentation
When it comes to serving your homemade Caramel Chocolate Crunch Bars, presentation is essential. Once fully chilled, use a sharp knife to cut the bars into squares or rectangles. For cleaner cuts, warm the knife under hot water, then dry it before slicing. This technique prevents the chocolate from cracking and helps maintain the integrity of the layers.
Consider serving the bars on a decorative platter with a sprinkle of sea salt on top for a gourmet touch. Pair them with a scoop of vanilla ice cream or a dollop of whipped cream to create a delightful dessert experience. For a more elegant presentation, serve the bars alongside fresh berries or a drizzle of additional caramel sauce.
Nutritional Information
When indulging in sweets, it’s helpful to be aware of the nutritional content. Each serving of Caramel Chocolate Crunch Bars typically contains approximately 200 calories, with a balanced distribution of carbohydrates, fats, and proteins. The bars provide a source of quick energy due to their sugar content, while the nuts (if added) contribute healthy fats and protein.
For those with dietary preferences, there are several modifications you can make. To create gluten-free bars, ensure that all ingredients, especially chocolate chips and graham crackers (if used), are certified gluten-free. For a vegan option, substitute the butter with coconut oil or a vegan butter alternative and use dairy-free chocolate chips. Homemade treats often contain fewer preservatives than store-bought alternatives, offering a fresher and more wholesome dessert option.
Creative Variations and Customizations
One of the beauties of this recipe lies in its versatility. You can easily customize your Caramel Chocolate Crunch Bars to suit your taste preferences or seasonal ingredients. For a spiced twist, consider adding a pinch of cinnamon or nutmeg to the caramel mixture. A sprinkle of sea salt on top of the chocolate layer can also enhance the flavor, balancing the sweetness with a savory touch.
Incorporating seasonal ingredients can elevate your bars even further. During the fall, add chopped apples or pears for a fruity addition, or in the spring, mix in some toasted coconut for a tropical flavor. You can also experiment with different types of chocolate—white chocolate, dark chocolate, or even flavored chocolate bars—to add a unique twist.
To serve, think beyond the traditional. Try pairing the bars with a scoop of ice cream for an indulgent dessert or drizzle with additional sauces like chocolate syrup, peanut butter, or even a homemade berry compote for a refreshing touch.
Storing and Preserving Your Bars
To keep your Caramel Chocolate Crunch Bars fresh, it’s essential to store them properly. Place the bars in an airtight container, separating layers with parchment paper to prevent sticking. They can be kept at room temperature for up to a week, but refrigeration is recommended to maintain the texture and prevent the caramel from becoming too sticky.
For longer storage, you can freeze the bars. Wrap them tightly in plastic wrap or aluminum foil and place them in a freezer-safe container. They can be frozen for up to three months. When you’re ready to enjoy them, simply thaw them in the refrigerator overnight for a convenient treat.
Conclusion
The Caramel Chocolate Crunch Bars recipe is a delightful fusion of textures and flavors, making it a perfect homemade treat for any occasion. With its layers of rich chocolate, sweet caramel, and optional nutty crunch, it appeals to dessert lovers of all kinds. Whether you choose to enjoy them as a snack, dessert, or share them with friends and family, these bars are sure to impress.
Don’t hesitate to get creative with your version of the recipe, adding your favorite flavors and ingredients to make it uniquely yours. Homemade treats not only bring joy but also allow you to control the ingredients, ensuring a fresher and more wholesome dessert experience. So gather your ingredients, follow the steps, and indulge in the deliciousness of your very own Caramel Chocolate Crunch Bars.