
Introduction
Cheesy Bliss Bread is a delightful comfort food that brings warmth and joy to any table. Imagine a loaf of bread, soft and fluffy, infused with the rich flavors of melted cheese and aromatic herbs. This recipe captivates the senses and transforms ordinary gatherings into extraordinary culinary experiences. Homemade bread has a special charm; the process of kneading, rising, and baking fills the kitchen with irresistible aromas that evoke a sense of nostalgia and togetherness. Whether it’s a family dinner, a potluck gathering, or a cozy night in, Cheesy Bliss Bread is the perfect accompaniment, ensuring that every bite is a delightful celebration of flavor.
In addition to its comforting characteristics, Cheesy Bliss Bread boasts versatility. It can be served as an appetizer, paired with soups and salads, or enjoyed on its own as a snack. The cheesy goodness melts in your mouth, creating a symphony of flavors that are sure to please both adults and kids alike. With this recipe, you can easily impress your guests, making it a go-to option for any occasion.
Understanding the Ingredients
To craft the perfect Cheesy Bliss Bread, understanding the ingredients is crucial. Each component plays a significant role, contributing to the overall texture, flavor, and aroma of the final product. Let’s delve into the key ingredients that make this recipe a standout.
All-Purpose Flour
All-purpose flour serves as the foundation for the bread’s texture. It provides the necessary structure, allowing the bread to rise while maintaining a soft crumb. The gluten content in all-purpose flour is essential for creating elasticity, which helps the dough hold its shape. For the best results, ensure you measure the flour correctly—using the scoop-and-sweep method can help avoid packing it too tightly in the measuring cup.
Active Dry Yeast
Active dry yeast is vital for bread-making, as it is responsible for fermentation, which causes the dough to rise. When activated properly, yeast ferments the sugars in the flour, producing carbon dioxide that creates air pockets in the bread. This process not only helps the bread rise but also enhances its flavor. Make sure to check the expiration date on your yeast, as using expired yeast can lead to unsatisfactory results.
Olive Oil
Olive oil adds moisture and flavor to the dough, enriching the overall taste of the bread. It helps create a tender crumb and contributes to the bread’s golden crust. Additionally, olive oil can enhance the bread’s shelf life, keeping it fresh for longer. For optimal results, consider using high-quality extra virgin olive oil, as it imparts a more robust flavor.
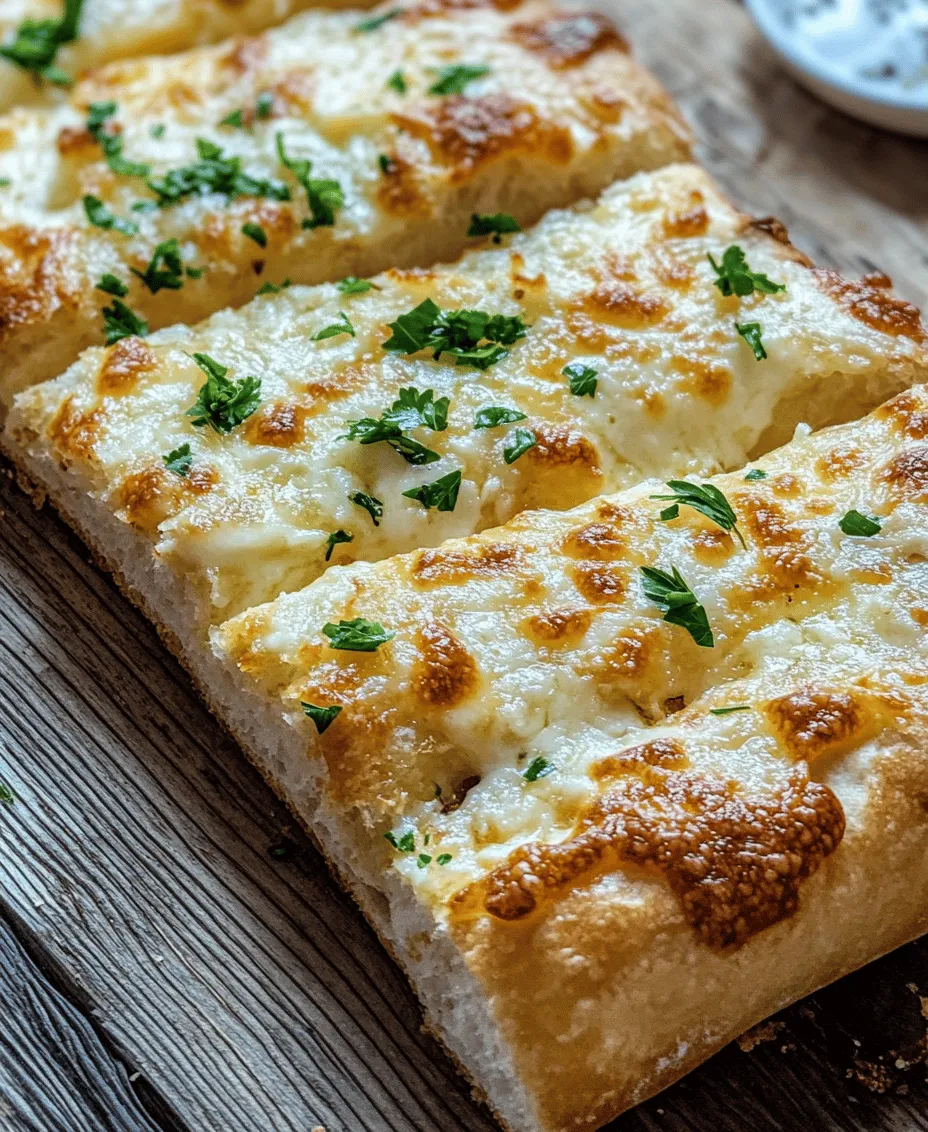
Cheeses (Mozzarella & Parmesan)
The star ingredients of Cheesy Bliss Bread are undoubtedly the cheeses. Mozzarella cheese brings a delightful stretch and creaminess, melting beautifully throughout the loaf. On the other hand, Parmesan cheese adds a sharp, nutty flavor that balances the richness of the mozzarella. Together, they create a harmonious cheesy experience that elevates the bread to new heights. For the best flavor, opt for freshly grated cheese, as pre-packaged varieties often contain anti-caking agents that can affect melting.
Garlic and Herbs
Garlic and herbs play a crucial role in boosting the flavor profile of the bread. Fresh garlic lends a pungent, aromatic quality that complements the cheeses perfectly. Meanwhile, herbs such as rosemary, thyme, or oregano can add depth and complexity. Customizing the herbs to your taste not only personalizes the bread but also enhances its appeal.
The Significance of High-Quality Ingredients
Using high-quality ingredients is paramount for achieving optimal taste in Cheesy Bliss Bread. Fresh, organic products not only enhance flavor but also contribute to the overall texture and aroma of the bread. Investing in quality ingredients can make a significant difference in the final product, ensuring a delightful experience with every bite.
Step-by-Step Guide to Making Cheesy Bliss Bread
Creating your own Cheesy Bliss Bread is a rewarding endeavor, and with a step-by-step approach, you can achieve incredible results. Let’s break down the process into manageable steps, ensuring that you have all the information needed to make this cheesy delight.
Activating the Yeast
The first step in making Cheesy Bliss Bread is activating the yeast. This is crucial for ensuring that your bread rises properly. Start by measuring warm water (about 110°F or 43°C) and adding a pinch of sugar to it. Sprinkle the active dry yeast over the top and let it sit for about 5-10 minutes. During this time, the yeast will begin to bubble and froth, indicating that it is alive and ready to use. If there is no activity after 10 minutes, it may be best to start over with fresh yeast.
Mixing Dry Ingredients
While the yeast is activating, prepare the dry ingredients. In a large mixing bowl, combine all-purpose flour and salt. The salt not only enhances flavor but also regulates yeast activity, preventing it from working too quickly. To ensure even distribution, use a whisk or fork to mix the dry ingredients thoroughly. This step is essential, as it helps prevent clumping and ensures consistent flavor throughout the bread.
Combining Ingredients
Once the yeast is activated, it’s time to combine the ingredients. Pour the yeast mixture into the bowl with the dry ingredients, followed by olive oil. Using a wooden spoon or a spatula, gently stir the mixture until it starts to come together. The goal is to create a shaggy dough. Avoid overmixing at this stage, as it can lead to a dense bread.
Kneading the Dough
Kneading the dough is a critical step in achieving the perfect consistency and elasticity. Transfer the shaggy dough onto a floured surface and begin kneading by pushing the dough away from you, folding it back over itself, and turning it slightly after each push. Knead for about 8-10 minutes, or until the dough becomes smooth and elastic. If the dough is sticking to your hands or the surface, sprinkle a little more flour as needed. Proper kneading develops gluten, which gives the bread its structure.
First Rise
After kneading, it’s time for the dough to undergo its first rise. Place the dough in a lightly greased bowl, cover it with a damp cloth or plastic wrap, and let it rise in a warm, draft-free area for about 1-2 hours, or until it has doubled in size. This fermentation process is crucial, as it develops flavors and creates air pockets that make the bread light and airy. The dough will be ready for the next step when you can gently poke it with your finger, and the indentation remains.
Incorporating the Cheese
Once the dough has risen, gently punch it down to release any excess air. Now comes the fun part—incorporating the cheese. Turn the dough out onto a floured surface and flatten it slightly with your hands. Sprinkle the mozzarella and Parmesan cheese over the surface, along with any garlic and herbs you wish to add. Fold the dough over the cheese and knead gently to distribute the cheese evenly throughout. This technique ensures that every slice of bread will have that irresistible cheesy goodness.
With these foundational steps completed, you’re well on your way to baking a loaf of Cheesy Bliss Bread that will become a beloved staple in your home. The process may seem intricate, but each step brings you closer to a comforting and delicious outcome that everyone will enjoy!
Shaping the Bread
Once your dough has risen and is ready to be shaped, you have a couple of delightful options for how to present your Cheesy Bliss Bread. The most common shapes are the traditional loaf and individual rolls, each offering a unique serving style and experience.
Loaf Shape: To shape your dough into a loaf, gently punch down the risen dough to release any air bubbles. Turn it out onto a lightly floured surface and shape it into a rectangle. Roll the dough tightly from one short end to the other, tucking the seams underneath as you go to create a smooth top. Place the shaped loaf into a greased bread pan, allowing it to rise again.
Rolls Shape: If you prefer individual servings, divide the dough into equal portions after the first rise. Shape each piece into a ball by tucking the edges into the center and rolling it on the counter. Place the balls in a greased baking dish or on a parchment-lined baking sheet, ensuring they are close but not touching. This method will create soft, pull-apart rolls that are perfect for sharing.
Second Rise
The second rise is a crucial step in bread-making that significantly affects the texture and flavor of your Cheesy Bliss Bread. During this rise, the yeast continues to work, producing carbon dioxide and causing the dough to expand further. This process helps develop the gluten structure, resulting in a light and airy bread.
Allow the shaped bread to rise in a warm, draft-free area until it has nearly doubled in size. This usually takes about 30 to 45 minutes, but keep an eye on the dough rather than the clock. The ideal rise is when the dough springs back slowly when lightly pressed with a finger.
Preheating the Oven
While your dough undergoes its second rise, the next important step is preheating your oven. A properly preheated oven is essential for achieving a perfect crust and texture. Set your oven to 375°F (190°C) and allow it to heat for at least 20 minutes before placing your bread inside. This ensures that the bread will have immediate exposure to high heat, promoting a good rise and browning.
Brushing with Butter
Before baking, give your bread an extra layer of flavor and shine by brushing it with melted butter. This simple step not only enhances the bread’s taste but also contributes to a beautiful golden crust. Use a pastry brush to coat the surface gently but thoroughly. For added flavor, consider mixing minced garlic or herbs into the melted butter for a more aromatic finish.
Baking
Now it’s time to bake your Cheesy Bliss Bread! Place the loaf or rolls in the preheated oven and bake for about 25 to 30 minutes, or until the top is golden brown and the bread sounds hollow when tapped on the bottom.
Key Indicators for Doneness: To ensure your bread is properly baked, look for a few indicators:
– Color: The top should be a deep, golden brown.
– Sound: When tapped on the bottom, the loaf should produce a hollow sound.
– Temperature: If you have a kitchen thermometer, the internal temperature should reach around 190°F (88°C) for bread.
Once baked, remove the bread from the oven and let it cool in the pan for a few minutes before transferring it to a wire rack to cool completely. This cooling process allows the crust to set and prevents the bread from becoming soggy.
Serving Suggestions and Pairings
Cheesy Bliss Bread is a versatile dish that can pair wonderfully with a variety of accompaniments. Here are some ideas for serving:
1. Dipping Sauces: Serve your bread warm with a selection of dipping sauces. Consider marinara, garlic butter, or a creamy herb dip. These sauces enhance the cheese flavor and make for an interactive dining experience.
2. Soups: This bread is perfect for dipping into soups. Pair it with classic tomato soup, creamy potato leek soup, or a hearty vegetable stew. The cheese-filled bread complements the flavors and adds a satisfying texture.
3. Salads: A fresh salad can balance the richness of Cheesy Bliss Bread. Try it with a simple mixed greens salad dressed with a light vinaigrette or a Caesar salad for a more indulgent pairing.
4. Beverage Pairings: Depending on your preference, you can pair your Cheesy Bliss Bread with various beverages. A crisp white wine, like a Chardonnay or Sauvignon Blanc, complements the cheese beautifully. For craft beer enthusiasts, a light lager or a hoppy pale ale can enhance the flavors. Non-alcoholic options might include sparkling water with a twist of lemon or a refreshing iced tea.
Creative Ways to Repurpose Leftover Bread
If you happen to have leftovers (though this is unlikely), there are several delightful ways to repurpose Cheesy Bliss Bread:
1. Croutons: Cut the bread into cubes, toss them with olive oil and your choice of seasonings, then bake until crispy. These homemade croutons make a perfect addition to salads or soups.
2. Sandwiches: Use the bread to create delicious sandwiches. The cheesy flavor pairs well with deli meats, fresh vegetables, and spreads.
3. French Toast: If you are feeling adventurous, transform leftover bread into a sweet breakfast treat by making French toast. Dip slices in an egg mixture and cook until golden brown, then serve with syrup and fruit.
Nutritional Information
Understanding the nutritional content of your Cheesy Bliss Bread can help you enjoy it as part of a balanced diet. Here’s a breakdown of the nutritional information per serving (assuming 12 slices from the loaf):
– Calories: Approximately 200
– Carbohydrates: 30g
– Protein: 6g
– Fat: 8g
– Fiber: 1g
Macronutrients: This bread is relatively high in carbohydrates due to the flour, providing energy. The cheese adds protein and fat, contributing to a satisfying meal. However, moderation is key, especially if you are watching your calorie intake.
Healthier Substitutions: To make this recipe healthier, consider using whole wheat flour instead of all-purpose flour, which increases fiber content. You could also reduce the amount of cheese used or substitute a lower-fat cheese to cut calories without sacrificing too much flavor.
Variations and Customization
One of the joys of baking is the ability to customize recipes according to your taste. Here are some suggestions for variations and customizations for your Cheesy Bliss Bread:
1. Cheese Combinations: Experiment with different types of cheese for unique flavors. Cheddar, gouda, mozzarella, or even pepper jack can all create delightful variations. Mixing cheeses can also enhance the overall taste and texture.
2. Adding Ingredients: For an extra kick of flavor, consider adding ingredients such as diced jalapeños, sun-dried tomatoes, or fresh herbs like rosemary or thyme. These additions can elevate your bread and make it even more enjoyable.
3. Gluten-Free Options: If you or your guests require a gluten-free option, substitute traditional flour with a gluten-free flour blend. Look for a blend that includes xanthan gum, which helps mimic the texture of traditional bread.
Conclusion
Making Cheesy Bliss Bread is an experience that brings warmth and joy to any kitchen. The delightful aroma that fills your home as it bakes is only matched by the satisfaction of sharing this flavorful bread with family and friends. Homemade baked goods like this not only satisfy hunger but also create memories and foster connections.
As you experiment with this recipe, don’t hesitate to add your unique twist or personal touch. Whether it’s through different cheese combinations, additional flavors, or creative serving suggestions, take the time to make this recipe your own. Each loaf you bake is a chance to explore and enjoy the simple pleasure of homemade bread. So gather your ingredients, roll up your sleeves, and let the baking adventure begin!