Introduction
There’s something undeniably comforting about the aroma of freshly baked bread wafting through your home. The process of kneading, rising, and baking is not just about creating something delicious; it’s an experience that connects us to our roots, evoking memories of family gatherings and warm kitchens. Among the myriad of bread recipes, cloud-like dinner rolls stand out with their pillowy softness, buttery flavor, and irresistible charm. These rolls are not just a side dish; they’re the perfect complement to any meal, from holiday feasts to weeknight dinners.
What sets these cloud-like dinner rolls apart from the rest? It’s their extraordinary texture—a light, airy quality that makes each bite feel like a fluffy cloud. The flavor is subtly sweet, enhanced by the richness of butter and a hint of honey, making them versatile enough to be enjoyed with savory dishes or slathered with jam. Perhaps most appealing is the simplicity of the recipe, which allows both novice bakers and seasoned pros to create bakery-quality rolls in the comfort of their own kitchens. Whether you’re looking to impress guests or simply indulge in a comforting treat, these dinner rolls are bound to become a staple in your baking repertoire.
The Science Behind Cloud-Like Dinner Rolls
Before diving into the recipe, it’s essential to understand the science at play behind these delightful rolls. Each ingredient serves a specific purpose, contributing to the overall texture, flavor, and success of the final product. Let’s break down the key components of our cloud-like dinner rolls and explore the role they play in creating that coveted fluffiness.
Ingredients Overview
1. All-Purpose Flour: This is the backbone of our dinner rolls. All-purpose flour has a moderate protein content, which is ideal for developing gluten. Gluten is what gives bread its structure and chewiness. Using all-purpose flour ensures that the rolls will have the perfect balance of tenderness and strength.
2. Instant Yeast: We’re using instant yeast for this recipe, which is a favorite among bakers for its convenience and reliability. Unlike active dry yeast, which requires proofing in warm water before use, instant yeast can be mixed directly into the dry ingredients. This not only saves time but also results in a quicker rise, allowing you to enjoy your rolls sooner.
3. Granulated Sugar: Sugar plays a dual role in this recipe. Firstly, it acts as food for the yeast, promoting fermentation and helping the dough rise. Secondly, it enhances the flavor of the rolls, giving them a subtle sweetness that balances the savory elements of your meal.
4. Salt: Although it may seem counterintuitive to add salt to a dough, it’s crucial for flavor enhancement. Salt balances the sweetness of the sugar and strengthens the gluten network in the dough, resulting in rolls that are both flavorful and structurally sound.
5. Whole Milk: The use of whole milk in this recipe contributes to the richness and tenderness of the rolls. The fat content in whole milk helps create a softer texture, while its warmth aids in activating the yeast, promoting a better rise.
6. Unsalted Butter: Butter is a key ingredient in achieving that rich, buttery flavor we crave in dinner rolls. Using unsalted butter allows you to control the salt content in the dough, ensuring a balanced flavor without overpowering the rolls.
7. Honey: This natural sweetener not only adds a touch of sweetness but also contributes moisture to the rolls, enhancing their softness. Honey helps the rolls stay fresh longer, making them perfect for leftovers (if there are any!).
The Role of Instant Yeast
One of the most critical elements in achieving those cloud-like rolls is the yeast. Instant yeast, also known as rapid-rise or bread machine yeast, is designed to work quickly, allowing for faster fermentation. When combined with warm milk and sugar, the yeast activates, producing carbon dioxide gas that creates air pockets in the dough. This is what gives the rolls their light and airy texture.
Unlike active dry yeast, which requires rehydration before mixing, instant yeast can be added directly, making this recipe more straightforward and accessible for those who may be new to baking. When using instant yeast, it’s essential to store it properly in a cool, dry place to maintain its potency.
The Importance of Kneading and Gluten Development
Kneading is another crucial step in the bread-making process. As you knead the dough, gluten strands begin to develop, creating a strong network that traps the gas produced by the yeast. This gluten development is what allows the rolls to rise and maintain their fluffy structure during baking.
It’s important not to skip this step, as proper kneading ensures that your rolls will have that desirable cloud-like texture. The dough should be kneaded until it becomes smooth and elastic, which usually takes about 8-10 minutes by hand or 5-7 minutes in a stand mixer.
Ingredients Breakdown
Now that we understand the science behind our ingredients, let’s take a closer look at each one and how it contributes to the overall success of our cloud-like dinner rolls.
– All-Purpose Flour: The foundation of our rolls, all-purpose flour strikes the perfect balance between strength and tenderness. When measuring flour, be sure to spoon it into the measuring cup and level it off with a knife to avoid using too much, which can lead to dense rolls.
– Instant Yeast: Always check the expiration date on your yeast package to ensure it’s still active. If you’re unsure, you can test it by mixing it with warm water and sugar; if it bubbles and foams after a few minutes, it’s good to go.
– Granulated Sugar: For optimal results, use granulated sugar as it dissolves easily in the dough. You can also experiment with brown sugar for a deeper flavor profile, but keep in mind that it may slightly alter the texture.
– Salt: Don’t skip the salt! It not only enhances flavor but also strengthens the dough. If you prefer to reduce sodium intake, consider using a smaller amount of salt without compromising the overall flavor.
– Whole Milk: For the best texture, use whole milk, as the fat content contributes to a richer flavor and softer crumb. If you’re lactose intolerant, you can substitute with a non-dairy milk, but the rolls may not be quite as rich.
– Unsalted Butter: Using unsalted butter allows you to control the saltiness of your dough. Be sure to melt it gently; overheating can cause the butter to separate, which can affect the texture of your rolls.
– Honey: This ingredient adds a natural sweetness and moisture. If you prefer, you can substitute with maple syrup or agave nectar for a different flavor profile.
By understanding the role of each ingredient, you’re better equipped to make adjustments and substitutions as needed, ensuring that your cloud-like dinner rolls turn out perfectly every time.
In the next part of this article, we will dive into the step-by-step instructions for making these delightful rolls, along with tips for achieving the best results. Whether you’re preparing for a special occasion or just looking to elevate your weeknight dinner, these cloud-like dinner rolls are sure to impress. Stay tuned!
{{image_1}}
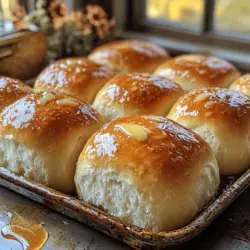
Additional Butter for Brushing
Before diving into the recipe, let’s talk about the finishing touch that elevates these cloud-like dinner rolls to another level: brushing them with butter. This simple yet impactful step not only enhances the flavor of the rolls but also helps maintain their softness after baking. Using room temperature or melted butter, you can achieve a golden crust while adding a rich, buttery taste that complements the airy texture of the rolls.
Step-by-Step Instructions
Preparing the Yeast Mixture
The first step in creating the perfect cloud-like dinner rolls is to prepare your yeast mixture. Start with warm water, ideally between 100°F and 110°F. This temperature is crucial because it ensures the yeast activates properly without killing it. Sprinkle the yeast over the water and let it sit for about 5 to 10 minutes until it becomes frothy. This bubbling action indicates that the yeast is alive and ready to help your rolls rise.
Combining Wet Ingredients
Once your yeast is activated, it’s time to combine the wet ingredients. In a mixing bowl, combine the frothy yeast mixture with melted butter, milk, and sugar. The sugar provides nourishment for the yeast, contributing to a better rise and a slightly sweet flavor. Use a whisk to blend these ingredients smoothly. Ensuring a consistent mixture at this stage is vital; any lumps could affect the texture of your dinner rolls.
Mixing Dry Ingredients
Next, you’ll want to prepare the dry ingredients. In a separate bowl, whisk together all-purpose flour and salt. Mixing the dry ingredients separately helps distribute the salt evenly, which is essential for flavor and yeast function. To prevent lumps, sift the flour if you have time, although this step is not mandatory. Gradually add the dry ingredients to the wet mixture, stirring until a shaggy dough begins to form.
Kneading the Dough
Now it’s time to knead the dough. Turn it out onto a lightly floured surface and knead for about 8 to 10 minutes. The goal here is to develop the gluten in the flour, which will give your rolls their structure. You’ll know the dough is ready when it’s smooth, elastic, and springs back when poked. If it feels too sticky, sprinkle a little more flour as needed, but be cautious not to add too much, as it could lead to dense rolls.
First Rise
After kneading, shape the dough into a ball and place it in a lightly greased bowl. Cover it with a clean kitchen towel or plastic wrap, and let it rise in a warm, draft-free area until it has doubled in size. This usually takes about 1 to 1.5 hours. Ideal conditions for rising include a warm oven (turned off) or a sunny spot in your kitchen. The dough is ready when it has roughly doubled in size and retains an indentation when you gently poke it.
Shaping the Rolls
Once the dough has risen, it’s time to shape your rolls. Gently punch the dough down to release the air and turn it out onto a floured surface. Divide the dough into equal portions, aiming for about 12 to 16 pieces, depending on how large you want your rolls. Shape each piece into a round ball by tucking the edges under to create a smooth surface. Uniform size is key here, as it ensures even baking.
Second Rise
Place the shaped rolls in a greased baking dish or on a lined baking sheet, spacing them a few inches apart. Cover them loosely with a towel and let them rise again for about 30 to 45 minutes. This second rise is crucial for achieving that light and fluffy texture. You’ll know they’re ready when they have puffed up and are slightly touching each other.
Baking the Rolls
Preheat your oven to 375°F (190°C) while the rolls are rising. Once they have completed their second rise, place them in the preheated oven and bake for 15 to 20 minutes, or until they are golden brown. A great way to check for doneness is to tap the bottom of a roll; it should sound hollow. Additionally, you can use an instant-read thermometer; the internal temperature should read around 190°F (88°C).
Brushing with Butter
As soon as you take the rolls out of the oven, brush the tops with melted butter. This step adds a gorgeous sheen and enhances the flavor. The butter will soak into the warm rolls, helping to keep them soft and delicious.
The Perfect Serving Suggestions
These cloud-like dinner rolls are incredibly versatile and pair beautifully with a variety of dishes. Here are some serving suggestions to elevate your dining experience:
– With Soups and Salads: Serve warm with a hearty soup, such as tomato basil or creamy potato, or alongside a fresh garden salad. The rolls can be used to scoop up the last bits of soup or to complement your favorite dressing.
– With Main Courses: These rolls make a perfect side for roasted meats, grilled chicken, or vegetarian casseroles. Their soft texture provides a wonderful contrast to hearty main dishes.
– Spreads and Toppings: Enhance the flavor of your rolls with various spreads. Classic butter, honey, or a selection of jams are all delightful options. For a savory twist, try garlic herb butter or whipped cream cheese.
– Creative Uses for Leftover Rolls: If you have leftovers (which is rare, considering how delicious they are), consider making sliders with your favorite fillings. They can also be transformed into breakfast sandwiches with eggs and cheese or even served with a side of butter for a delightful snack.
Storing and Reheating Cloud-Like Dinner Rolls
To keep your cloud-like dinner rolls fresh, it’s essential to store them correctly. Here are some best practices:
– Room Temperature Storage: If you plan on consuming the rolls within a day or two, store them in an airtight container at room temperature. This will maintain their soft texture and prevent them from drying out.
– Refrigeration: If you need to store them for longer, you can refrigerate them, but keep in mind that this may affect their softness. Make sure they are in an airtight container to prevent them from absorbing odors.
– Freezing: For long-term storage, freezing is your best option. Wrap each roll tightly in plastic wrap, then place them in a freezer-safe bag. They can be frozen for up to three months.
Reheating
When you’re ready to enjoy your rolls, reheating is simple. Here are two effective methods:
– Oven: Preheat your oven to 350°F (175°C). Place the rolls on a baking sheet and cover them with aluminum foil to prevent over-browning. Heat for about 10-15 minutes until warmed through.
– Microwave: For a quicker option, place the rolls on a microwave-safe plate and cover them with a damp paper towel. Heat in short bursts of 10-15 seconds until warmed. Be careful not to overheat, as this can dry them out.
Conclusion
Making cloud-like dinner rolls is not just about baking; it’s about the joy of creating something special that brings people together. The process is rewarding, and the result is a batch of soft, fluffy rolls that can elevate any meal. Whether you serve them as a side dish or enjoy them on their own with a pat of butter, these rolls are sure to impress.
I encourage you to try this recipe and embrace the art of bread-making. The delightful aroma of freshly baked rolls filling your kitchen is a joy that simply cannot be replicated. So roll up your sleeves, gather your ingredients, and enjoy the satisfaction of sharing homemade bread with family and friends. Happy baking!