Introduction
Potato fingers, also known as potato wedges or fries, are a beloved snack that transcends age and cultural boundaries. Whether served as a side dish at a family dinner, a party appetizer, or a late-night craving, their crispy texture and savory flavor make them a universally appealing choice. What makes this recipe for Crispy Easy Potato Fingers stand out is its simplicity and versatility. With just a handful of ingredients and a few easy steps, you can create a delicious snack that rivals any restaurant fare.
In recent years, there has been a growing popularity of homemade snacks, with many people opting to prepare their favorite indulgences from the comfort of their kitchens. The trend towards cooking at home not only allows for customization but also promotes healthier eating habits. Instead of deep-frying your potato fingers, this recipe focuses on baking, which significantly reduces the amount of oil needed while still achieving that desired crunch. So, if you’re ready to elevate your snacking game, let’s dive into how to make these delightful crispy potato fingers.
Understanding the Ingredients
The foundation of any great potato dish lies in the choice of potatoes. When it comes to achieving that perfect crispy texture, selecting the right type of potato is crucial. The most popular varieties for making potato fingers include Russet and Yukon Gold potatoes.
Best Types of Potatoes for Crispiness
– Russet Potatoes: Known for their high starch content, Russet potatoes are ideal for achieving a crispy exterior. Their fluffy interior also provides a satisfying contrast to the crunch, making them a favorite for fries and wedges.
– Yukon Gold Potatoes: These potatoes have a slightly waxy texture, which helps them hold their shape well during cooking. Yukon Golds offer a buttery flavor that enhances the overall taste of the potato fingers.
Overview of Seasonings and Their Roles
Seasoning plays a vital role in elevating the flavor profile of your potato fingers. A blend of spices can transform simple potatoes into a delicious snack that will have everyone asking for seconds. Here are the key seasonings you’ll need:
– Garlic Powder: Adds a robust and savory flavor, enhancing the overall taste of the potato fingers.
– Paprika: This spice not only contributes a beautiful color but also introduces a subtle smokiness that pairs wonderfully with potatoes.
– Onion Powder: A staple in many kitchens, onion powder provides a sweet and fragrant note that complements the other spices.
– Salt and Black Pepper: The classics! Salt enhances all the flavors, while black pepper adds just the right amount of heat.
Optional Ingredients
For those looking to take their potato fingers to the next level, consider adding these optional ingredients:
– Fresh Parsley: Finely chopped parsley can add a pop of color and a fresh, herbal note that brightens the dish.
– Parmesan Cheese: A sprinkle of grated Parmesan cheese adds a rich, nutty flavor and extra crispiness as it bakes.
Health Benefits of Using Olive Oil Versus Other Cooking Oils
When it comes to cooking oils, olive oil stands out as a healthier option. Rich in monounsaturated fats and antioxidants, olive oil not only enhances the flavor of your potato fingers but also offers several health benefits. It can help reduce inflammation, improve heart health, and provide essential nutrients. By choosing olive oil over other fats, you’re not only making a delicious choice but a nutritious one as well.
Step-by-Step Guide to Making Crispy Potato Fingers
Preheating the Oven
The first step to achieving perfectly baked potato fingers is to preheat your oven. A hot oven ensures that the potatoes cook evenly and develop a crispy exterior. Set your oven to 425°F (220°C) and allow it to preheat fully while you prepare the potatoes.
Preparing the Potatoes
Once your oven is preheating, it’s time to prepare the star of the show: the potatoes. Here’s how to do it:
1. Washing: Begin by thoroughly washing your potatoes to remove any dirt or debris. Scrubbing them under running water will ensure they are clean and ready for cooking.
2. Peeling (Optional): Depending on your preference, you can peel the potatoes or leave the skins on. Leaving the skins adds texture and nutrients, but if you prefer a smoother bite, feel free to peel them.
3. Cutting Techniques: Cut the potatoes into uniform sticks or wedges. Aim for a thickness of about 1/4 to 1/2 inch. Uniform sizes are essential for even cooking, preventing some pieces from burning while others remain undercooked.
Tips for Achieving Uniform Sizes
To achieve uniformity in size, consider using a sharp knife or a mandoline slicer. This tool allows for consistent cuts, ensuring that all potato pieces will cook at the same rate. If you’re unsure, take your time while cutting; precision is key to an evenly baked snack.
Seasoning the Potatoes
Once your potatoes are cut, it’s time to season them. Here’s how to ensure every piece is coated evenly:
1. In a Large Bowl: Place the cut potatoes in a large mixing bowl. This allows for easy tossing and ensures all the pieces are well-covered in seasoning.
2. Add Olive Oil: Drizzle a generous amount of olive oil over the potatoes. The oil not only helps the seasonings stick but also contributes to the crispiness during baking. Aim for about 2 tablespoons for every 4 medium potatoes.
3. Sprinkle the Seasonings: Add your garlic powder, paprika, onion powder, salt, and black pepper to the bowl. If you’re using optional ingredients like parsley or Parmesan cheese, add them at this stage as well.
4. Tossing: Use your hands or a spatula to toss the potatoes until they are evenly coated in oil and spices. Make sure each piece is well-seasoned for maximum flavor.
Importance of Mixing and Marinating for Flavor Infusion
For the best flavor, consider letting your seasoned potatoes sit for about 15 minutes. This marinating time allows the spices to penetrate the potato flesh, resulting in a more flavorful outcome. If you have the time, you can even marinate them in the refrigerator for up to an hour, enhancing the taste even further.
Arranging for Optimal Crispiness
Now that your potatoes are seasoned, it’s crucial to arrange them properly on the baking sheet for optimal crispiness. Here’s how to do it:
1. Prepare the Baking Sheet: Line a baking sheet with parchment paper or lightly grease it with olive oil to prevent sticking.
2. Spread the Potatoes: Lay the seasoned potato fingers in a single layer on the baking sheet. Ensure there is enough space between each piece; overcrowding will lead to steaming rather than crisping.
3. Spacing Matters: Aim for at least an inch of space between each potato finger. This allows hot air to circulate around them, which is essential for achieving that coveted crispy texture.
The Science Behind Air Circulation and Even Baking
When baking, air circulation is key. It helps to cook the potatoes evenly from all sides. By following the spacing guidelines and avoiding overcrowding, you allow the heat to circulate freely, which results in perfectly crispy potato fingers. The goal is to create an environment similar to frying, where the hot air envelops the potatoes and cooks them through while creating a crispy outer layer.
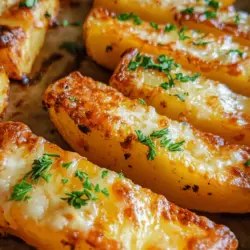
With your oven preheated, your potatoes seasoned, and arranged correctly, you are now ready to proceed to baking them into golden, crispy perfection.
{{image_1}}
Understanding Baking Times and Temperatures
When it comes to achieving the perfect crispy texture for your potato fingers, understanding baking times and temperatures is crucial. The recommended baking temperature of 425°F (220°C) strikes the ideal balance between cooking the potatoes through while developing a satisfying crispiness on the outside. This high temperature ensures that the moisture inside the potatoes evaporates quickly, which is essential for that golden-brown finish.
Why 425°F (220°C) is Ideal for Achieving Crispiness
Baking at 425°F (220°C) allows for a rapid heat transfer that helps the exterior of the potato fingers crisp up without overcooking the interior. The hot air circulates around the potatoes, causing them to brown evenly and develop a crunchy texture. If you bake at a lower temperature, the potato fingers may end up soft and mushy instead of crispy. Conversely, higher temperatures can lead to burnt edges before the insides are fully cooked. Thus, 425°F (220°C) is the sweet spot for achieving perfectly crispy potato fingers.
The Flipping Technique: Ensuring Even Browning
To ensure that your potato fingers achieve even browning, it’s essential to flip them halfway through the baking process. After about 15-20 minutes, use a spatula to carefully turn the potato fingers over. This flipping technique allows all sides to come into contact with the hot baking sheet, leading to a uniform crisp. Make sure to flip gently to avoid breaking them. If you have an air fryer, you can also use this method for even better results, as the airflow will help achieve that desired crispiness without the need for excessive flipping.
Recognizing When They Are Done: Visual and Texture Cues
Knowing when your potato fingers are done is key to enjoying them at their best. Look for a golden-brown color that indicates they are nicely roasted. The texture should feel firm and crispy on the outside, while the inside should be tender when tested with a fork. Aim for a cooking time of about 25-30 minutes, but keep a close eye during the last few minutes to prevent overcooking. If you’re uncertain, a quick taste test will let you know if they are ready to serve.
Enhancing Flavor with Parmesan Cheese
For an extra layer of richness and depth, consider adding Parmesan cheese to your potato fingers. This optional step can elevate the dish from simple snack to gourmet treat. The nutty, salty flavor of Parmesan complements the potatoes beautifully, enhancing their natural taste.
Timing for Adding Cheese to Achieve the Perfect Crust
To achieve the perfect cheesy crust, add the grated Parmesan cheese during the last 5-7 minutes of baking. This timing allows the cheese to melt and form a delightful crust without burning. To do this, simply sprinkle an even layer of cheese over the potato fingers and return them to the oven. Keep an eye on them, as the cheese will brown quickly.
Variations Using Different Cheeses or Seasonings
Experimenting with different cheeses can lead to exciting flavor variations. Cheddar cheese offers a sharpness that pairs well with potatoes, while mozzarella provides a gooey texture. Alternatively, you can mix in some spices, such as garlic powder, paprika, or even herbs like rosemary or thyme, to add an aromatic touch to your potato fingers. The possibilities are endless, allowing you to customize this dish to suit your taste preferences.
Serving Suggestions
Once your crispy potato fingers are ready, it’s time to think about how to serve them. Presentation and accompaniments can enhance the overall experience, making your snack even more enjoyable.
Ideal Dipping Sauces to Complement Potato Fingers
Dipping sauces play a critical role in elevating the flavor of your potato fingers. Here are some classic and creative options to consider:
– Classic Options: Ketchup, mayonnaise, and aioli are traditional favorites that never go out of style. Ketchup provides a tangy sweetness, while mayonnaise adds creaminess. Aioli, a garlic-flavored mayonnaise, brings a gourmet touch to your snack.
– Creative Options: For those looking to spice things up, try a spicy sriracha mayo for a kick or a garlic dip for a rich, aromatic flavor. Yogurt-based sauces with herbs or spices are also a refreshing choice, providing a contrast to the warmth of the baked potatoes.
Presentation Ideas for Serving at Gatherings or Parties
When serving potato fingers at gatherings or parties, presentation is key. Consider using a large platter lined with parchment paper for an appealing display. You can arrange the potato fingers in a circular pattern or stack them creatively for visual interest. Include small bowls of your chosen dipping sauces for an inviting touch. Garnishing with fresh herbs, such as parsley or chives, can add a pop of color and freshness to your platter.
Nutritional Information
Understanding the nutritional content of your crispy potato fingers can help you enjoy them guilt-free. A typical serving size of potato fingers (about 100 grams) contains approximately 150-200 calories, depending on the cooking method and any added ingredients like oil or cheese.
Overview of Calories and Macronutrients per Serving
In general, a serving may include:
– Calories: 150-200
– Carbohydrates: 30g
– Protein: 2-4g
– Fat: 5-8g
This balance allows you to enjoy them as a satisfying snack without compromising your dietary goals.
Discussion on Health-Conscious Modifications
For those looking to make health-conscious modifications, consider reducing the amount of oil used during baking or opting for a low-fat cheese. You can also use sweet potatoes instead of regular potatoes for added nutrients and a slightly different flavor. Additionally, incorporating more spices and herbs instead of relying solely on cheese can add robust flavors while keeping the dish lighter.
Conclusion
Making crispy potato fingers at home is not just about satisfying your cravings; it’s also about the joy of cooking and sharing delicious food with loved ones. The crispy exterior, tender inside, and ability to customize with various cheeses and seasonings make this recipe a favorite among many.
Additionally, serving these potato fingers at gatherings, whether as a casual snack or a party appetizer, allows you to showcase your culinary skills while delighting your guests. As you experiment with flavors and dip pairings, you’ll discover new and exciting ways to enjoy this classic treat.
So gather your ingredients, preheat your oven, and get ready to indulge in the satisfaction of homemade crispy potato fingers. Whether enjoyed on a cozy family night or at a lively celebration, these potato fingers are sure to bring joy to your table.