Introduction
Homemade snacks hold a special place in our hearts, elevating any gathering or simple evening into a memorable experience. Whether it’s a cozy night in or a lively party with friends, the right snack can turn the atmosphere from ordinary to extraordinary. Among an array of delightful options, Homemade Garlic Butter Cheese Bombs stand out as a perfect combination of flavors and textures. These delectable bites of dough encasing a creamy, cheesy filling are irresistibly good and embody the essence of comfort food.
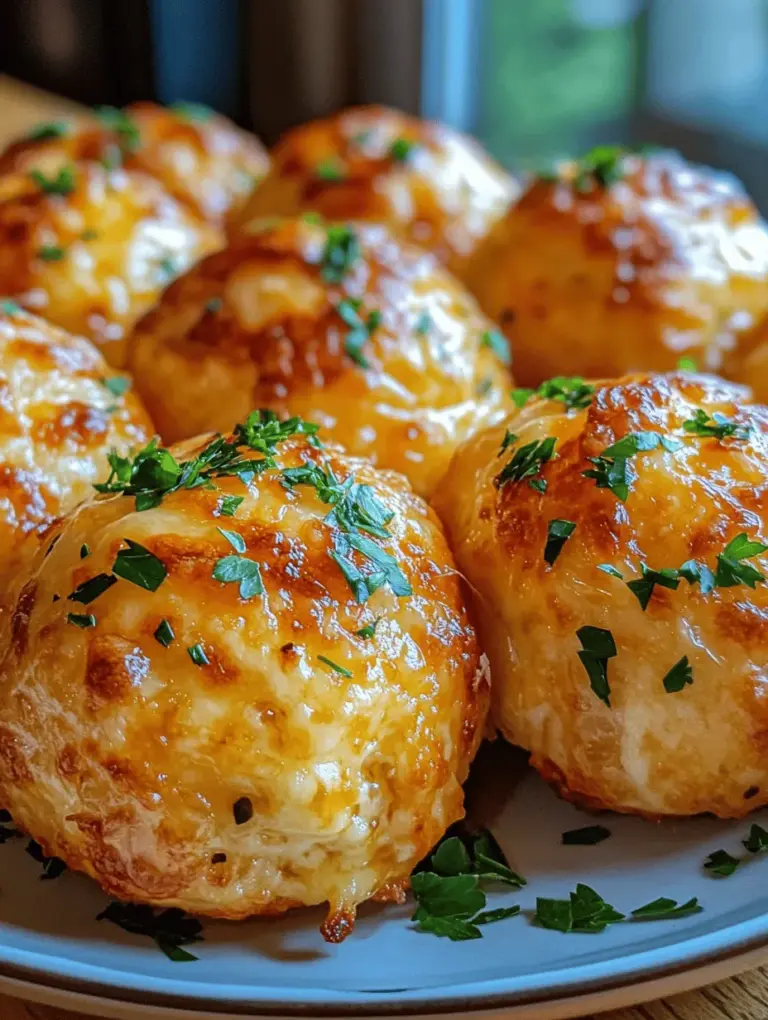
Imagine biting into a warm, fluffy dough shell that gives way to a melty, cheesy center, all enhanced by the rich, savory notes of garlic and butter. They are the ultimate indulgence that can serve as an appetizer, a party snack, or even a comforting treat after a long day.
Not only are Garlic Butter Cheese Bombs delicious, but they are also versatile. They can be tailored to your personal taste; feel free to add herbs or spices to the cheese filling according to your preference. Plus, they are easy to prepare, making them suitable for both novice cooks and seasoned chefs. In this guide, we’ll walk you through the steps of creating these delightful cheese bombs, ensuring that your next culinary endeavor is both enjoyable and satisfying.
Understanding the Ingredients
To master the art of making Homemade Garlic Butter Cheese Bombs, it’s essential to understand the role of each ingredient. The quality and freshness of your ingredients directly impact the flavor and texture of your final product, so let’s break down the essentials:
All-Purpose Flour
All-purpose flour serves as the foundation for the dough in our cheese bombs. It provides structure and stability, allowing the dough to rise properly and hold its shape during baking. When selecting your flour, opt for high-quality brands to ensure a consistent texture.
Baking Powder
Baking powder acts as a leavening agent, creating air pockets in the dough that contribute to its fluffiness. This ingredient is crucial as it helps your cheese bombs rise beautifully in the oven, resulting in a light and airy texture that contrasts perfectly with the gooey cheese filling.
Garlic Powder
To achieve the signature flavor profile of Garlic Butter Cheese Bombs, garlic powder is a must-have. It infuses the dough with a savory depth that pairs harmoniously with the richness of the cheese. While fresh garlic can also be used, garlic powder offers a more even distribution of flavor throughout the dough.
Mozzarella and Cream Cheese
The heart of these cheese bombs lies in their cheesy filling. Mozzarella cheese provides a stretchy, melty quality, while cream cheese adds a rich, creamy texture that binds everything together. Together, they create a decadent filling that oozes out with each bite. Make sure to use high-quality cheeses for the best results.
Fresh Parsley
Fresh parsley is not just a garnish; it adds a vibrant pop of color and freshness to the cheesy filling. This herb enhances the overall flavor and brings a touch of brightness that balances the richness of the butter and cheese. Chopped finely, parsley will help to create a visually appealing and flavorful blend inside the cheese bombs.
Step-by-Step Preparation
Now that we have a clear understanding of our ingredients, it’s time to dive into the preparation of Homemade Garlic Butter Cheese Bombs. Follow this detailed guide to ensure your cheese bombs turn out perfectly.
Preparing the Dough
1. Mixing the Dry Ingredients: Start by combining the all-purpose flour, baking powder, and garlic powder in a large mixing bowl. Whisk them together to ensure they are evenly distributed. This step is crucial as it prevents clumping and ensures that the baking powder is well-integrated.
2. Incorporating Cold Butter: Next, cut cold butter into small cubes and add it to the flour mixture. Using a pastry cutter, fork, or your fingers, work the butter into the flour until it resembles coarse crumbs. The cold butter is essential for achieving the right texture—this ensures that the fat doesn’t fully incorporate, allowing for flaky layers once baked.
3. Mixing Wet Ingredients: In a separate bowl, combine any wet ingredients as specified in your recipe (this usually includes milk or water). Make sure your wet ingredients are also cool or at room temperature to maintain the integrity of the dough.
4. Combining the Mixtures: Gradually pour the wet mixture into the dry ingredients, mixing gently with a spatula or wooden spoon. It’s important not to overwork the dough at this stage, as doing so can lead to tough cheese bombs. You want a slightly shaggy dough that holds together but still has some texture.
Adding the Cheese Filling
1. Preparing the Cheese Mixture: In another bowl, combine shredded mozzarella, softened cream cheese, and finely chopped fresh parsley. Mix until the ingredients are well incorporated. The cream cheese should be soft enough to blend easily, so you might want to leave it out at room temperature for a bit before mixing.
2. Incorporating the Cheese: Once your dough is ready, take small portions and flatten them gently in your palm. Place a tablespoon of the cheese mixture in the center of each piece of dough.
3. Forming the Cheese Balls: Carefully fold the edges of the dough over the cheese filling, pinching to seal them tightly. You want to ensure that the filling is completely encased to prevent leaks during baking. Roll the filled dough into a ball, making sure it’s smooth and uniform in size. This not only looks appealing but also helps with even cooking.
Rolling the Cheese Bombs
1. Ideal Size: Aim for cheese balls that are about 1.5 inches in diameter. This size is perfect for baking evenly while still being large enough to offer a satisfying bite.
2. Ensuring Even Cooking: As you roll each cheese ball, make sure they are all roughly the same size. This ensures that they cook uniformly, preventing some from being overdone while others remain undercooked.
Making the Garlic Butter Sauce
The icing on the cake—or rather, the drizzle on the cheese bombs—is the garlic butter sauce. This sauce is key to enhancing the flavor of the cheese bombs, making them even more irresistible.
1. Melting the Butter: In a small saucepan, melt unsalted butter over low heat. Be careful not to let it brown; you want it just melted to keep the flavor clean and rich.
2. Infusing with Garlic: Once the butter is melted, add minced garlic (or more garlic powder if you prefer) to the butter and allow it to simmer gently for a few minutes. This infuses the butter with the aromatic flavor of garlic.
3. Finishing Touches: Once the garlic is fragrant, remove the sauce from the heat. You can also add a pinch of salt or additional chopped parsley for extra flavor, depending on your taste.
As you prepare these Homemade Garlic Butter Cheese Bombs, remember that the joy of cooking comes not only from the end result but also from the process itself. Take your time, enjoy the aromas, and anticipate the delicious outcome that awaits. The combination of fluffy dough and gooey cheese, enhanced by the rich garlic butter sauce, will undoubtedly make these cheese bombs a hit at your next gathering. Get ready to impress your guests with this delightful snack that is sure to disappear in no time!
{{image_1}}
Step-by-Step Process for Creating the Garlic Butter
To craft the perfect garlic butter for your Cheese Bombs, begin by gathering your ingredients: unsalted butter, fresh garlic, and a selection of herbs or spices to enhance the flavor profile.
1. Melt the Butter: Start by measuring out half a cup of unsalted butter. Place it in a small saucepan over low heat. The goal here is to melt the butter gently to prevent it from browning, which could lead to a less desirable flavor.
2. Add Fresh Garlic: Mince four to five cloves of fresh garlic. Once the butter has melted completely, add the minced garlic to the saucepan. Stir the mixture gently, allowing the garlic to infuse into the butter.
3. Infusion Time: Keep the heat low and let the garlic cook in the butter for about 5-7 minutes. This time allows the garlic to soften and infuse its flavor without burning. Stir occasionally to ensure even cooking.
4. Seasoning: After the garlic has softened, you can add herbs or spices for additional flavor. Consider using chopped fresh parsley, thyme, or a pinch of red pepper flakes for a bit of heat. Stir well to combine.
5. Strain (Optional): If you prefer a smoother garlic butter, strain the mixture through a fine mesh sieve to remove the garlic pieces. However, leaving the garlic in will give you a stronger flavor.
6. Cool and Use: Let the garlic butter cool slightly before using it in your Cheese Bombs. It should remain pourable but not hot enough to melt the cheese when applied.
Tips on Avoiding Burnt Garlic and Achieving the Perfect Infusion of Flavors
– Use Fresh Garlic: Fresh garlic is essential for a vibrant flavor. Avoid pre-minced garlic, as it can have a bitter taste.
– Control the Heat: Always cook garlic on low heat. High temperatures can cause garlic to burn quickly, resulting in a bitter taste.
– Watch the Time: Pay attention to the garlic as it cooks. It’s better to undercook than overcook; you can always let it infuse longer.
– Experiment with Flavors: Consider adding lemon zest or a splash of vinegar for a tangy twist. This can brighten the flavor profile and complement the richness of the butter.
Variation Ideas for Garlic Butter
– Herb-Infused Garlic Butter: Incorporate a blend of fresh herbs such as rosemary, basil, or dill for a fragrant twist.
– Spicy Garlic Butter: Add chili powder, cayenne pepper, or crushed red pepper flakes for a spicy kick.
– Cheesy Garlic Butter: Mix in some grated Parmesan cheese for a richer flavor.
– Smoky Garlic Butter: Incorporate smoked paprika or a dash of liquid smoke for a depth of flavor.
Baking the Cheese Bombs
Now that your garlic butter is ready, it’s time to bake the Cheese Bombs to perfection.
1. Preheat the Oven: Begin by preheating your oven to 375°F (190°C). This temperature ensures that the Cheese Bombs cook evenly and develop a lovely golden-brown exterior.
2. Prepare the Cheese Bombs: Roll out your dough and cut it into squares. Place a generous amount of cheese in the center of each square, then gather the corners and pinch them together to form a ball.
3. Brush with Garlic Butter: Place the formed Cheese Bombs onto a baking sheet lined with parchment paper. Generously brush each ball with the prepared garlic butter, ensuring to cover the tops thoroughly.
4. Bake: Bake in the preheated oven for about 15-20 minutes.
Signs to Look For to Ensure the Cheese Bombs are Done
– Golden-Brown Color: The Cheese Bombs should have a rich, golden-brown color on the outside. This indicates that the dough is cooked and the garlic butter has infused nicely.
– Cheese Oozing: If you see melted cheese oozing from the sides, they are likely ready. Just be cautious, as the cheese will be very hot.
– Firm Yet Soft Texture: Gently press on the tops; they should feel firm yet soft to the touch, indicating a fluffy interior.
Tips for Achieving a Golden-Brown Exterior
– Use Egg Wash: For an extra golden sheen, brush the tops with a beaten egg before baking.
– Positioning in the Oven: Place the baking sheet on the middle rack of the oven to ensure even heat distribution.
– Rotate Halfway: If your oven has hot spots, rotate the baking sheet halfway through the baking time for an even bake.
Serving Suggestions
Garlic Butter Cheese Bombs are versatile and can be served in numerous delightful ways:
– Perfect for Gatherings: These cheesy delights make excellent appetizers at parties, game days, or family gatherings. Arrange them on a large platter for an inviting presentation.
– Pair with Dips: Serve with a variety of dips such as marinara sauce, ranch dressing, or even a creamy garlic dip. This adds an extra layer of flavor and allows guests to customize their experience.
– Presentation Ideas: Place the Cheese Bombs in a cast-iron skillet or on a wooden board. Garnish with fresh herbs like parsley or basil for a pop of color.
– Snack or Appetizer: These Cheese Bombs can be enjoyed as a delicious snack during movie nights or as a starter before a main meal.
Storage and Reheating
To keep your Garlic Butter Cheese Bombs fresh and tasty, follow these storage and reheating tips:
– Storing Leftovers: Place any leftover Cheese Bombs in an airtight container. They can be stored in the refrigerator for up to three days.
– Freezing: For longer storage, freeze the Cheese Bombs. Arrange them in a single layer on a baking sheet until solid, then transfer to a freezer-safe bag. They can be stored for up to three months.
– Reheating Methods: To reheat, preheat your oven to 350°F (175°C). Place the Cheese Bombs on a baking sheet and heat for about 10-15 minutes, or until warmed through. This method helps maintain their fluffy texture.
– Microwave Caution: If using a microwave, heat on low power in short intervals, but be aware that this may make the exterior less crispy.
Nutritional Information
Understanding the nutritional content of your Garlic Butter Cheese Bombs can help you make informed choices.
– Nutritional Overview: Each Cheese Bomb contains approximately 150-200 calories, depending on the size and the type of cheese used. They are rich in carbohydrates and fats, providing a comforting indulgence.
– Health-Conscious Variations: For those looking to make healthier choices, consider using whole wheat flour for the dough or opting for low-fat cheese varieties. You can also reduce the amount of butter or substitute with olive oil for a healthier fat source.
– Balancing Indulgence: Enjoy these Cheese Bombs in moderation, perhaps pairing them with a fresh salad or vegetable dishes to balance the meal.
Conclusion
Making Garlic Butter Cheese Bombs is a delightful experience that brings joy to both the cook and those who get to enjoy the finished product. The rich, cheesy interior and the aromatic garlic butter create a flavor combination that is hard to resist. Whether served at a gathering or enjoyed as a snack, these Cheese Bombs are sure to impress.
Feel free to experiment with different flavors and ingredients as you become more comfortable with the recipe. Each variation allows for personalization and creativity in the kitchen. So gather your ingredients, roll up your sleeves, and enjoy the process of making these delicious bites that will become a staple in your culinary repertoire.