
Lemon Crinkle Cookies are a delightful treat that perfectly blend the bright flavor of lemon with a soft, chewy texture. With their signature crinkle effect, these cookies are as visually appealing as they are delicious. Each bite offers a refreshing taste, making them ideal for any occasion—from casual gatherings with friends to festive celebrations that call for a sweet touch. The combination of zesty lemon juice and fragrant lemon zest creates a bright flavor profile that balances beautifully with the sweetness of the cookie dough. Whether enjoyed alongside a cup of tea or served at a summer barbecue, Lemon Crinkle Cookies are sure to be a hit.
The origins of Lemon Crinkle Cookies can be traced back to traditional crinkle cookie recipes that often feature chocolate or vanilla flavors. However, the addition of lemon elevates these cookies, giving them a unique twist that stands out among typical cookie offerings. Their playful appearance, reminiscent of snow-covered hills, invites the anticipation of a deliciously tart surprise within. As you bite into the cookie, the soft, chewy center reveals a burst of citrus flavor that awakens the taste buds.
In this comprehensive guide, we will explore the intricacies of creating these cookies, including the science behind the ingredients, step-by-step instructions, and some variations to suit different tastes. Whether you’re a seasoned baker or a beginner, you’ll find everything you need to create these scrumptious Lemon Crinkle Cookies.
Understanding the Ingredients
Before diving into the baking process, it’s essential to understand the ingredients that contribute to the overall flavor and texture of Lemon Crinkle Cookies. Each component plays a crucial role, and selecting high-quality ingredients can significantly impact the final outcome.
Overview of Essential Ingredients
1. All-Purpose Flour: The backbone of cookie structure, all-purpose flour provides the necessary gluten to hold the cookies together while still allowing for a soft and chewy texture. It’s important to measure the flour accurately to avoid overly dense or crumbly cookies.
2. Baking Powder and Baking Soda: These leavening agents are essential for creating the signature crinkle effect. Baking powder helps the cookies rise, while baking soda promotes browning and contributes to the cookies’ chewy texture. The right balance between the two can make all the difference in achieving the perfect cookie.
3. Unsalted Butter: Butter adds richness and flavor to the cookies. Using unsalted butter allows for better control over the salt content in the recipe. The temperature of the butter is also significant; it should be softened but not melted to ensure a light and fluffy cookie dough.
4. Granulated vs. Powdered Sugar: The type of sugar used will affect the texture and appearance of the cookies. Granulated sugar adds sweetness and helps with the spreading of the cookies, while powdered sugar is often used for coating the cookies, providing that signature crinkle appearance. The combination of both sugars creates a balanced sweetness and a delightful texture.
5. Fresh Lemon Juice and Zest: The stars of the show, fresh lemon juice and zest, enhance the flavor and aroma of the cookies. The zest contains essential oils that provide a vibrant lemon scent and a burst of flavor, while the juice adds moisture and acidity, balancing the sweetness of the sugars.
6. Egg: The egg serves as a binding agent, adding moisture and richness to the dough. It plays a crucial role in achieving the desired texture, ensuring that the cookies are soft and chewy.
Importance of Ingredient Quality
When it comes to baking, the quality of your ingredients can significantly affect the final product. Here are some tips for selecting the best ingredients for your Lemon Crinkle Cookies:
– Choosing Fresh Lemons: For maximum flavor, always opt for fresh lemons rather than bottled lemon juice. Look for lemons that are firm and heavy for their size, as this indicates that they are juicy. Zest the lemons before juicing to capture the full range of citrus flavor.
– The Impact of Butter Temperature: The temperature of the butter can greatly influence the texture of your cookies. Softened butter should yield easily to pressure but should not be melted. If your butter is too cold, it will not cream properly with the sugars, leading to dense cookies. Conversely, melted butter can result in overly flat cookies.
Preparation Steps
With the ingredients ready, it’s time to prepare your workspace and get started on the cookies. A well-organized kitchen can make the baking process smoother and more enjoyable.
Prepping Your Workspace
Before you begin mixing ingredients, take a moment to organize your workspace. Gather all the necessary tools and ingredients, including:
– Mixing bowls
– Measuring cups and spoons
– A whisk or electric mixer
– A baking sheet lined with parchment paper
– A cooling rack
Properly measuring your ingredients is crucial for achieving the desired texture and flavor, so make sure to use the appropriate measuring techniques. For dry ingredients like flour and sugar, spoon the ingredient into the measuring cup and level it off with a knife for accuracy. For liquids, use a clear measuring cup to ensure you reach the correct measurement.
Detailed Step-by-Step Instructions
1. Preparing the Oven and Baking Sheet: Preheat your oven to 350°F (175°C). While the oven is heating, line your baking sheet with parchment paper to prevent the cookies from sticking and to facilitate easy cleanup.
2. Mixing Dry Ingredients: In a medium bowl, whisk together the all-purpose flour, baking powder, baking soda, and a pinch of salt. This step ensures even distribution of the leavening agents throughout the flour, which is crucial for achieving the perfect rise and texture.
3. Creaming Butter and Sugar: In a large mixing bowl, use an electric mixer to cream together the softened unsalted butter, granulated sugar, and powdered sugar until the mixture is light and fluffy. This process typically takes about 3-5 minutes. Creaming incorporates air into the batter, which helps create a lighter texture in the finished cookies.
4. Incorporating Wet Ingredients: Add the egg, fresh lemon juice, and lemon zest to the creamed butter and sugar. Beat the mixture until well combined. The addition of lemon juice and zest at this stage not only enhances the flavor but also helps to create a more cohesive dough.
5. Combining Dry and Wet Ingredients: Gradually add the dry flour mixture to the wet ingredients, mixing on low speed until just combined. Be careful not to overmix, as this can lead to tough cookies. The dough should be soft and slightly sticky.
6. Chilling the Dough: To help maintain the shape of your cookies during baking, chill the dough in the refrigerator for at least 30 minutes. Chilling solidifies the fats in the dough, resulting in cookies that hold their shape and have a delightful chewy texture.
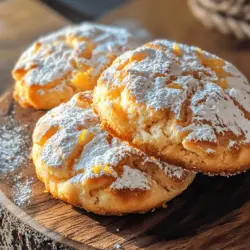
7. Portioning and Rolling: Once the dough is chilled, use a cookie scoop or tablespoon to portion out the dough. Roll each portion into a ball and then roll it in powdered sugar, coating it generously. This step is essential for achieving the signature crinkle effect as the cookies bake.
8. Baking: Place the coated dough balls on the prepared baking sheet, spacing them about 2 inches apart to allow for spreading. Bake in the preheated oven for about 10-12 minutes, or until the edges are set and the tops are slightly cracked.
9. Cooling: Allow the cookies to cool on the baking sheet for a few minutes before transferring them to a wire rack to cool completely. This resting period helps the cookies firm up while retaining their soft center.
With these detailed steps, you are well on your way to baking a batch of delicious Lemon Crinkle Cookies. The combination of zesty lemon flavor and the delightful texture will surely impress your family and friends, making them a favorite for years to come. As you prepare to bake, keep in mind the importance of ingredient quality and precise measurements, as they are key to achieving the perfect cookie. Enjoy the process and the delightful aroma that will fill your kitchen as these cookies bake to perfection.
{{image_1}}
Baking the Cookies
Once you have prepared your lemon crinkle cookie dough, it’s time for the most exciting part: baking! This stage is crucial for achieving those perfectly puffy, crackled tops and soft centers that make these cookies so delightful. Here are some essential baking tips to ensure your lemon crinkle cookies turn out perfectly every time.
Baking Tips for Success
Oven Temperature and Its Effect on Baking
The temperature of your oven plays a significant role in how your cookies bake. For lemon crinkle cookies, preheat your oven to 350°F (175°C). Using an oven thermometer can help you verify that the temperature is accurate, as many home ovens may not be calibrated correctly. Baking at the right temperature ensures that your cookies rise beautifully without spreading too much. If your oven tends to run hot, consider lowering the temperature slightly to avoid over-browning.
Knowing When the Cookies Are Done: Visual Cues to Look For
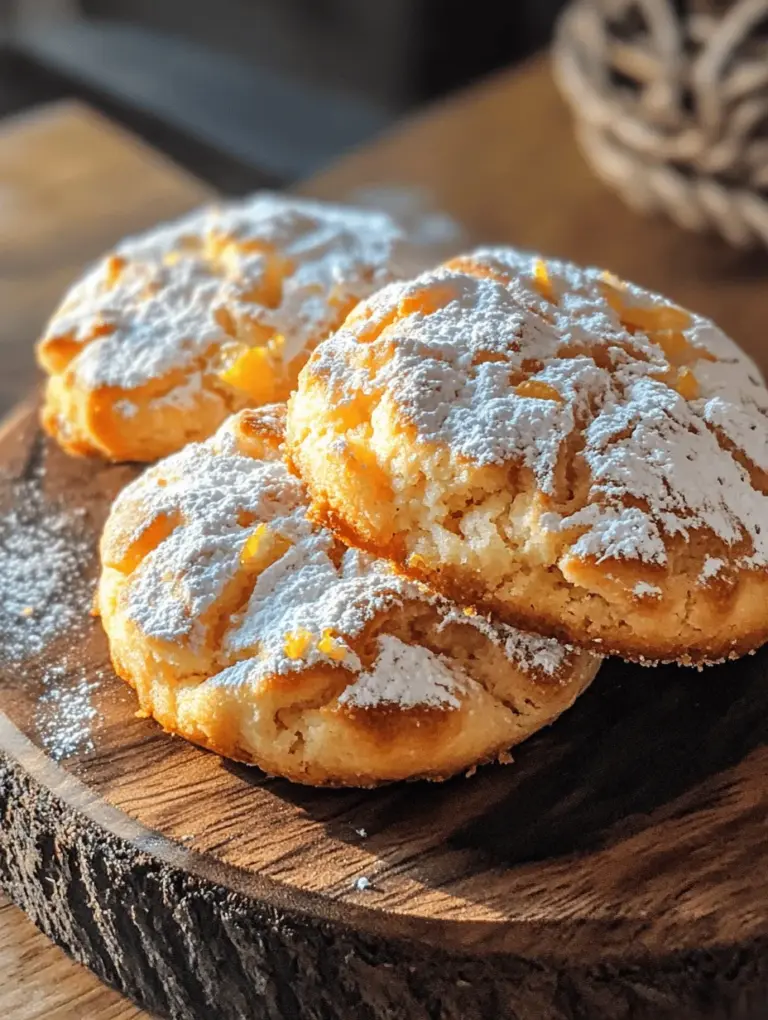
Knowing when your cookies are done can be tricky, but there are some visual cues to help you. As they bake, look for the following signs:
1. Color: The edges of the cookies should be set and lightly golden while the centers remain pale.
2. Texture: The tops will begin to crack and form that signature crinkle. They should look slightly puffy and not raw in the center.
3. Touch: Gently touch the edge of a cookie. If it springs back slightly but is still soft in the center, they are ready to come out of the oven.
Typically, lemon crinkle cookies will take about 10-12 minutes to bake, but keep a close eye on them towards the end of the baking time.
Cooling Techniques for Optimal Texture
Once your cookies are done, it’s essential to cool them properly to achieve the best texture. Here’s how:
1. Cooling on the Baking Sheet: Let the cookies cool on the baking sheet for about 5 minutes. This helps them set and makes them easier to transfer.
2. Transfer to a Wire Rack: After a few minutes, use a spatula to transfer the cookies to a wire rack. Cooling them on a rack allows air to circulate around them, preventing sogginess.
Proper cooling is key to maintaining that delightful chewy texture, so don’t rush this step!
Troubleshooting Common Issues
Even the best bakers can run into problems. Here are some common issues you might face and how to fix them:
1. Cookies Spread Too Much: If your cookies spread excessively, it may be due to warm dough. Always chill the dough for at least 30 minutes before baking. You can also ensure your butter is at room temperature but not overly soft.
2. Cookies Too Thick: If your cookies are not spreading enough and are too thick, try gently flattening them before baking or slightly adjusting the baking time. Make sure you’re not over-measuring the flour, which can lead to a denser cookie.
3. Adjusting Bake Time Based on Oven Variations: Each oven is unique, so you may need to adjust the baking time based on how your specific oven behaves. Keep an eye on the first batch and note the time it takes to achieve the desired texture, adjusting future batches as necessary.
Flavor Variations and Add-Ins
One of the best things about lemon crinkle cookies is their versatility. While the classic lemon flavor is delightful, you can easily enhance these cookies with various add-ins and flavor variations.
Exploring Flavor Enhancements
1. Adding Chocolate Chips or White Chocolate for a Twist: For a delicious contrast to the tangy lemon, consider adding chocolate chips or chunks of white chocolate to the dough. The creamy sweetness complements the zesty lemon perfectly.
2. Using Alternative Citrus Fruits for Different Flavors: Experiment with other citrus fruits like orange or lime for a refreshing twist. You can substitute lemon zest and juice with the zest and juice of your preferred citrus fruit while keeping the other ingredients the same.
3. Incorporating Herbs Like Basil or Mint for a Unique Touch: For an unexpected flavor profile, try adding finely chopped fresh herbs such as basil or mint. This combination works particularly well with lemon and can elevate your cookies to a gourmet level.
Adapting for Dietary Needs
If you or your loved ones have specific dietary needs, you can adapt this recipe accordingly:
1. Gluten-Free Alternatives for Flour: For gluten-free lemon crinkle cookies, replace all-purpose flour with a gluten-free flour blend. Make sure to choose a blend that includes xanthan gum or add it separately to help bind the ingredients.
2. Vegan Options Using Egg Substitutes and Plant-Based Butter: To make these cookies vegan, substitute the eggs with flaxseed meal or unsweetened applesauce. Use plant-based butter instead of regular butter to maintain the texture and flavor.
Serving Suggestions
Presenting your lemon crinkle cookies beautifully can enhance the enjoyment of this delightful treat. Here are a few serving suggestions to consider:
Presentation Ideas
1. Plating the Cookies for Gatherings: Arrange your cookies on a decorative platter or tiered stand for parties or gatherings. Dust them with powdered sugar just before serving for an elegant touch.
2. Pairing with Beverages: Lemon crinkle cookies pair exceptionally well with tea, coffee, or lemonade. Consider serving them alongside a refreshing iced tea or a warm cup of herbal tea for a delightful afternoon treat.
Storing and Freezing Cookies
To keep your cookies fresh and ready for enjoyment, it’s essential to know how to store and freeze them properly.
1. Best Practices for Keeping Cookies Fresh: Store your lemon crinkle cookies in an airtight container at room temperature for up to a week. To maintain their texture, you can place a slice of bread in the container to help keep them soft.
2. How to Freeze the Dough or Finished Cookies for Future Enjoyment: If you want to enjoy these cookies later, you can freeze the dough or the finished cookies. To freeze the dough, scoop out individual cookie portions onto a baking sheet and freeze until solid. Transfer the frozen dough balls to a zip-top bag and store for up to three months. When ready to bake, simply bake from frozen, adding an extra minute or two to the baking time.
For finished cookies, allow them to cool completely before placing them in an airtight container or freezer bag. They can be stored in the freezer for up to three months. Thaw at room temperature before serving.
Conclusion
Lemon crinkle cookies are a delightful addition to any dessert table or simply as a sweet treat for yourself. With their bright flavor and charming appearance, they are sure to impress anyone who takes a bite. The process of making these cookies not only fills your kitchen with an enticing aroma but also provides a rewarding experience as you watch them transform from dough to delectable treats. By following the detailed instructions and tips provided in this guide, you can confidently bake a batch of lemon crinkle cookies that will bring joy to your family and friends. Enjoy the journey of baking and the delicious results!