Introduction to Pretzel Perfection: Soft & Chewy Delights
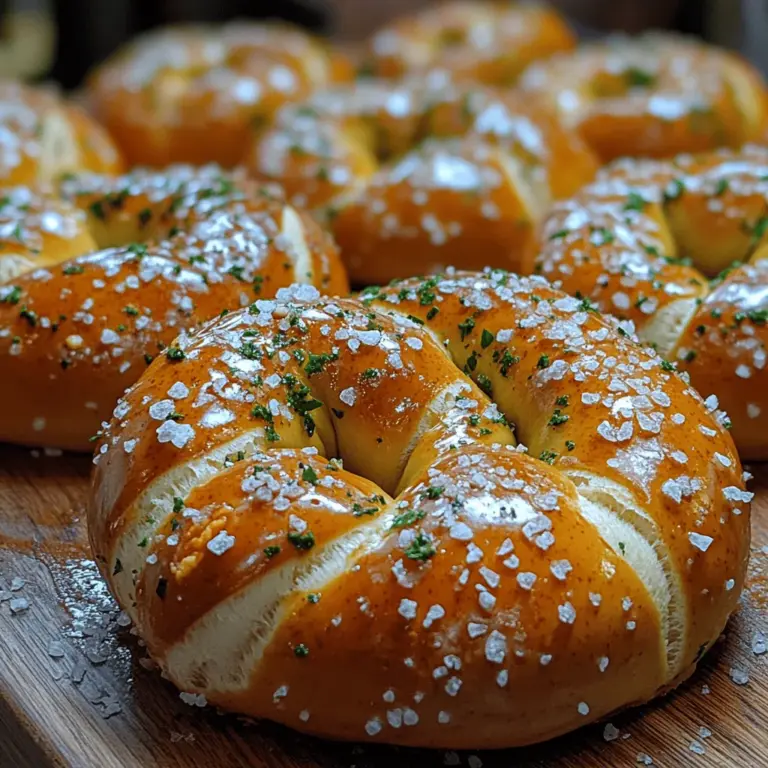
Pretzels are more than just a snack; they are a symbol of comfort food that transcends cultures and generations. Originating from ancient times, these twisted treats have found their way into the hearts (and stomachs) of people around the world. Whether enjoyed at a bustling street fair, a sporting event, or a cozy family gathering, soft pretzels have captured the essence of indulgence and joy. Their chewy texture, golden-brown crust, and delightful aroma make them irresistible, and the thought of enjoying a fresh, warm pretzel straight from the oven is enough to make anyone’s mouth water.
While pretzels are widely available from vendors and bakeries, there is something truly special about making them at home. Homemade soft pretzels allow you to customize flavors, toppings, and even shapes, bringing a personal touch to each bite. The satisfaction of kneading the dough, watching it rise, and savoring the final product is an experience that goes beyond mere cooking—it’s a delightful journey of creation. In this article, we will guide you through the fascinating process of making these soft and chewy delights from scratch, ensuring that you not only master the technique but also understand the science behind what makes pretzels so perfect.
Understanding the Ingredients for Perfect Pretzels
All-Purpose Flour
The foundation of any great pretzel is its flour. All-purpose flour is the go-to choice for soft pretzels due to its balanced protein content, which is crucial for developing the gluten structure that lends the pretzel its characteristic chewiness. When mixed with water and kneaded, the proteins in the flour form gluten strands that provide elasticity and strength to the dough. This essential component ensures that your pretzels have the right texture—soft on the inside, with a satisfying chew.
Active Dry Yeast
Yeast is a vital ingredient in the pretzel-making process, responsible for fermentation and dough rise. Active dry yeast needs to be activated before use, and its job is to consume the sugars in the dough and produce carbon dioxide, creating air pockets that make the pretzel light and fluffy. Choosing fresh yeast is essential for achieving optimal results, so check the expiration date on the package and store it in a cool, dry place.
Warm Water
Water is the lifeblood of dough. For yeast to activate effectively, it must be mixed with warm water, typically around 110°F (43°C). This temperature range is ideal because it encourages yeast activity without killing it. Too hot or too cold water can hinder the fermentation process, leading to dense pretzels rather than the desired airy texture.
Sugar and Salt
Sugar and salt play crucial roles in balancing flavors and aiding fermentation. Sugar provides a slight sweetness, enhancing the overall taste of the pretzel, while also serving as food for the yeast, promoting a better rise. Salt, on the other hand, enhances flavors and strengthens the gluten structure, ensuring that each pretzel is well-seasoned and satisfying. It is essential to measure these ingredients accurately, as they can significantly influence the taste and texture of your pretzels.
Baking Soda
One of the unique steps in making soft pretzels is the boiling process, which involves dissolving baking soda in water. This step is vital for achieving that classic pretzel crust. When the pretzels are boiled in the baking soda solution before baking, they develop a rich, dark color and a slightly tangy flavor due to the alkaline nature of the baking soda. This reaction is what sets pretzels apart from regular bread, giving them their signature chewy texture and deep golden-brown crust.
Egg Wash
An egg wash is a simple mixture of beaten egg and water brushed onto the pretzels before baking. This technique not only enhances the color of the pretzels, giving them a glossy finish but also helps toppings adhere better to the surface. The result is a visually appealing treat that looks as good as it tastes.
Optional Toppings
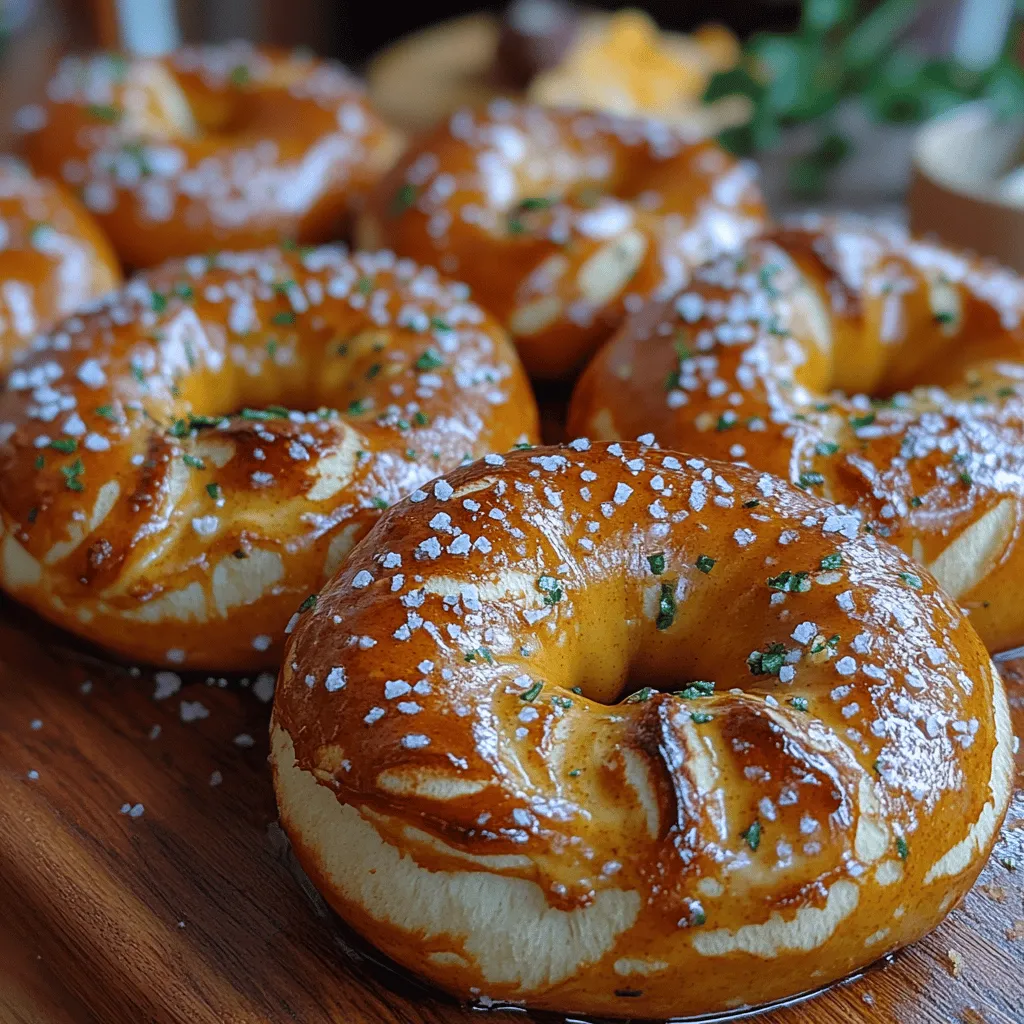
The world of pretzel toppings is as diverse as your imagination allows. From coarse sea salt to garlic powder, cheese, sesame seeds, or even cinnamon sugar, the options for customizing your pretzels are endless. These toppings can elevate the flavor profile, making your homemade pretzels uniquely yours. Experimenting with different combinations can be a fun way to add variety to your pretzel-making adventures.
The Science Behind Pretzel Making
Understanding the science of pretzel making can enhance your baking experience and lead to better results. Each step in the process has its own importance, contributing to the final product’s flavor and texture.
Yeast Activation
Activating yeast is a crucial first step in bread-making. When warm water is mixed with active dry yeast, it awakens the dormant yeast cells, allowing them to start consuming sugars. This process produces carbon dioxide gas, which gets trapped in the gluten structure of the dough, causing it to rise. Signs of successful yeast activation include a foamy layer on the surface of the water after about 5-10 minutes, indicating that the yeast is alive and ready to work.
Gluten Development
The kneading process is integral to gluten development. As you knead the dough, you are working the proteins in the flour to form a strong gluten network. This network gives the dough its elasticity and strength, allowing it to hold the gases produced by the yeast during fermentation. Proper gluten development is what gives pretzels their desirable chewiness, making the kneading process a vital part of achieving perfect results.
The Boiling Step
The boiling step, where pretzels are briefly submerged in a baking soda solution, is what truly distinguishes them from other bread. This process gelatinizes the starches on the surface of the dough, creating a barrier that results in a chewy outer layer. The alkaline environment from the baking soda also alters the pH of the pretzel, contributing to the Maillard reaction during baking, which enhances color and flavor. Skipping this step would mean missing out on the iconic pretzel crust.
Baking
The final stage of the pretzel-making process is baking, where the Maillard reaction occurs. This chemical reaction between amino acids and reducing sugars gives baked goods their golden-brown color and complex flavors. The heat from the oven causes the pretzels to rise further, develop a crispy exterior, and retain that soft and chewy interior. The result is a beautifully baked pretzel that is both visually appealing and deliciously satisfying.
Step-by-Step Instructions for Soft & Chewy Pretzels
Activating the Yeast
To begin, gather your ingredients and measure out 1 cup of warm water (around 110°F/43°C) into a mixing bowl. Sprinkle 2 teaspoons of active dry yeast over the water and add 1 tablespoon of sugar. Stir gently to combine, then let the mixture sit for 5-10 minutes until it becomes frothy. This foamy layer indicates that your yeast is active and ready for the next step.
Making the Dough
Once the yeast is activated, add 2 cups of all-purpose flour and 1 teaspoon of salt to the bowl. Mix the ingredients until a shaggy dough forms. If the dough is too sticky, gradually add more flour, 1 tablespoon at a time, until it reaches the right consistency. Knead the dough on a floured surface for about 5-7 minutes until it becomes smooth and elastic. You should be able to stretch a small piece of dough without it tearing.
Letting the Dough Rise
After kneading, shape the dough into a ball and place it in a greased bowl, covering it with a clean kitchen towel or plastic wrap. Let the dough rise in a warm, draft-free area for about 1 hour, or until it has doubled in size. You can speed up this process by placing the bowl in a slightly warmed oven (turned off) or near a warm window. To check if the dough is ready, gently press your finger into it; if the indentation remains, the dough is ready to be shaped.
Preparing the Baking Solution
While the dough is rising, prepare the baking solution. In a large pot, bring 4 cups of water to a gentle boil, then add 1/4 cup of baking soda. Be cautious as the mixture may bubble up when the baking soda is added. This solution will be used to boil the pretzels before baking, creating that classic crust. Once prepared, reduce the heat to keep the solution simmering while you shape your pretzels.
By following these initial steps, you are well on your way to creating your own batch of soft and chewy pretzels. The combination of the right ingredients, proper techniques, and a little bit of patience will yield delicious results. As you continue with the recipe, you will discover the joy of homemade pretzels and the satisfaction that comes from crafting this beloved treat from start to finish.
Safety Tips and the Importance of Timing
When it comes to making homemade pretzels, safety should always be a priority. Ensure that your workspace is clean, and all utensils and equipment are sanitized before you begin. It’s essential to be aware of the hot water used during the boiling process, as it can cause burns if not handled properly. Always use a long-handled slotted spoon to lower and lift the pretzels from the boiling solution.
Timing is crucial in pretzel-making; from proofing the dough to boiling and baking, each step has a specific duration that directly affects the final outcome. Over-proofing can lead to a sour taste and flat texture, while under-boiling may result in pretzels that are too soft and fail to develop that iconic chewy bite. Stay attentive to each timing aspect, and you’ll be well on your way to pretzel perfection.
Shaping the Pretzels
Once your dough has risen to fluffy perfection, it’s time to shape the pretzels. Start by dividing the dough into equal portions, usually about 8 to 12 pieces, depending on how large you want each pretzel to be. Lightly flour your work surface to prevent sticking and roll each piece into a long rope, approximately 24 inches in length.
To shape the pretzel, lay the rope in a U-shape, twist the ends together two times, and then fold the twisted ends down to the bottom of the U, pressing them gently to secure the shape. This classic pretzel shape not only looks appealing but also allows for even boiling and baking. Practice makes perfect, so don’t worry if your first few don’t look exactly like the ones from your favorite bakery!
Techniques for Achieving the Classic Pretzel Shape
Achieving the iconic pretzel shape can seem daunting, but with a little practice and patience, you’ll master it in no time. Here are some tips to help you along the way:
1. Rest the Dough: After rolling out the ropes, allow them to rest for about 5 minutes. This relaxes the gluten, making it easier to shape without springing back.
2. Use Flour Wisely: While it’s important to use flour to prevent sticking, too much can affect the texture of your pretzels. Use just enough to keep the dough manageable.
3. Consistent Thickness: Ensure that the thickness of your dough rope is consistent throughout. This helps the pretzels cook evenly, resulting in a uniform texture.
Boiling the Pretzels
One of the defining steps in making soft pretzels is the boiling process, which gives them their signature chewy exterior. Bring a large pot of water to a rolling boil and add baking soda—this helps achieve that beautiful brown color and unique flavor.
Timing, Techniques, and What to Watch Out For During Boiling
Carefully lower each shaped pretzel into the boiling water, making sure not to overcrowd the pot. Boil for about 30 seconds on each side. Keep an eye on them; they should puff up slightly but not fall apart. Use a slotted spoon to remove them from the water and let them drain well before placing them on a baking sheet lined with parchment paper.
Adding the Egg Wash
Once your pretzels are boiled and drained, it’s time for the crucial egg wash. This mixture of beaten egg and a splash of water is brushed over the surface of each pretzel. The egg wash serves multiple purposes: it gives the pretzels a beautiful golden-brown finish as they bake, enhances the flavor, and helps toppings adhere better.
Baking
Preheat your oven to 425°F (220°C) and place the pretzels on a baking sheet lined with parchment paper. Bake for 12 to 15 minutes or until they are golden brown.
Tips for Achieving the Perfect Golden Brown Color
– Watch the Color: Keep a close eye on the pretzels as they bake. The combination of the egg wash and the high-temperature baking will create a lovely golden hue.
– Rotate the Pan: Midway through baking, rotate the baking sheet to ensure even cooking, especially if your oven has hot spots.
Cooling and Serving
Once your pretzels are out of the oven, allow them to cool on a wire rack for a few minutes. This cooling period helps them firm up while still retaining that soft and chewy interior.
Best Practices for Serving and Enjoying Pretzels Fresh Out of the Oven
Serve your pretzels warm for the best experience. They can be enjoyed plain, sprinkled with coarse sea salt, or dressed up with toppings. Pair them with your favorite dipping sauces for an added layer of flavor.
Flavor Variations and Customizations
Homemade pretzels offer an excellent canvas for creativity. Here are some flavor variations and customizations you can try:
1. Toppings: After applying the egg wash, consider sprinkling on toppings like garlic powder, onion flakes, or shredded cheddar cheese. For a sweet twist, try cinnamon sugar after baking.
2. Dipping Sauces: Pretzels pair beautifully with a variety of dipping sauces. Classic options include mustard or cheese dip. For something unique, try a spicy sriracha mayo or a rich beer cheese sauce.
3. Experimenting with Flavors: While the base pretzel recipe remains the same, feel free to infuse the dough with herbs, spices, or cheeses. Just be mindful of how these additions might affect the dough’s hydration and consistency.
Nutritional Information and Serving Suggestions
Understanding the nutritional content of your homemade pretzels can help you enjoy them responsibly. On average, a single pretzel contains approximately:
– 200-250 calories
– 6-8 grams of protein
– 35-40 grams of carbohydrates
– 2-4 grams of fat
Serving Sizes and Suggestions for Pairing with Meals or Snacks
One pretzel is typically a satisfying snack on its own, but they can also be served as part of a meal. Consider pairing them with hearty soups, salads, or even as a side for game-day snacks.
Storage Tips for Leftover Pretzels
If you have any pretzels left over (which is rare!), store them in an airtight container at room temperature for up to two days. To reheat, pop them in a 350°F (175°C) oven for about 5-7 minutes to restore their chewy texture.
Conclusion: Embracing the Joy of Homemade Pretzels
Making homemade pretzels from scratch is not just about enjoying a delicious snack; it’s about the satisfaction that comes from creating something with your own hands. The process can be a delightful activity to share with family and friends, whether you’re shaping the dough together or experimenting with flavors.
So don’t hesitate to get creative with your pretzel-making! Try different toppings, pair them with unique dipping sauces, and most importantly, enjoy the process. The joy of sharing these homemade treats with loved ones is a reward that goes beyond taste—it’s about creating memories around the kitchen. So roll up your sleeves, gather your ingredients, and embark on this delicious journey to pretzel perfection!
