Introduction
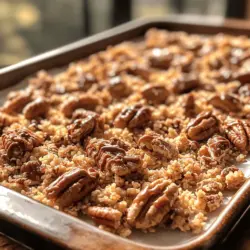
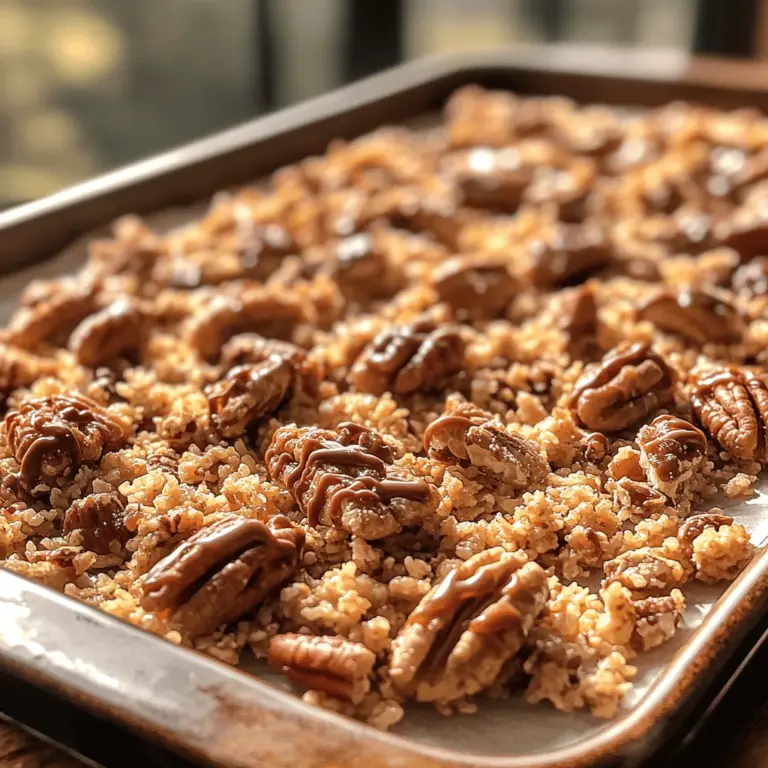
Sweet and Salty Praline Crunch is a delightful treat that perfectly embodies the balance of flavors that many dessert lovers crave. This irresistible combination of sweet caramel, crunchy nuts, and a subtle hint of salt creates an enticing snack that satisfies multiple cravings at once. Whether you are looking for a quick pick-me-up, a unique party treat, or a homemade gift for holidays or special occasions, this recipe delivers on all fronts.
The magic of Sweet and Salty Praline Crunch lies in its ability to harmonize contrasting flavors. The sweetness of the caramel and the nuttiness of the pecans and walnuts are beautifully complemented by a touch of salt, making each bite a tantalizing experience for your taste buds. This balance between sweet and salty not only enhances the flavor but also elevates the overall texture, providing a satisfying crunch that’s hard to resist.
Moreover, the versatility of this snack is remarkable. It can be enjoyed on its own, served atop ice cream, or even used as a topping for desserts like cakes and cheesecakes. This recipe is not just a treat; it’s an experience that can bring people together, making it perfect for gatherings, celebrations, or simply as a special indulgence during your downtime.
Understanding the Ingredients
To create the perfect Sweet and Salty Praline Crunch, it’s essential to understand the role that each ingredient plays in the recipe. Let’s take a closer look at the main components that come together to create this delightful snack:
Pecans and Walnuts
Pecans and walnuts are the stars of this recipe, providing both crunch and a rich flavor profile. Not only do they add texture, but they also bring a wealth of nutritional benefits. Both nuts are an excellent source of healthy fats, protein, and essential vitamins and minerals. Pecans are particularly rich in antioxidants, while walnuts are known for their high omega-3 fatty acid content, making them a great choice for heart health. Their natural oils enhance the overall flavor of the praline crunch, while also helping to create a satisfying mouthfeel.
Rice Cereal
Rice cereal is the unsung hero in this recipe. It contributes to the overall crunchiness that makes Sweet and Salty Praline Crunch so enjoyable. The airy texture of the cereal allows the caramel to coat each piece evenly, creating a light yet crispy base. Additionally, the rice cereal absorbs some of the sweetness from the caramel, providing a balanced flavor experience.
Granulated Sugar and Butter
Granulated sugar and butter are the key components that come together to create the luscious caramel base of the praline crunch. The sugar caramelizes when heated, transforming into a golden syrup that wraps all the other ingredients in a sweet embrace. Butter not only adds richness to the caramel but also helps to achieve the desired consistency, making it easier to coat the nuts and rice cereal evenly.
Light Corn Syrup
Light corn syrup plays a crucial role in achieving the perfect caramel consistency. It helps to prevent the sugar from crystallizing, ensuring a smooth and glossy finish. This syrup also adds a subtle sweetness that enhances the overall flavor of the praline crunch. Without corn syrup, the caramel may become grainy, which would detract from the delightful texture we’re aiming for.
Vanilla Extract and Salt
Vanilla extract is the perfect addition to elevate the flavor complexity of Sweet and Salty Praline Crunch. It adds a warm, sweet aroma that complements the caramel beautifully. A pinch of salt is also essential, as it enhances the sweetness while providing that sought-after contrast. Together, these two ingredients create a well-rounded flavor profile that keeps you coming back for more.
Baking Soda
Baking soda is often overlooked, but it serves an important purpose in this recipe. When added to the caramel, baking soda causes the mixture to bubble and foam, creating a lighter texture. This reaction helps to aerate the caramel, which results in a crunchier final product. It’s a small but vital step that can make all the difference in the texture of your praline crunch.
Optional Chocolate Chips
For those looking to add an extra layer of flavor, optional chocolate chips can be incorporated into the mix. The richness of chocolate pairs beautifully with the sweet and salty elements, creating an indulgent treat that’s hard to resist. Whether you choose dark, milk, or white chocolate, the addition of chocolate chips can elevate your Sweet and Salty Praline Crunch to a whole new level.
Preparation Essentials
Before diving into the cooking process, preparation is key to achieving the best results with your Sweet and Salty Praline Crunch. Here are some essential steps to ensure everything goes smoothly:
Preparing the Baking Sheet
Start by preparing your baking sheet. Line it with parchment paper to prevent the praline crunch from sticking and to make cleanup a breeze. Parchment paper provides a non-stick surface that allows you to easily lift the finished product off the sheet once it has cooled. Make sure to leave some overhang on the sides to help lift the entire batch out when it’s time to cut it into pieces.
Toasting Nuts
Toasting the nuts is a simple yet effective way to maximize their flavor and aroma. Preheat your oven to 350°F (175°C) and spread your pecans and walnuts in a single layer on a baking sheet. Toast them in the oven for about 8-10 minutes, or until they are golden brown and fragrant. Be sure to keep an eye on them, as nuts can burn quickly. Once toasted, remove them from the oven and allow them to cool slightly before incorporating them into the recipe. This step not only enhances the flavor but also adds an appealing crunch to your final treat.
Step-by-Step Recipe Guide
Now that you have a solid understanding of the ingredients and preparation essentials, it’s time to dive into the step-by-step guide for making Sweet and Salty Praline Crunch. Follow these instructions closely to ensure your snack turns out perfectly every time.
Ingredients List
– 1 cup pecans, toasted
– 1 cup walnuts, toasted
– 3 cups rice cereal
– 1 cup granulated sugar
– 1/2 cup unsalted butter
– 1/2 cup light corn syrup
– 1 teaspoon vanilla extract
– 1/2 teaspoon salt
– 1/4 teaspoon baking soda
– 1 cup optional chocolate chips (if desired)
Instructions
1. Preheat the Oven: Begin by preheating your oven to 350°F (175°C) if you haven’t already done so for toasting the nuts.
2. Prepare the Baking Sheet: Line a baking sheet with parchment paper, ensuring it is well-covered to prevent sticking.
3. Toast the Nuts: If you haven’t toasted your pecans and walnuts yet, spread them out on the prepared baking sheet and toast in the oven for 8-10 minutes. Keep an eye on them to avoid burning.
4. Combine Rice Cereal and Nuts: In a large mixing bowl, combine the toasted pecans, walnuts, and rice cereal. Stir gently to mix.
5. Make the Caramel: In a medium saucepan over medium heat, combine the granulated sugar, unsalted butter, and light corn syrup. Stir constantly until the mixture comes to a boil. Allow it to boil without stirring for about 3-4 minutes, until it reaches a golden color.
6. Add Flavor Enhancers: Remove the saucepan from the heat and quickly stir in the vanilla extract, salt, and baking soda. Be cautious, as the mixture will bubble up.
7. Combine Caramel with the Cereal and Nuts: Pour the hot caramel over the rice cereal and nut mixture, and quickly stir until every piece is well-coated.
8. Spread on Baking Sheet: Transfer the mixture to the prepared baking sheet, spreading it out into an even layer. Press it down gently with a spatula to ensure it sticks together.
9. Optional Step: If using chocolate chips, sprinkle them on top of the warm mixture and gently press them in.
10. Cool and Set: Allow the praline crunch to cool completely at room temperature. Once cooled, break it into pieces or cut it into bars as desired.
This Sweet and Salty Praline Crunch recipe creates a delightful snack that is perfect for any occasion. The combination of textures and flavors will leave you and your guests craving more, making it a must-try treat for any dessert lover. Enjoy the delicious balance of sweet and salty in every bite!
{{image_1}}
Detailed Instructions for Each Stage of the Recipe
Creating the Sweet & Salty Praline Crunch involves several stages, each crucial for achieving the perfect blend of flavors and textures. Follow these detailed instructions to ensure your treat turns out just right.
Preparing the Baking Sheet
Before you begin, prepare your baking sheet by lining it with parchment paper. Parchment paper is preferred over aluminum foil because it provides a non-stick surface that makes it easier to remove your praline crunch once it’s cooled. Additionally, parchment paper helps to absorb some of the excess moisture, preventing the crunch from becoming soggy. To prepare your baking sheet:
1. Cut the parchment paper: Measure your baking sheet and cut a piece of parchment paper to fit. Allow a little overhang for easy removal.
2. Place the paper: Lay the parchment paper flat on the baking sheet, ensuring it covers the entire surface without any creases.
3. Preheat the oven: Set your oven to 350°F (175°C) to prepare for toasting the nuts.
Toasting the Nuts
Toasting the nuts is a critical step that enhances their flavor and adds a delightful crunch to your praline mix. Here’s how to do it effectively:
1. Choose your nuts: Use a combination of pecans, almonds, and peanuts for a well-rounded taste.
2. Spread the nuts: Place the nuts in a single layer on a separate baking sheet to ensure even toasting.
3. Toast in the oven: Bake the nuts in the preheated oven for about 8-10 minutes. Keep an eye on them and stir halfway through to promote even toasting. You want them to turn a light golden brown and become fragrant but not burnt.
4. Cool the nuts: Once toasted, remove the nuts from the oven and allow them to cool for a few minutes before chopping them coarsely.
Making the Praline Mixture
The key to a great praline mixture is achieving the perfect caramelization. Follow these steps for a successful caramel:
1. Combine the sugar and butter: In a medium saucepan, combine 1 cup of granulated sugar and 1/2 cup of unsalted butter over medium heat.
2. Stir continuously: As the mixture heats, stir continuously with a wooden spoon until the sugar dissolves completely. This helps prevent burning.
3. Bring to a boil: Once dissolved, allow the mixture to come to a rolling boil without stirring. Watch closely, as it can burn quickly.
4. Monitor the temperature: Use a candy thermometer to monitor the temperature. You want to reach the hard crack stage, around 300°F (150°C). This ensures the caramel will harden properly.
5. Add salt and vanilla: Remove the pan from heat and quickly stir in a pinch of sea salt and 1 teaspoon of vanilla extract. The mixture will bubble up, so be cautious.
Combining Ingredients
Now it’s time to combine the toasted nuts and cereal with the praline mixture:
1. Prepare your mixing bowl: In a large mixing bowl, combine the chopped nuts and 3 cups of your choice of cereal (like rice cereal or cornflakes).
2. Pour the praline mixture: Carefully pour the hot praline mixture over the nuts and cereal.
3. Stir to combine: Using a spatula or wooden spoon, stir gently but thoroughly to ensure that all the cereal and nuts are evenly coated with the praline mixture.
4. Work quickly: This mixture will harden as it cools, so it’s essential to work quickly to ensure even coating.
Spreading the Mixture and Cooling
After combining the components, the final steps focus on spreading and cooling the mixture:
1. Spread on the prepared baking sheet: Transfer the mixture to the prepared parchment-lined baking sheet. Using the spatula, spread it evenly across the surface.
2. Press down lightly: To help it hold its shape, gently press down on the mixture with the spatula or your hands (damp hands can help prevent sticking).
3. Let it cool: Allow the mixture to cool completely at room temperature, which will take about 30 minutes. Once cooled, it will firm up and become crunchy.
The Art of Drizzling Chocolate
While your praline crunch is cooling, consider adding a chocolate drizzle for an extra layer of flavor and visual appeal.
Optional Step: Benefits of Adding a Chocolate Drizzle
A chocolate drizzle can enhance the sweetness and provide a lovely contrast to the salty nuts. It also adds a beautiful finishing touch that makes your Sweet & Salty Praline Crunch visually stunning.
Techniques for Melting Chocolate in the Microwave
To melt chocolate effectively, follow these steps:
1. Chop the chocolate: Use high-quality chocolate bars or chips. Chop them into small, uniform pieces for even melting.
2. Use a microwave-safe bowl: Place the chocolate in a microwave-safe bowl.
3. Microwave in intervals: Heat the chocolate on medium power in 30-second intervals, stirring after each interval until fully melted and smooth. This prevents overheating.
4. Add a drizzle: Once melted, use a spoon or a piping bag to drizzle the chocolate over the cooled praline crunch.
Creative Ways to Drizzle Chocolate for Visual Appeal
1. Use a piping bag: Fill a piping bag with melted chocolate for precise drizzling.
2. Create patterns: Drizzle in zig-zag patterns or create concentric circles for an artistic look.
3. Mix chocolates: Use both dark and white chocolate for a striking contrast.
Serving Suggestions and Pairings
Your Sweet & Salty Praline Crunch is now ready to enjoy! Here are some great ways to serve and pair it:
1. Snack bowls: Serve the praline crunch in small bowls or jars for a great snack during movie nights or gatherings.
2. Gift jars: Package it in decorative jars tied with a ribbon for thoughtful homemade gifts.
3. Ice cream topping: Use it as a crunchy topping for ice cream or yogurt, adding texture and flavor.
Pairing Suggestions
To complement the flavors of your Sweet & Salty Praline Crunch, consider these pairing suggestions:
1. Beverages: A cup of hot chocolate or a creamy latte pairs wonderfully with the crunch’s sweetness.
2. Desserts: Serve alongside a slice of cheesecake or a warm brownie for a decadent dessert experience.
Storage and Shelf Life
To maintain the freshness of your Sweet & Salty Praline Crunch, follow these storage tips:
1. Cooling completely: Ensure the mixture is completely cooled before storing to prevent condensation.
2. Airtight container: Store the praline crunch in an airtight container at room temperature. This will keep it crunchy for a longer period.
3. Avoid humidity: Keep it away from humid areas, as moisture can affect its texture.
4. Shelf life: Properly stored, your praline crunch can last for up to two weeks, although it’s likely to be eaten much sooner!
Conclusion
In summary, the Sweet & Salty Praline Crunch is a delightful treat that combines the rich flavors of caramelized nuts and crispy cereal with a hint of saltiness. The optional chocolate drizzle adds an extra touch of sweetness and visual appeal. This recipe is not only easy to make but also perfect for sharing with friends and family.
We encourage you to try this recipe for its unique blend of flavors and textures. Homemade snacks like this praline crunch are a joy to create and share, bringing a sense of warmth and togetherness to any occasion. Enjoy making this treat, and savor the satisfaction of indulging in a deliciously crunchy snack!


