Introduction
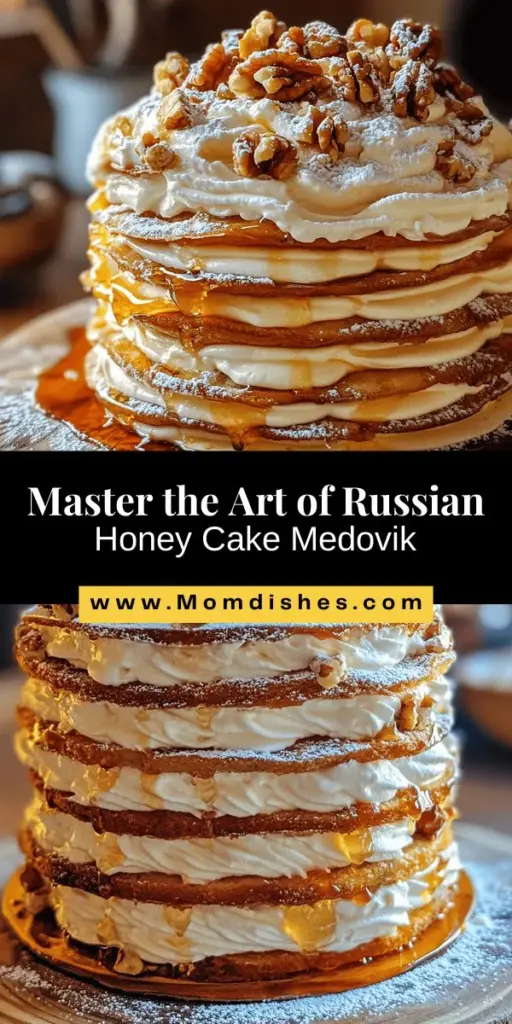
The Russian Honey Cake, known as “Medovik,” is a classic dessert that holds a special place in the hearts and kitchens of many. With its rich history and delightful layers, this cake is not just a treat for the taste buds; it embodies the essence of Russian hospitality and tradition. The cake’s unique flavor profile—a harmonious blend of sweet honey, creamy layers, and a hint of nostalgia—makes it a beloved choice for both celebratory occasions and family gatherings.
This recipe for Russian Honey Cake presents an opportunity for bakers of all skill levels to create a show-stopping dessert that is as pleasing to the eye as it is to the palate. Its intricate layers and indulgent flavors may seem daunting at first, but with the right guidance, anyone can master this delightful cake. Whether you’re a novice baker looking to impress or an experienced one seeking to expand your repertoire, this recipe will lead you through each step with ease.
Understanding Russian Honey Cake
Historical Background
The origins of Russian Honey Cake can be traced back to the 19th century, where it became a staple in Russian households. Traditionally, this cake was prepared during festive occasions and special celebrations, symbolizing warmth, love, and abundance. The cake’s name stems from the primary ingredient, honey, which has been cherished in Russian culture for centuries. It is not merely a sweetener; honey is a symbol of health, prosperity, and longevity.
As the years progressed, the Russian Honey Cake evolved, with various regions adding their unique twists to the recipe. However, the essence remained the same—layered cake with a sweet, creamy filling that captures the heart of Russian culinary tradition. Today, Medovik has found its way into bakeries and homes worldwide, celebrated for its delightful taste and texture.
Traditional Elements and Ingredients
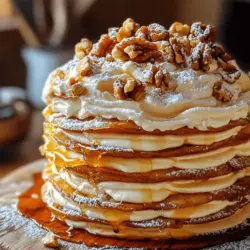
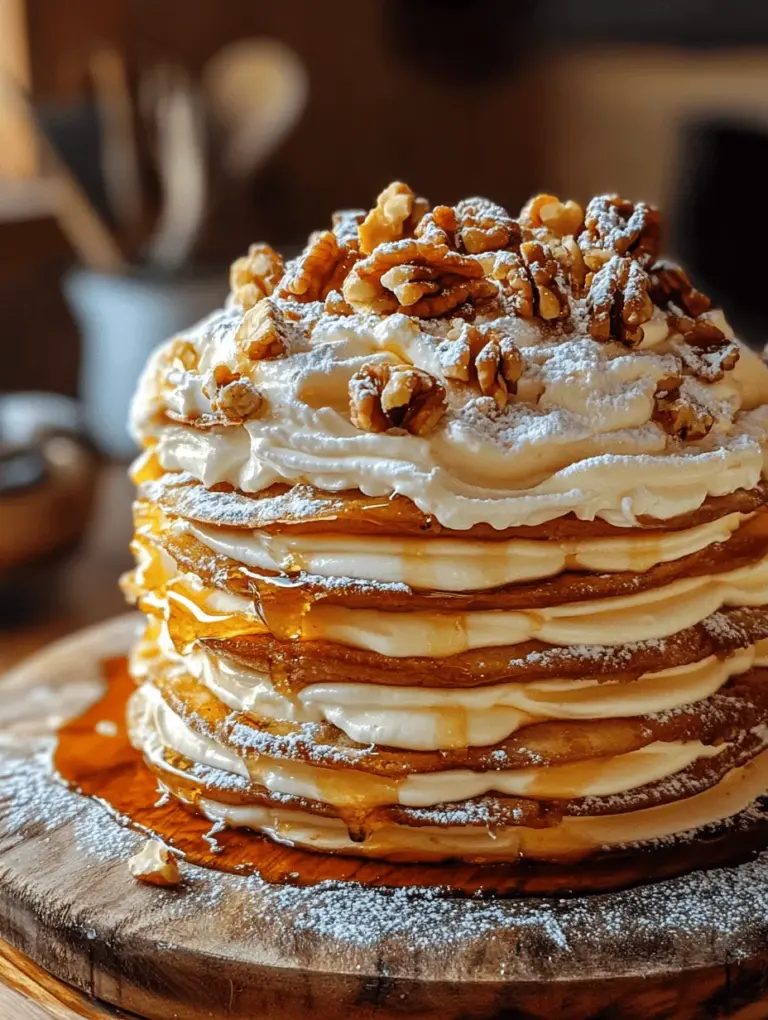
At its core, the Russian Honey Cake is characterized by its layered structure, typically consisting of multiple thin layers of honey-infused dough, interspersed with creamy fillings. The cake is often garnished with crushed walnuts or other nuts, which add a delightful crunch and enhance the overall flavor.
Honey is the star ingredient, contributing both sweetness and a distinct flavor that sets this cake apart from other layered desserts. The choice of honey can significantly influence the cake’s taste, with different varieties offering varying notes and complexities.
In addition to honey, the cake relies on a few essential ingredients that work together to create its signature texture and flavor. Each ingredient plays a vital role in the overall harmony of the cake, making it a true symphony of flavors.
Ingredient Breakdown
Key Ingredients
1. Honey: The heart and soul of the Russian Honey Cake, honey not only sweetens the layers but also imparts a unique flavor that is both rich and aromatic. Different types of honey, such as clover, wildflower, or buckwheat, can be used to achieve diverse taste profiles. Clover honey, for instance, offers a milder sweetness, while buckwheat honey brings a more robust and earthy flavor.
2. Granulated Sugar: While honey is the key sweetener, granulated sugar is also incorporated to enhance the sweetness and contribute to the cake’s texture. It helps to create a tender crumb, balancing the moisture from the honey.
3. Unsalted Butter: Essential for adding creaminess and depth of flavor, unsalted butter ensures that the cake layers remain moist and indulgent. The butter should be at room temperature for optimal mixing.
4. Eggs: Eggs play a crucial role in providing structure and stability to the cake. They also contribute richness and moisture, helping to create a tender final product.
5. Vanilla Extract: A splash of vanilla extract enhances the overall flavor of the cake, adding a warm, aromatic note that complements the honey beautifully.
6. Baking Soda: This leavening agent is crucial for achieving the right rise in the cake layers. It reacts with the acidity of the honey, creating bubbles that help the layers become light and airy.
7. All-Purpose Flour: The backbone of the cake, all-purpose flour provides structure and stability. It absorbs moisture and helps bind the ingredients together, resulting in a cohesive batter.
8. Heavy Cream: Used for the whipped cream layer, heavy cream adds a luxurious texture and richness to the filling, making each bite of the cake indulgent.
9. Walnuts: While optional, crushed walnuts make for a delightful garnish. They add a crunchy texture and a nutty flavor that enhances the overall experience of the cake.
Step-by-Step Recipe Instructions
Preparing the Dough
1. Mixing the Ingredients: Start by gathering all your ingredients at room temperature. This is crucial for achieving the right consistency. In a large mixing bowl, combine the honey, granulated sugar, and unsalted butter. Using an electric mixer, beat the mixture on medium speed until it becomes light and fluffy. This process typically takes about 3-5 minutes. The incorporation of air during this step is essential for achieving a tender cake texture.
2. Adding Eggs and Vanilla: Once the butter and honey mixture is fluffy, add the eggs one at a time, mixing well after each addition. This will help emulsify the ingredients and create a smooth batter. Next, add the vanilla extract and mix until combined.
3. Incorporating Dry Ingredients: In a separate bowl, whisk together the all-purpose flour and baking soda. Gradually add this dry mixture to the wet ingredients, mixing on low speed until just combined. Be careful not to over-mix, as this can lead to a dense cake.
4. Adjusting Consistency: The dough should be soft and slightly sticky. If it feels too wet, add a little more flour, a tablespoon at a time, until you achieve the right consistency. Cover the bowl with plastic wrap and refrigerate the dough for about 30 minutes. This chilling step will make it easier to roll out the dough later.
Forming and Baking the Layers
1. Rolling Out the Dough: Preheat your oven to 350°F (175°C). Line a baking sheet with parchment paper. Take the chilled dough out of the refrigerator and divide it into equal portions, typically around 8-10 pieces, depending on how many layers you desire. On a floured surface, roll out one piece of dough into a thin circle, about 1/8 inch thick.
2. Baking the Layers: Transfer the rolled dough onto the prepared baking sheet. Prick the surface with a fork to prevent bubbling during baking. Bake in the preheated oven for 5-7 minutes, or until the edges are lightly golden. Keep an eye on the layers, as they can brown quickly. Once baked, remove from the oven and let cool completely on a wire rack.
3. Repeat the Process: Continue rolling and baking the remaining portions of dough until all layers are prepared. Make sure to cool each layer completely before proceeding to assemble the cake.
With these initial steps, you are well on your way to creating a beautiful and delicious Russian Honey Cake. The flavors, textures, and history behind this dessert combine to create a sweet symphony that is sure to impress anyone who has the pleasure of tasting it. Stay tuned for the next part of this recipe, where we will dive into assembling the layers and creating the luscious cream filling that makes this cake truly special.
{{image_1}}
Importance of Baking Time and Temperature for Achieving the Right Texture
Baking is both an art and a science, and the Russian Honey Cake is a perfect illustration of how crucial baking time and temperature are to achieving the ideal texture. Each layer of this cake should bake until golden brown, ensuring a soft yet slightly crisp exterior that holds together beautifully.
For this recipe, preheat your oven to 350°F (175°C). The layers should bake for about 8-10 minutes each, depending on your oven’s calibration and the thickness of the batter. Keeping an eye on the color is vital; you want the layers to turn a light golden hue without becoming overly dark or dry.
Tips for Monitoring the Baking Process to Prevent Over-Baking
To prevent over-baking, it’s essential to monitor the layers closely as they bake. Here are some tips to keep in mind:
1. Use an Oven Thermometer: Ensure your oven is at the correct temperature, as many ovens can be off by as much as 25 degrees.
2. Check Early: Start checking the layers a couple of minutes before the suggested baking time. Insert a toothpick in the center; if it comes out clean or with a few moist crumbs, the layer is done.
3. Rotate the Pans: If your oven has hot spots, rotate the baking pans halfway through to ensure even baking.
Cooling the Layers
Once the layers are baked to perfection, cooling them correctly is crucial for a successful cake assembly. Cooling allows the layers to set, preventing them from becoming soggy or falling apart during assembly.
The Significance of Cooling Before Assembly for Structural Integrity
Cooling the layers before assembly is vital for maintaining structural integrity. If you attempt to assemble the cake while the layers are still warm, the whipped cream may melt, leading to a messy assembly and a cake that falls apart when served.
Best Practices for Cooling on a Wire Rack
To cool your cake layers effectively, follow these best practices:
1. Remove from the Oven: Once baked, take the layers out of the oven and let them sit in the pans for about 5-10 minutes.
2. Transfer to a Wire Rack: Carefully remove the layers from the pans and transfer them to a wire rack. This allows air to circulate around the layers, ensuring they cool evenly.
3. Let Them Cool Completely: Allow the layers to cool completely before you begin assembling the cake. This may take about 30-45 minutes.
Preparing the Cream
While the layers cool, it’s time to prepare the whipped cream that will hold this masterpiece together.
Techniques for Whipping Cream to the Right Consistency
When whipping cream, achieving the right consistency is key. Follow these steps:
1. Chill Your Equipment: Place your mixing bowl and beaters in the refrigerator for about 15 minutes before whipping. Cold equipment helps the cream whip more easily.
2. Start Slowly: Begin whipping the cream on low speed to incorporate air gradually. Once it starts to thicken, increase the speed to medium-high.
3. Watch Closely: Stop whipping as soon as stiff peaks form. Over-whipping can lead to butter formation, which is not desirable for this cake.
Discussion on the Role of Powdered Sugar in Stabilizing Whipped Cream
Powdered sugar plays an essential role in stabilizing whipped cream, preventing it from deflating. As you whip the cream, gradually add about 1 to 2 tablespoons of powdered sugar per cup of cream. This not only sweetens the cream but also helps it maintain its structure when layered between the honey cake layers.
Assembling the Cake
Now that the layers are cool and the cream is perfectly whipped, it’s time to assemble the cake.
Step-by-Step Assembly Process with Visual Cues for Layering
1. Layer Placement: Start with one layer of honey cake as the base. Place it on your serving platter.
2. Spread the Cream: Use a spatula to spread an even layer of whipped cream over the first layer. Aim for about a quarter-inch thick.
3. Repeat: Place the second layer on top of the cream and repeat the process until all layers are stacked, finishing with the last layer on top.
4. Top Layer Cream: Finish by spreading the remaining whipped cream over the top and sides of the cake for a smooth finish.
Tips for Spreading Whipped Cream Evenly Between Layers
For an even spread of whipped cream:
– Use an Offset Spatula: This tool is perfect for spreading cream to create a smooth, even layer.
– Dollop and Spread: Add dollops of whipped cream on the layer before spreading to maintain even distribution.
– Level Off: After spreading, use the sides of the spatula to level off the cream, ensuring a clean look.
Decorating the Cake
The decoration is where your creativity can shine. A well-decorated cake not only looks appealing but also enhances the overall presentation.
Suggestions for Garnishing with Walnuts and Powdered Sugar
1. Chopped Walnuts: Sprinkle finely chopped walnuts on the top of the cake to add texture and visual appeal. You can also create a border around the base.
2. Powdered Sugar Dusting: Lightly dust the top of the cake with powdered sugar using a fine-mesh sieve for a classic look.
3. Whipped Cream Rosettes: Use a piping bag fitted with a star tip to create decorative rosettes of whipped cream on top for an elegant finish.
Importance of Chilling the Cake for Flavor Development
Once assembled, it’s best to refrigerate the cake for at least a few hours, ideally overnight. Chilling allows the flavors to meld and develop, enhancing the overall taste of the cake.
Serving Suggestions
When it comes to serving your Russian Honey Cake, presentation and pairing can elevate the experience.
Ideas for Presentation and Serving the Cake
– Slice Neatly: Use a sharp knife dipped in warm water to slice clean pieces, revealing the beautiful layers.
– Plating: Serve slices on individual plates, garnished with a dollop of whipped cream and a sprinkle of chopped walnuts or a light dusting of powdered sugar.
Pairing the Cake with Beverages (Tea, Coffee, etc.)
Pair this delightful cake with beverages such as:
– Tea: A strong black tea complements the sweetness of the honey cake perfectly.
– Coffee: The rich flavors of coffee balance the cake’s sweetness, making for a comforting combination.
– Dessert Wines: A light dessert wine can also enhance the overall flavor profile.
Discussing the Cake’s Versatility for Different Occasions (Birthdays, Holidays)
The Russian Honey Cake is versatile and suitable for various occasions, including:
– Birthdays: Its unique flavor makes it a standout birthday cake.
– Holidays: Perfect for celebrations like Christmas or Easter, where its rich flavors fit the festive spirit.
– Special Gatherings: Serve it at tea parties or family gatherings for a delightful treat that everyone will love.
Nutritional Information
Understanding the nutritional content of your cake helps you appreciate the balance of flavors.
Overview of the Nutritional Content per Serving
Each slice of Russian Honey Cake typically contains approximately:
– Calories: 350-400
– Fat: 20g
– Carbohydrates: 40g
– Protein: 4g
Discussion on the Balance of Sweetness and Richness in the Cake
This cake strikes a beautiful balance between sweetness and richness. The honey adds natural sweetness, while the whipped cream provides a light, airy texture that counteracts the cake’s density.
Considerations for Dietary Adjustments or Substitutions
For those looking to make dietary adjustments, consider these options:
– Gluten-Free: Substitute all-purpose flour with a gluten-free blend.
– Dairy-Free: Use coconut cream or a non-dairy whipped topping to replace the heavy cream.
– Reduced Sugar: Adjust the powdered sugar to taste, especially if you prefer a less sweet dessert.
Conclusion
Making the Russian Honey Cake is a delightful journey that culminates in a dessert that is not only beautiful but also rich in flavor and tradition. From the careful baking of the layers to the whipping of the cream and the final assembly, each step offers an opportunity for creativity and personal touch.
We encourage you to try this recipe and share it with your loved ones. The joy of baking and creating memorable desserts is a wonderful experience, and this cake is sure to impress and delight everyone who tries it. Enjoy each delectable slice and the sweet symphony it brings to your table!