Introduction
Rhubarb, often referred to as a vegetable but enjoyed as a fruit, boasts a unique tangy flavor that has captivated the taste buds of many dessert enthusiasts. Its vibrant pink and green stalks provide a stunning visual appeal, while its tartness adds a refreshing twist to sweet recipes. As seasons change, so do the ingredients available to us, and rhubarb is a prime example of how seasonal produce can elevate our baking. This versatility allows home bakers to experiment with flavors and create delightful treats that highlight the beauty of nature’s bounty. One such treat is the Tangy Rhubarb Dream Bars, a delectable dessert that perfectly balances the tangy notes of rhubarb with a sweet, crumbly topping.
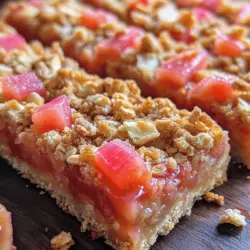
These dream bars are not only a feast for the eyes but also a celebration of spring and summer flavors. They serve as a wonderful option for gatherings, picnics, or simply as a sweet indulgence after dinner. If you’re looking to impress guests or simply satisfy your sweet tooth, this recipe will guide you step-by-step through the process of creating these delightful bars.
The Allure of Rhubarb
Rhubarb has a rich history that dates back to ancient times. Originating in Asia, it was first cultivated for its medicinal properties rather than its culinary potential. It wasn’t until the 18th century that rhubarb found its way into European kitchens, where it quickly gained popularity as a dessert ingredient. Today, rhubarb is a beloved staple in many households, especially in the spring when it is in season.
Beyond its historical significance, rhubarb is also packed with nutrients. It is low in calories yet high in vitamins K and C, as well as dietary fiber. This makes it a health-conscious choice for those looking to indulge without the guilt. Additionally, rhubarb’s versatility allows it to shine in a variety of dishes, from pies and crumbles to jams and sauces. Its tartness complements sweet ingredients beautifully, making it a favorite among bakers.
When it comes to desserts, rhubarb is often paired with strawberries to create the classic strawberry-rhubarb pie. However, its potential goes far beyond that. Rhubarb can be used in sauces, compotes, and, as in this case, dream bars. The combination of its vibrant flavor and nutritional benefits makes rhubarb a standout ingredient in the culinary world.
Ingredients Breakdown
Crust Ingredients
To create the perfect foundation for your Tangy Rhubarb Dream Bars, you’ll need a few essential ingredients for the crust. Each element plays a crucial role in achieving the desired texture and flavor.
1. All-Purpose Flour: This is the backbone of the crust. All-purpose flour provides the necessary structure to hold the bars together while allowing for a tender, crumbly texture. Its versatility makes it a staple in most baking recipes.
2. Granulated Sugar: Sugar not only sweetens the crust but also contributes to its overall texture. By balancing sweetness with the tart rhubarb filling, granulated sugar is essential for creating a harmonious flavor profile.
3. Softened Butter: The use of softened butter in the crust is vital for achieving a tender and flaky texture. When mixed with the flour and sugar, the butter creates small pockets of fat that contribute to a crumbly and melt-in-your-mouth sensation.
4. Vanilla Extract: A splash of vanilla extract enhances the flavor of the crust, adding warmth and depth. This simple ingredient elevates the overall taste, making each bite even more enjoyable.
5. Salt: A pinch of salt is crucial in balancing the sweetness of the sugar. It enhances the flavors of the other ingredients, ensuring that the crust is well-rounded and delicious.
Rhubarb Filling Ingredients
The filling is where the magic happens, and this recipe highlights rhubarb’s natural tanginess.
1. Fresh Rhubarb: The star of the show, rhubarb provides the signature tartness that makes these bars so delightful. When cooked, it softens and releases its juices, creating a luscious filling.
2. Granulated Sugar: Just as in the crust, sugar plays a vital role in the filling. It balances the rhubarb’s tartness, ensuring that the final product is not overly sour.
3. Cornstarch: Cornstarch acts as a thickening agent, helping to bind the filling together. It absorbs excess moisture from the rhubarb, resulting in a perfect consistency that holds up when cut into bars.
4. Lemon Juice: Adding lemon juice not only enhances the flavor but also brings an additional layer of acidity that complements the rhubarb. The citrus notes brighten the filling, making it even more refreshing.
5. Egg: The egg serves as a binding agent, helping to hold the filling together. It also adds richness and a silky texture to the final product.
Topping Ingredients
The topping adds a delightful crunch and sweetness, completing the Tangy Rhubarb Dream Bars.
1. Old-Fashioned Oats: Oats provide a hearty texture that contrasts beautifully with the soft filling. They add a wholesome quality to the bars, making them feel more substantial.
2. Brown Sugar: Brown sugar brings a deeper sweetness and a hint of molasses flavor. This adds complexity to the topping, enhancing the overall taste of the bars.
3. Cinnamon: A dash of cinnamon adds warmth and depth to the topping. Its fragrant qualities complement the rhubarb and sugar perfectly.
4. Melted Butter: Melted butter binds the topping ingredients together, creating a crumbly texture that holds its shape when baked. It also contributes to the overall richness of the bars.
With all these ingredients combined, the Tangy Rhubarb Dream Bars promise to deliver a delightful balance of flavors and textures, making them a must-try for any dessert lover.
Step-by-Step Instructions for Tangy Rhubarb Dream Bars
Now that we have explored the ingredients, it’s time to dive into the preparation of these wonderful bars. The first step in any baking endeavor is to ensure that your oven is preheated to the correct temperature. Preheating the oven is crucial for achieving optimal baking results. It allows the ingredients to react properly and ensures even cooking throughout the dish.
1. Preheat the Oven: Set your oven to 350°F (175°C). This temperature is ideal for baking the rhubarb bars, allowing the crust to become golden and the filling to set perfectly.
Once your oven is preheated, you’ll be ready to move on to preparing the crust, filling, and topping in a systematic way that guarantees perfect results.
Stay tuned for part two, where we will continue with detailed step-by-step instructions, ensuring that your Tangy Rhubarb Dream Bars turn out deliciously every time. Whether you are baking for a special occasion or just indulging yourself, mastering this recipe will surely impress your family and friends.
{{image_1}}
Making the Crust: Techniques for Achieving the Perfect Base
Creating a delightful crust for your Tangy Rhubarb Dream Bars is a crucial step that sets the foundation for the entire dessert. To achieve a perfectly crisp and buttery base, start with cold ingredients. Use chilled butter, which will create pockets of steam during baking, resulting in a flaky texture. The key to a successful crust is to combine the dry ingredients with the cold butter using a pastry cutter or your fingers until the mixture resembles coarse crumbs. This technique prevents the dough from becoming overworked, which can lead to a dense crust.
Next, add your wet ingredients gradually. This might include a splash of vanilla extract or an egg yolk, depending on your chosen recipe. Mix gently until just combined. Avoid kneading the dough too much; this can develop gluten and make the crust tough. Instead, aim for a cohesive dough that holds together but is still crumbly. Once the dough is formed, press it evenly into the prepared baking dish, ensuring that it reaches the corners and edges. Using a fork to prick holes in the base before baking helps prevent bubbling.
Tips for Mixing to Avoid Overworking the Dough
When mixing your crust, the goal is to blend the ingredients just enough to combine them without overworking. Here are some tips to achieve this:
1. Use a Light Hand: Gently fold the wet ingredients into the dry until just mixed. It’s okay if there are a few small lumps; they will bake out.
2. Chill Between Mixing and Baking: If the dough feels warm or soft after mixing, chill it in the refrigerator for 20-30 minutes before pressing into the pan. This helps solidify the butter again and reduces the risk of a tough crust.
3. Avoid Excess Flour: While it’s tempting to add more flour to make handling easier, excessive flour can lead to a dry crust. Use just enough to keep the dough from sticking.
Preparing the Rhubarb Filling: Ensuring Optimal Flavor and Consistency
The filling is where the magic happens in your Tangy Rhubarb Dream Bars. Begin by preparing the rhubarb properly. Rinse the stalks under cold water and trim the ends. For even cooking and better incorporation into the filling, chop the rhubarb into small, uniform pieces, about 1/2 inch in size. This ensures that the rhubarb cooks evenly and provides a tender bite in every bar.
Once chopped, toss the rhubarb with sugar and a bit of cornstarch or flour to help thicken the filling as it bakes. The sugar will draw out the rhubarb’s natural juices, and the thickener will create a luscious, jam-like consistency. Let the mixture sit for about 10 minutes to allow the sugar to dissolve and the rhubarb to release its juices.
Importance of Chopping Rhubarb into Small Pieces for Even Cooking
Chopping the rhubarb into small pieces is essential for several reasons. First, smaller pieces cook more quickly, ensuring that the filling becomes tender without turning mushy. Additionally, smaller pieces allow for better distribution throughout the bars, ensuring that each bite is packed with that tangy flavor. If the rhubarb pieces are too large, they might not cook through completely, resulting in a chewy texture that contrasts with the intended softness of the filling.
How to Properly Combine Filling Ingredients for Maximum Flavor
To maximize the flavor of your rhubarb filling, it’s important to carefully combine the ingredients. After letting the rhubarb sit with sugar, add in any additional flavorings you desire, such as vanilla extract or a splash of lemon juice. The acidity from the lemon will complement the tartness of the rhubarb beautifully. Gently fold all the ingredients together, ensuring that the rhubarb is well-coated with the sugar and any other add-ins. This method guarantees that every piece of rhubarb is flavorful and enhances the overall taste of your dessert.
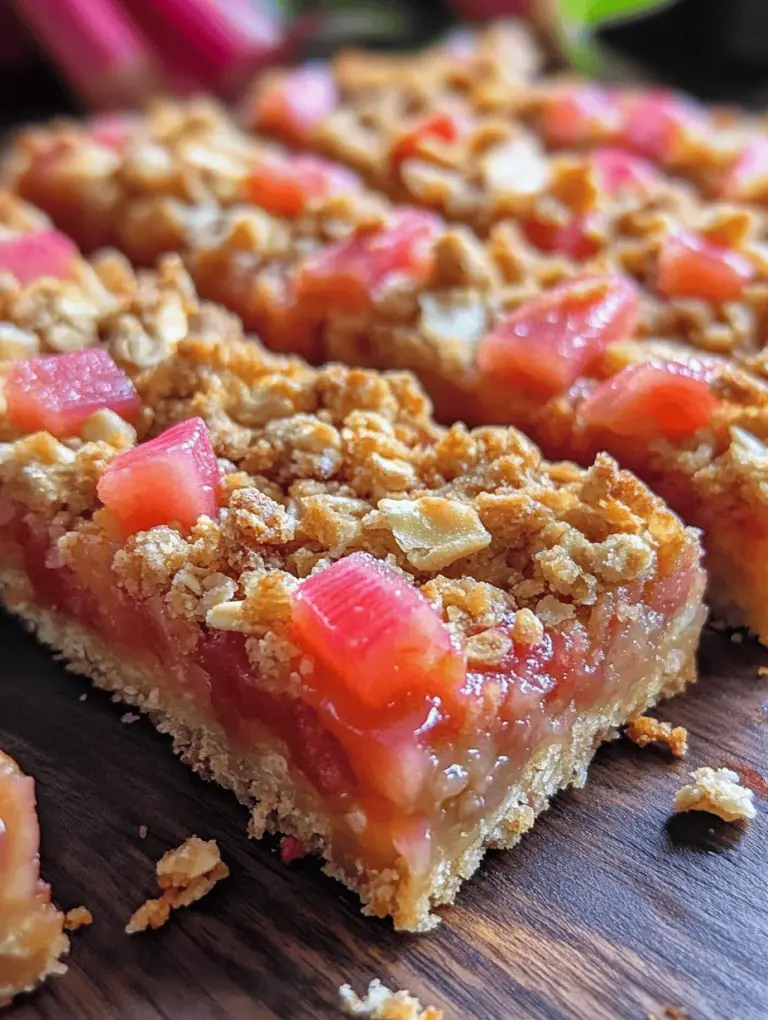
Crafting the Topping: Techniques for Achieving the Desired Crumbly Texture
For the topping of your Tangy Rhubarb Dream Bars, a crumbly texture is key to creating a delightful contrast to the soft filling. To achieve this, start with a combination of flour, brown sugar, oats, and melted butter. Mix these ingredients until they resemble coarse crumbs. Use your fingers or a pastry cutter to break up any clumps and ensure an even distribution of the butter throughout the dry ingredients.
A good tip for achieving an extra crumbly topping is to chill the topping mixture after it’s been made. This can help the butter solidify slightly before baking, resulting in a more textured topping that won’t simply melt into the filling. Sprinkle the topping evenly over the rhubarb filling before placing it in the oven.
Baking the Bars: Ideal Conditions and How to Know When They’re Done
Baking your Tangy Rhubarb Dream Bars requires attention to detail to ensure perfect results. Preheat your oven to the temperature specified in your recipe, typically around 350°F (175°C). Place the baking dish in the center of the oven for even heat distribution. Baking times can vary, but generally, you should expect to bake the bars for about 30-35 minutes.
To check for doneness, look for a golden-brown topping and bubbling filling. The edges should be set, while the center may still look slightly wobbly, as it will continue to firm up as it cools. A toothpick inserted into the center should come out clean or with a few moist crumbs, indicating that the filling is cooked through.
Signs of Perfect Doneness for Rhubarb Desserts
Identifying the perfect doneness in rhubarb desserts can be nuanced. Look for the following signs:
– Color: The topping should be golden brown, and the filling should appear glossy and bubbling at the edges.
– Texture: The sides should look set, while the center retains a slight jiggle, indicating it will firm up as it cools.
– Aroma: A sweet, tangy aroma should fill your kitchen, indicating that the flavors have melded beautifully.
Cooling and Cutting: Best Practices for Serving Bars Neatly
Allow your Tangy Rhubarb Dream Bars to cool in the pan for at least 15-20 minutes after removing them from the oven. This cooling period helps to set the filling, making it easier to cut cleanly. Once slightly cooled, transfer the pan to the refrigerator for an additional hour. This step is particularly beneficial as it further solidifies the bars, allowing for neat cuts.
When ready to serve, use a sharp knife to cut the bars into squares. For an even cleaner cut, you can dip the knife in hot water and wipe it dry between cuts. This technique prevents the filling from sticking to the knife and results in beautifully presented bars.
Serving Suggestions and Pairings
Your Tangy Rhubarb Dream Bars are versatile and can be paired with various accompaniments to elevate the experience:
– Whipped Cream or Vanilla Ice Cream: A dollop of freshly whipped cream or a scoop of vanilla ice cream adds a creamy contrast to the tartness of the bars, making each bite a delightful treat.
– Tea or Coffee: Serve these bars with a warm cup of tea or coffee for a relaxing afternoon indulgence. The flavors of the dessert complement the warmth of the beverages beautifully.
– Garnishing Ideas: For an elegant presentation, consider garnishing with a dusting of powdered sugar or a drizzle of caramel or chocolate sauce. Fresh mint leaves can also add a pop of color and freshness.
Storing and Reheating Rhubarb Dream Bars
To maintain the freshness and flavor of your Tangy Rhubarb Dream Bars, proper storage is essential. Here are some best practices:
– Refrigeration: Store the bars in an airtight container in the refrigerator for up to a week. This will keep them fresh and preserve the texture of the filling.
– Freezing: If you want to extend the shelf life, you can freeze the bars. Wrap them tightly in plastic wrap and then in aluminum foil to prevent freezer burn. They can be stored in the freezer for up to three months.
– Reheating: To reheat, simply place the bars in a preheated oven at 350°F (175°C) for 10-15 minutes, or until warmed through. If reheating from frozen, allow them to thaw in the refrigerator overnight before warming.
Variations and Customizations
One of the joys of baking is the ability to customize recipes to suit different tastes and dietary needs. Here are some ideas for variations and substitutions for your Tangy Rhubarb Dream Bars:
– Gluten-Free Options: Substitute regular flour with a gluten-free blend in both the crust and topping. Be sure to use certified gluten-free oats if including oats in the topping.
– Vegan Alternatives: Replace the egg in the crust with a flax egg (1 tablespoon ground flaxseed mixed with 2.5 tablespoons water) and use a vegan butter substitute.
– Incorporating Other Fruits: Consider mixing rhubarb with other fruits like strawberries or apples for a delightful twist. This not only enhances the flavor but also adds visual appeal.
– Experimenting with Flavors: You can add spices such as cinnamon or nutmeg to the filling for an added depth of flavor. A touch of ginger can also complement the tartness of the rhubarb beautifully.
Conclusion
Baking with rhubarb is not just about creating a delicious dessert; it’s about the joy and satisfaction that comes from making something from scratch. Tangy Rhubarb Dream Bars are a delightful way to celebrate this unique vegetable, showcasing its vibrant flavor and versatility. As you embark on this baking adventure, don’t hesitate to experiment with the recipe, incorporate your favorite flavors, and make it your own.
Homemade desserts like these bars have a special way of bringing people together, whether it’s at a family gathering or a casual afternoon tea with friends. Embrace the process of baking, relish in the aromas that fill your kitchen, and enjoy the delightful experience of sharing this treat with your loved ones. Happy baking!